HP Sprout Pro G2 Maintenance & Service Guide - Page 34
Removing the rear covers from the computer
 |
View all HP Sprout Pro G2 manuals
Add to My Manuals
Save this manual to your list of manuals |
Page 34 highlights
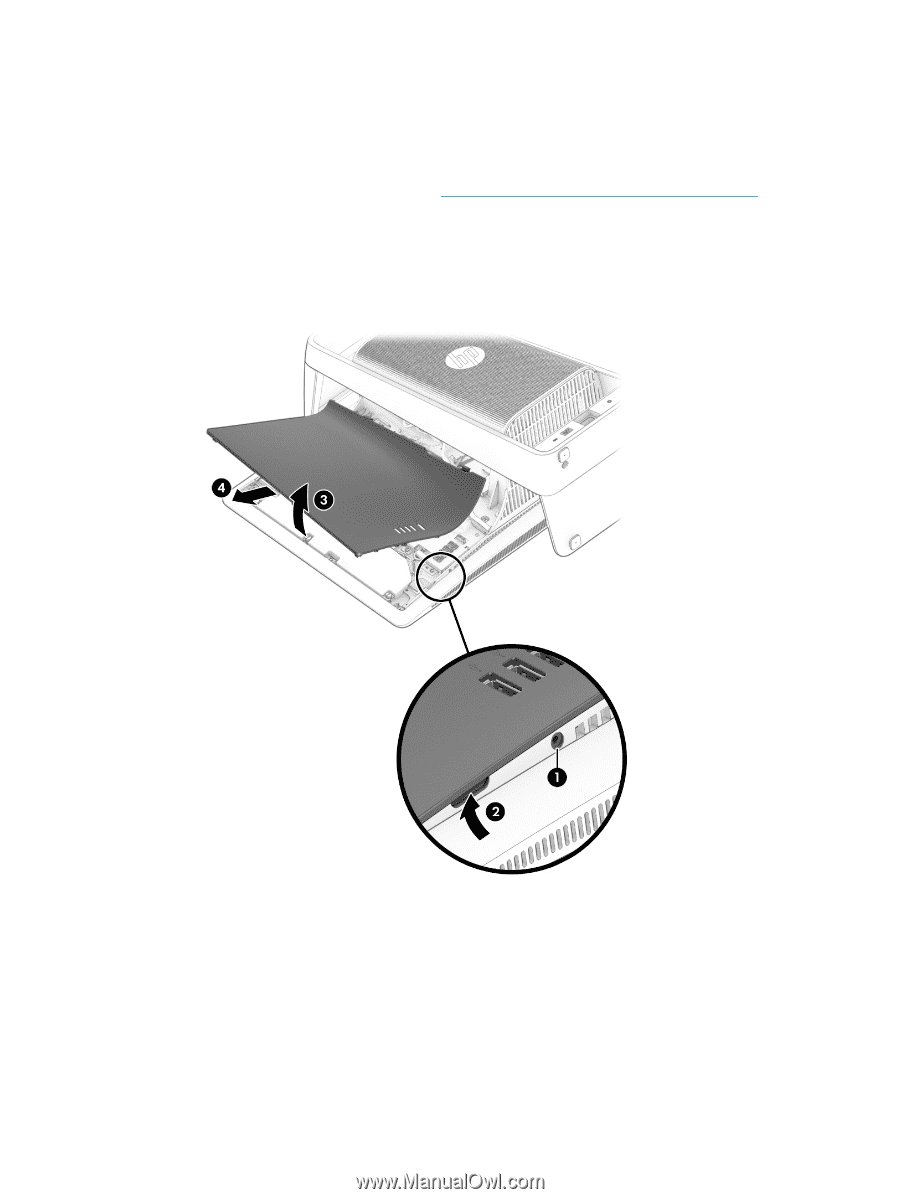
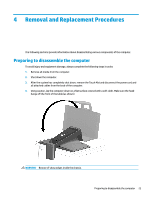
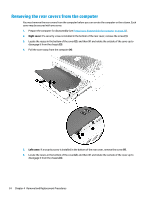
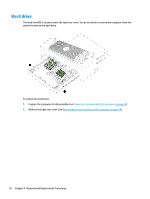
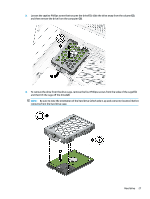
Removing the rear covers from the computer You must remove the rear covers from the computer before you can service the computer or the column. Each cover may be secured with one screw. 1. Prepare the computer for disassembly (see Preparing to disassemble the computer on page 23). 2. Right cover: If a security screw is installed in the bottom of the rear cover, remove the screw (1). 3. Locate the recess in the bottom of the cover (2), and then lift and rotate the outside of the cover up to disengage it from the chassis (3). 4. Pull the cover away from the computer (4). 5. Left cover: If a security screw is installed in the bottom of the rear cover, remove the screw (1). 6. Locate the recess in the bottom of the cover (2), and then lift and rotate the outside of the cover up to disengage it from the chassis (3). 24 Chapter 4 Removal and Replacement Procedures
-
 1
1 -
2
-
3
-
4
-
5
-
6
-
7
-
8
-
9
-
10
-
11
-
12
-
13
-
14
-
15
-
16
-
17
-
18
-
19
-
20
-
21
-
22
-
23
-
24
-
25
-
26
-
27
-
28
-
 29
29 -
 30
30 -
 31
31 -
 32
32 -
 33
33 -
 34
34 -
 35
35 -
 36
36 -
 37
37 -
 38
38 -
 39
39 -
40
-
41
-
42
-
43
-
44
-
45
-
46
-
47
-
48
-
49
-
50
-
51
-
52
-
53
-
54
-
55
-
56
-
57
-
58
-
59
-
60
-
61
-
62
-
63
-
64
-
65
-
66
-
67
-
68
-
69
-
70
-
71
-
72
-
73
-
74
-
75
-
76
-
77
-
78
-
79
-
80
-
81
-
82
-
83
-
84
-
85
-
86
-
87
-
88
-
89
-
90
-
91
-
92
-
93
-
94
-
95
-
96
-
97
-
98
-
99
-
100
-
101
-
102
-
103
-
104
-
105
-
106
-
107
-
108
-
109
-
110
-
111
-
112
-
113
-
114
-
115
-
116
-
117
-
118
-
119
-
120
-
121
-
122
-
123
-
124
-
125
-
126
-
127
-
128
-
129
-
130
-
131
-
132
-
133
-
134
-
135
-
136
 |
 |