HP Sprout Pro G2 Maintenance & Service Guide - Page 73
and the two smaller Torx screws, that secure the power supply
 |
View all HP Sprout Pro G2 manuals
Add to My Manuals
Save this manual to your list of manuals |
Page 73 highlights
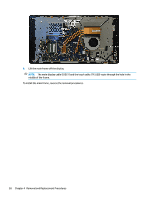
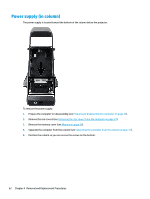
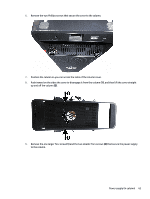
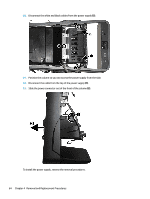
6. Remove the two Phillips screws that secure the cover to the column. 7. Position the column so you can access the sides of the column cover. 8. Push inward on the sides the cover to disengage it from the column (1), and then lift the cover straight up and off the column (2). 9. Remove the one larger Torx screw (1) and the two smaller Torx screws (2) that secure the power supply to the column. Power supply (in column) 63
-
 1
1 -
2
-
3
-
4
-
5
-
6
-
7
-
8
-
9
-
10
-
11
-
12
-
13
-
14
-
15
-
16
-
17
-
18
-
19
-
20
-
21
-
22
-
23
-
24
-
25
-
26
-
27
-
28
-
29
-
30
-
31
-
32
-
33
-
34
-
35
-
36
-
37
-
38
-
39
-
40
-
41
-
42
-
43
-
44
-
45
-
46
-
47
-
48
-
49
-
50
-
51
-
52
-
53
-
54
-
55
-
56
-
57
-
58
-
59
-
60
-
61
-
62
-
63
-
64
-
65
-
66
-
67
-
 68
68 -
 69
69 -
 70
70 -
 71
71 -
 72
72 -
 73
73 -
 74
74 -
 75
75 -
 76
76 -
 77
77 -
 78
78 -
79
-
80
-
81
-
82
-
83
-
84
-
85
-
86
-
87
-
88
-
89
-
90
-
91
-
92
-
93
-
94
-
95
-
96
-
97
-
98
-
99
-
100
-
101
-
102
-
103
-
104
-
105
-
106
-
107
-
108
-
109
-
110
-
111
-
112
-
113
-
114
-
115
-
116
-
117
-
118
-
119
-
120
-
121
-
122
-
123
-
124
-
125
-
126
-
127
-
128
-
129
-
130
-
131
-
132
-
133
-
134
-
135
-
136
 |
 |
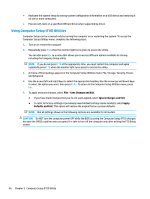
6.
Remove the two Phillips screws that secure the cover to the column.
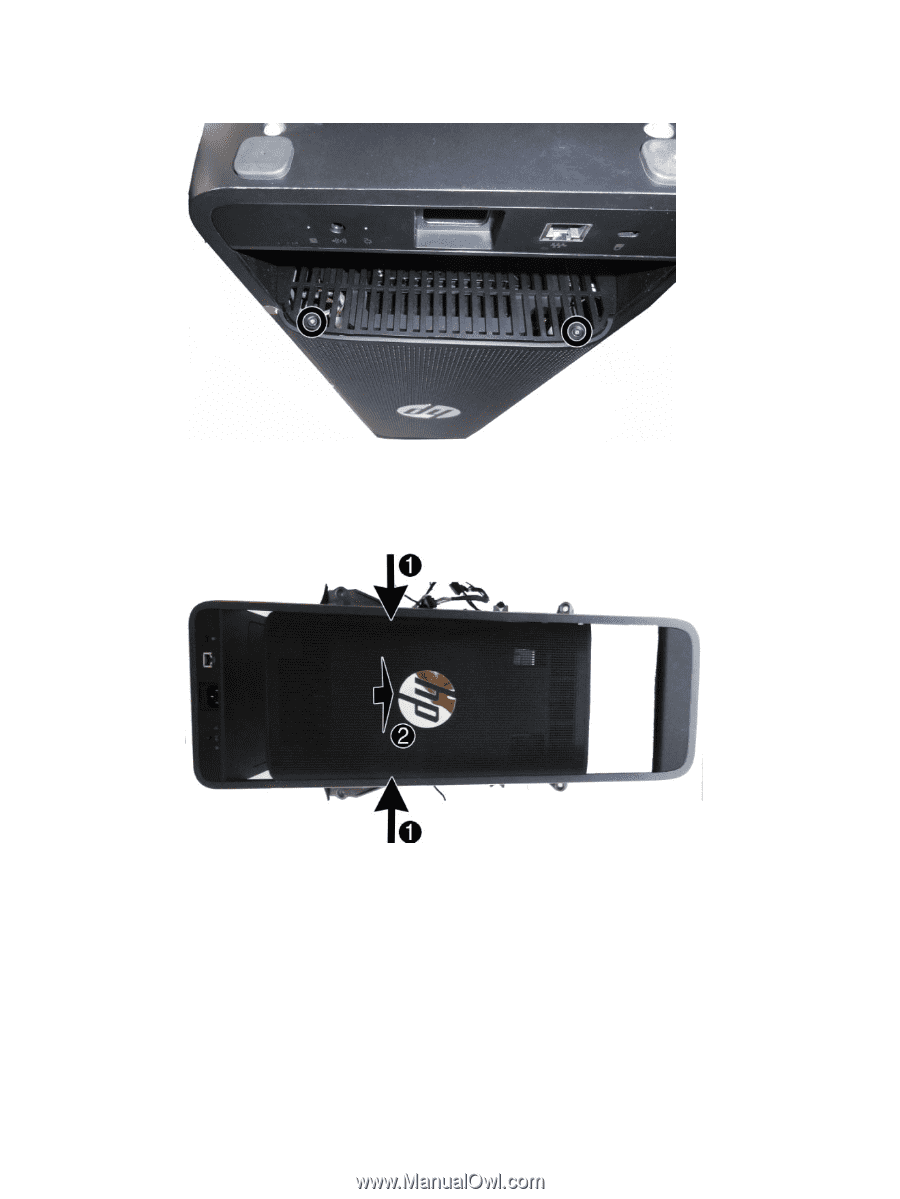
7.
Position the column so you can access the sides of the column cover.
8.
Push inward on the sides the cover to disengage it from the column
(1)
, and then lift the cover straight
up and
off
the column
(2)
.
9.
Remove the one larger Torx screw
(1)
and the two smaller Torx screws
(2)
that secure the power supply
to the column.
Power supply (in column)
63