HP Xw460c Administrator's Guide for Microsoft Windows on HP ProLiant Blade Wor - Page 25
Powering on the blade workstation
 |
View all HP Xw460c manuals
Add to My Manuals
Save this manual to your list of manuals |
Page 25 highlights
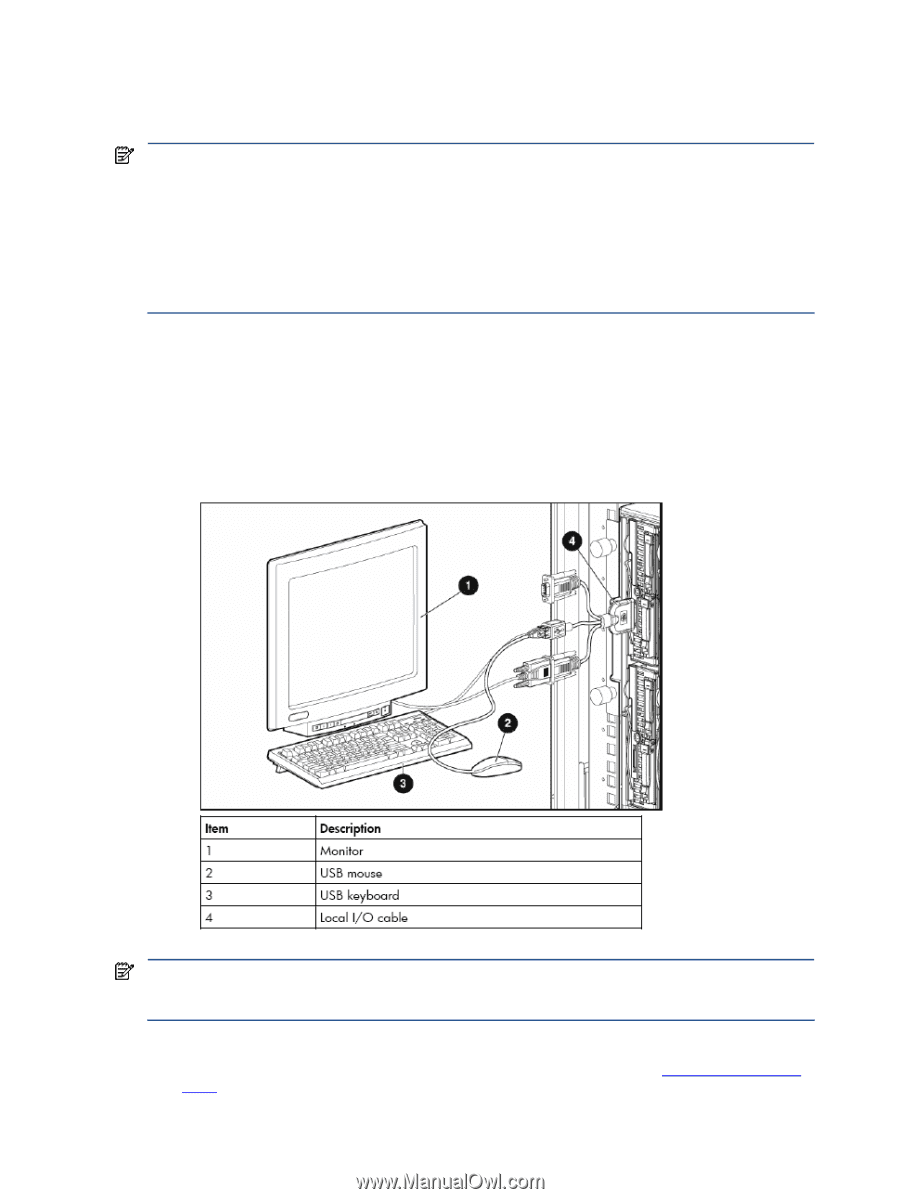
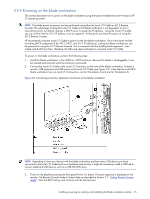
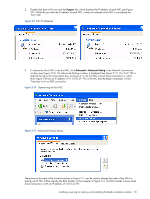
3-2-4 Powering on the blade workstation This section describes how to power on the blade workstation using the factory-installed Microsoft Windows XP32 operating system. NOTE: The blade power on process can be performed using either the Local I/O Cable or iLO 2 Remote Console. The advantage of using the Local I/O Cable is that blade verification is not dependent on iLO 2 networking (which, by default, requires a DHCP server to assign the IP address). Using the Local I/O Cable, you can confirm that the iLO 2 IP address is set as expected-at that point, you have the option of using the iLO 2 Remote Console. HP recommends using the Local I/O Cable to power on the first blade workstation. Once it has been verified (including DHCP assignment of the NIC1, NIC2, and iLO 2 IP addresses), subsequent blade workstations can be powered on using the iLO 2 Remote Console. This is consistent with the building block approach-start simple, and build from there. Therefore, the following steps are based on using the Local I/O Cable. To power on the blade workstation, perform the following steps: 1. Install the blade workstation in the c3000 or c7000 enclosure. Because the blade is hot-pluggable, it can be inserted and removed while the enclosure is powered. 2. Connect the Local I/O Cable to the Local I/O Connector on the front of the blade workstation. Connect a monitor, USB keyboard, and USB mouse to the Local I/O Cable (see Figure 3-3). Note that the xw2x220c blade workstation has two Local I/O Connectors, one for Workstation A and one for Workstation B. Figure 3-3 Connecting a monitor, keyboard, and mouse to the blade workstation NOTE: Depending on how you interact with the blade workstation and how many USB devices you have connected to the Local I/O Cable (such as a keyboard and mouse), it might be necessary to add a USB hub to connect additional USB devices, such as a USB CD/DVD drive. 3. Power on the blade by pressing the front panel Power On button. The boot sequence is displayed on the monitor. Set Remote Console Mode to Setup Mode as described in Section 2-1, "Setting Remote Console Mode". Save the BIOS setting, and continue with the boot process. Installing, powering on, booting, and validating the blade workstation solution 25
-
 1
1 -
2
-
3
-
4
-
5
-
6
-
7
-
8
-
9
-
10
-
11
-
12
-
13
-
14
-
15
-
16
-
17
-
18
-
19
-
 20
20 -
 21
21 -
 22
22 -
 23
23 -
 24
24 -
 25
25 -
 26
26 -
 27
27 -
 28
28 -
 29
29 -
 30
30 -
31
-
32
-
33
-
34
-
35
-
36
-
37
-
38
-
39
-
40
-
41
-
42
-
43
-
44
-
45
-
46
-
47
-
48
-
49
-
50
-
51
-
52
-
53
-
54
-
55
-
56
-
57
-
58
-
59
-
60
-
61
-
62
-
63
-
64
-
65
-
66
-
67
-
68
-
69
-
70
-
71
-
72
-
73
-
74
-
75
-
76
-
77
-
78
-
79
-
80
-
81
-
82
-
83
-
84
-
85
-
86
-
87
-
88
-
89
-
90
-
91
-
92
-
93
-
94
-
95
-
96
-
97
-
98
-
99
-
100
-
101
-
102
-
103
-
104
-
105
 |
 |