HP Xw460c Administrator's Guide for Microsoft Windows on HP ProLiant Blade Wor - Page 30
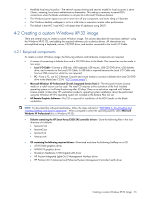
Advanced Settings dialog, NIC IP addresses
 |
View all HP Xw460c manuals
Add to My Manuals
Save this manual to your list of manuals |
Page 30 highlights
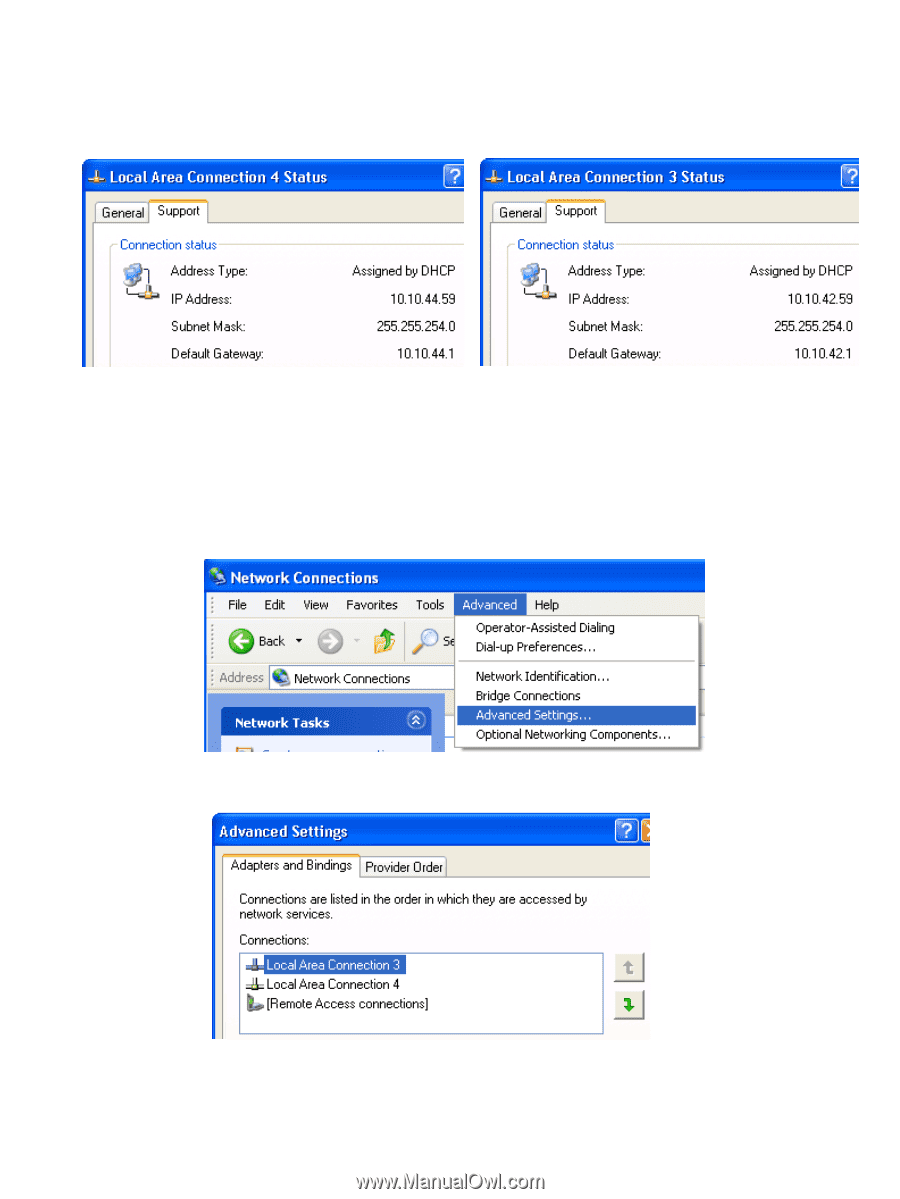
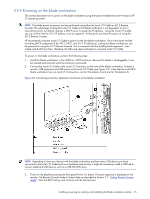
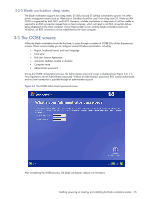
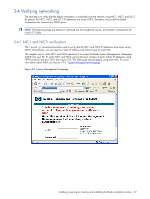
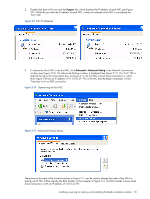
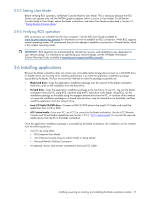
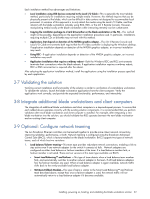
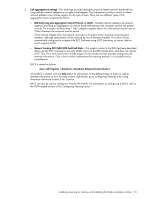
2. Double-click each LAN icon and the Support tab, which displays the IP address of each NIC (see Figure 3-9). While this provides the IP address of each NIC, it does not indicate which NIC is considered the "first" NIC. Figure 3-9 NIC IP addresses 3. To determine which NIC is the first NIC, click Advanced > Advanced Setting in the Network Connections window (see Figure 3-10). The Advanced Settings window is displayed (see Figure 3-11). The "first" NIC is listed at the top in the Connections box. In Figure 3-11, the first NIC is Local Area Connection 3, which (from Figure 3-9) has an IP address of 10.10.42.59. This is the NIC that the blade workstation will be "listening" to for an RGS connection. Figure 3-10 Determining the first NIC Figure 3-11 Advanced Settings dialog The arrows to the right of the Connections box in Figure 3-11 can be used to change the order of the NICs to specify which NIC will be used by the RGS Sender. In the example in Figure 3-11, the RGS Sender will use Local Area Connection 3 with an IP address of 10.10.42.59. Installing, powering on, booting, and validating the blade workstation solution 30
-
 1
1 -
2
-
3
-
4
-
5
-
6
-
7
-
8
-
9
-
10
-
11
-
12
-
13
-
14
-
15
-
16
-
17
-
18
-
19
-
20
-
21
-
22
-
23
-
24
-
 25
25 -
 26
26 -
 27
27 -
 28
28 -
 29
29 -
 30
30 -
 31
31 -
 32
32 -
 33
33 -
 34
34 -
 35
35 -
36
-
37
-
38
-
39
-
40
-
41
-
42
-
43
-
44
-
45
-
46
-
47
-
48
-
49
-
50
-
51
-
52
-
53
-
54
-
55
-
56
-
57
-
58
-
59
-
60
-
61
-
62
-
63
-
64
-
65
-
66
-
67
-
68
-
69
-
70
-
71
-
72
-
73
-
74
-
75
-
76
-
77
-
78
-
79
-
80
-
81
-
82
-
83
-
84
-
85
-
86
-
87
-
88
-
89
-
90
-
91
-
92
-
93
-
94
-
95
-
96
-
97
-
98
-
99
-
100
-
101
-
102
-
103
-
104
-
105
 |
 |