Lantronix xPrintServer - Office User Guide - Page 54
Resetting the xPrintServer Unit to Factory Defaults, Via the User Interface
 |
View all Lantronix xPrintServer - Office manuals
Add to My Manuals
Save this manual to your list of manuals |
Page 54 highlights
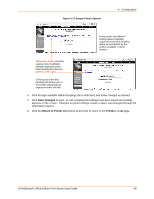
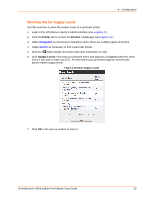
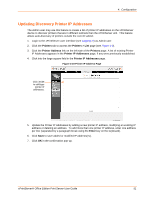
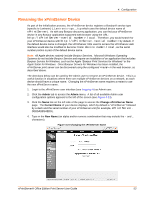
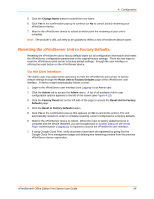
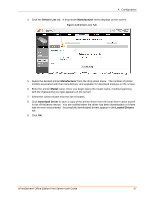
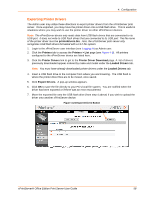
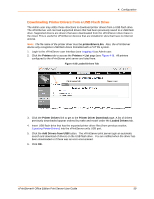
4: Configuration 5. Click the Change Name button to submit the new name. 6. Click Yes in the confirmation pop-up to continue (or No to cancel action) renaming your xPrintServer device. 7. Wait for the xPrintServer device to reboot at which point the renaming of your unit is complete. Note: The browser's URL will need to be updated to reflect a new xPrintServer device name. Resetting the xPrintServer Unit to Factory Defaults Resetting the xPrintServer unit to factory default wipes out all configuration information and resets the xPrintServer configuration parameters to the original factory settings. There are two ways to reset the xPrintServer print server to factory default settings: through the user interface or utilizing the reset button on the xPrintServer device. Via the User Interface The Admin user may utilize these directions to reset the xPrintServer print server to factory default settings through the Reset Unit to Factory Defaults page of the xPrintServer user interface. A device restart automatically follows a reset. 1. Login to the xPrintServer user interface (see Logging In) as Admin user. 2. Click the Admin tab to access the Admin menu. A list of all available Admin user configuration options appears to the left of the screen (see Figure 4-13). 3. Click the Factory Reset link on the left side of the page to access the Reset Unit to Factory Defaults page. 4. Click the Reset to Factory Defaults button. 5. Click Yes in the confirmation pop-up that appears (or No to cancel this action). The unit automatically restarts in order to complete resetting current configurations to factory defaults. 6. Wait for the xPrintServer device to reboot. When the reset to factory default process is complete and the device restarted, you are brought back to System Status on the Home Page. Authentication (Logging In) is required to access the xPrintServer user interface. 7. If using Google Cloud Print, verify all printers have been de-registered by going into the Google Cloud Print management page and deleting any remaining printers from the previous xPrintServer device registration. xPrintServer® Office Edition Print Server User Guide 54
-
 1
1 -
2
-
3
-
4
-
5
-
6
-
7
-
8
-
9
-
10
-
11
-
12
-
13
-
14
-
15
-
16
-
17
-
18
-
19
-
20
-
21
-
22
-
23
-
24
-
25
-
26
-
27
-
28
-
29
-
30
-
31
-
32
-
33
-
34
-
35
-
36
-
37
-
38
-
39
-
40
-
41
-
42
-
43
-
44
-
45
-
46
-
47
-
48
-
 49
49 -
 50
50 -
 51
51 -
 52
52 -
 53
53 -
 54
54 -
 55
55 -
 56
56 -
 57
57 -
 58
58 -
 59
59 -
60
-
61
-
62
-
63
-
64
-
65
-
66
-
67
-
68
-
69
-
70
-
71
-
72
-
73
-
74
-
75
-
76
-
77
-
78
-
79
-
80
-
81
-
82
-
83
-
84
-
85
-
86
-
87
-
88
-
89
-
90
-
91
-
92
-
93
-
94
 |
 |
