Lantronix xPrintServer - Office User Guide - Page 7

List of s

Page 7 highlights

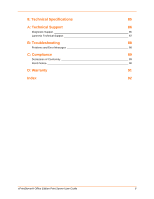
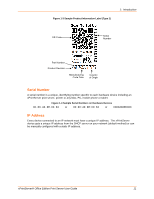
List of Figures Figure 1-1 xPrintServer Office Edition Print Server 9 Figure 1-2 Sample Product Information Label (Type 1 10 Figure 1-3 Sample Product Information Label (Type 2 11 Figure 1-4 Sample Serial Numbers on Hardware Devices 11 Figure 2-1 xPrintServer LEDs 13 Figure 2-2 Sample xPrintServer Mounting Options 15 Figure 2-3 Quick Connect Diagram 16 Figure 3-1 Serial Number 17 Figure 3-2 Redirected to Login Prompt 18 Figure 3-3 System Status Information on the Home Page 19 Figure 3-4 Login Prompt 21 Figure 3-5 Navigating the xPrintServer User Interface 22 Figure 3-6 Tabs Available for Users 23 Figure 3-7 Sample View of Buttons on iOS devices 24 Figure 3-8 Sample View of Native Print Menu 24 Figure 3-9 Sample View of Printer Options 24 Figure 4-1 Non-Admin User Access 31 Figure 4-2 User Account Translation Workflow 32 Figure 4-3 Changing Own Password 33 Figure 4-4 Changing Other User Passwords (Admin User Only 33 Figure 4-5 Adding or Deleting a User (Admin User Only 34 Figure 4-6 Exporting Users 35 Figure 4-7 Sample CSV File 36 Figure 4-8 Printer Access Control 37 Figure 4-9 Printer Details and Pop-Up Command Menu 39 Figure 4-10 Printer Discovery Page 40 Figure 4-11 Sample Printer Auto Discovery Report 41 Figure 4-12 Expanding Detected Printers Information 42 Figure 4-13 Admin Menu (Defaults to Time-zone Link 43 Figure 4-14 New Printer Description 46 Figure 4-15 New Printer Location 46 Figure 4-16 Show Share Info Pop-up 47 Figure 4-17 Sample Printer Options 49 Figure 4-18 Show Supply Levels 50 Figure 4-19 Printer IP Address Page 51 Figure 4-20 Print Job Details 52 Figure 4-21 Changing the xPrintServer Name 53 Figure 4-22 Logs 56 Figure 4-23 Drivers List Tab 57 Figure 4-24 Export Drivers Button 58 Figure 4-25 Loaded Drivers Tab 59 Figure 4-26 Active Directory Configuration 60 Figure 4-27 Saving Configuration 62 Figure 4-28 Restoring Configuration 63 Figure 4-29 Configuring Proxy Server 64 Figure 4-30 SSL/TLS Key and Certificate Management 65 Figure 5-1 Start Quick Setup 69 Figure 5-2 Google Cloud Print Printer Confirmation 70 Figure 5-3 Quick Setup Complete 70 Figure 5-4 Google Account 77 Figure 5-5 Adding a Google Account 78 xPrintServer® Office Edition Print Server User Guide 7

  • 1
  • 2
  • 3
  • 4
  • 5
  • 6
  • 7
  • 8
  • 9
  • 10
  • 11
  • 12
  • 13
  • 14
  • 15
  • 16
  • 17
  • 18
  • 19
  • 20
  • 21
  • 22
  • 23
  • 24
  • 25
  • 26
  • 27
  • 28
  • 29
  • 30
  • 31
  • 32
  • 33
  • 34
  • 35
  • 36
  • 37
  • 38
  • 39
  • 40
  • 41
  • 42
  • 43
  • 44
  • 45
  • 46
  • 47
  • 48
  • 49
  • 50
  • 51
  • 52
  • 53
  • 54
  • 55
  • 56
  • 57
  • 58
  • 59
  • 60
  • 61
  • 62
  • 63
  • 64
  • 65
  • 66
  • 67
  • 68
  • 69
  • 70
  • 71
  • 72
  • 73
  • 74
  • 75
  • 76
  • 77
  • 78
  • 79
  • 80
  • 81
  • 82
  • 83
  • 84
  • 85
  • 86
  • 87
  • 88
  • 89
  • 90
  • 91
  • 92
  • 93
  • 94

xPrintServer® Office Edition Print Server User Guide
7
List of Figures
Figure 1-1 xPrintServer Office Edition Print Server _______________________________________ 9
Figure 1-2 Sample Product Information Label (Type 1) ___________________________________ 10
Figure 1-3 Sample Product Information Label (Type 2) ___________________________________ 11
Figure 1-4 Sample Serial Numbers on Hardware Devices _________________________________ 11
Figure 2-1 xPrintServer LEDs _______________________________________________________ 13
Figure 2-2 Sample xPrintServer Mounting Options ______________________________________ 15
Figure 2-3 Quick Connect Diagram __________________________________________________ 16
Figure 3-1 Serial Number __________________________________________________________ 17
Figure 3-2 Redirected to Login Prompt ________________________________________________ 18
Figure 3-3 System Status Information on the Home Page _________________________________ 19
Figure 3-4 Login Prompt ___________________________________________________________ 21
Figure 3-5 Navigating the xPrintServer User Interface ____________________________________ 22
Figure 3-6 Tabs Available for Users __________________________________________________ 23
Figure 3-7 Sample View of Buttons on iOS devices ______________________________________ 24
Figure 3-8 Sample View of Native Print Menu __________________________________________ 24
Figure 3-9 Sample View of Printer Options_____________________________________________ 24
Figure 4-1 Non-Admin User Access __________________________________________________ 31
Figure 4-2 User Account Translation Workflow _________________________________________ 32
Figure 4-3 Changing Own Password _________________________________________________ 33
Figure 4-4 Changing Other User Passwords (Admin User Only) ____________________________ 33
Figure 4-5 Adding or Deleting a User (Admin User Only) __________________________________ 34
Figure 4-6 Exporting Users _________________________________________________________ 35
Figure 4-7 Sample CSV File ________________________________________________________ 36
Figure 4-8 Printer Access Control ____________________________________________________ 37
Figure 4-9 Printer Details and Pop-Up Command Menu __________________________________ 39
Figure 4-10 Printer Discovery Page __________________________________________________ 40
Figure 4-11 Sample Printer Auto Discovery Report ______________________________________ 41
Figure 4-12 Expanding Detected Printers Information ____________________________________ 42
Figure 4-13 Admin Menu (Defaults to Time-zone Link) ___________________________________ 43
Figure 4-14 New Printer Description __________________________________________________ 46
Figure 4-15 New Printer Location ____________________________________________________ 46
Figure 4-16 Show Share Info Pop-up _________________________________________________ 47
Figure 4-17 Sample Printer Options __________________________________________________ 49
Figure 4-18 Show Supply Levels ____________________________________________________ 50
Figure 4-19 Printer IP Address Page _________________________________________________ 51
Figure 4-20 Print Job Details________________________________________________________ 52
Figure 4-21 Changing the xPrintServer Name __________________________________________ 53
Figure 4-22 Logs _________________________________________________________________ 56
Figure 4-23 Drivers List Tab ________________________________________________________ 57
Figure 4-24 Export Drivers Button ___________________________________________________ 58
Figure 4-25 Loaded Drivers Tab _____________________________________________________ 59
Figure 4-26 Active Directory Configuration _____________________________________________ 60
Figure 4-27 Saving Configuration ____________________________________________________ 62
Figure 4-28 Restoring Configuration __________________________________________________ 63
Figure 4-29 Configuring Proxy Server ________________________________________________ 64
Figure 4-30 SSL/TLS Key and Certificate Management___________________________________ 65
Figure 5-1 Start Quick Setup________________________________________________________ 69
Figure 5-2 Google Cloud Print Printer Confirmation ______________________________________ 70
Figure 5-3 Quick Setup Complete____________________________________________________ 70
Figure 5-4 Google Account _________________________________________________________ 77
Figure 5-5 Adding a Google Account _________________________________________________ 78