Netgear GSM7212P GSM5212P/GSM7212P/GSM7212F/GSM7224P User Manual - Page 341
HTTP File Upload, Remote File Name
 |
View all Netgear GSM7212P manuals
Add to My Manuals
Save this manual to your list of manuals |
Page 341 highlights
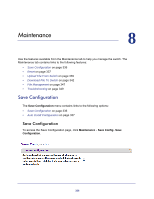
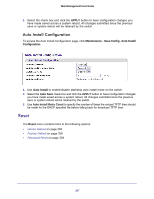
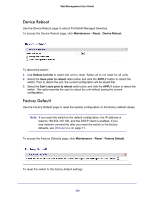
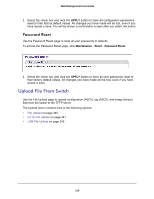
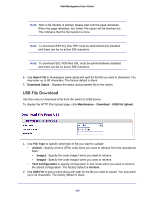
Web Management User Guide 3. Use Server Address Type to specify either IPv4 or IPv6 to indicate the format of the Server Address field. The factory default is IPv4. 4. Use Server Address to enter the IP address of the server in accordance with the format indicated by the Seer Address Type. The factory default is the IPv4 address 0.0.0.0. 5. Use Remote File Name to enter the name of the file you want to download from the server. You may enter up to 32 characters. The factory default is blank. 6. Use User Name to enter the username for remote login to SFTP/SCP server where the file will be sent. This field is visible only when SFTP or SCP transfer modes are selected. 7. Use Password to enter the password for remote login to SFTP/SCP server where the file will be sent. This field is visible only when SFTP or SCP transfer modes are selected. 8. The last row of the table is used to display information about the progress of the file transfer. HTTP File Upload To display the HTTP File Upload page, click Maintenance Upload HTTP File Upload. 1. Use File Type to specify what type of file you want to upload: • Archive - Specify archive (STK) code when you want to retrieve from the operational flash: • Image1 - Specify the code image1 when you want to retrieve. • Image2 - Specify the code image2 when you want to retrieve. • CLI Banner - Specify CLI Banner when you want retrieve the CLI banner file. • Startup Configuration - Specify configuration when you want to retrieve the stored configuration. • Text Configuration - Specify configuration in text mode when you want to retrieve the stored configuration. • Script File - Specify script file when you want to retrieve the stored configuration. • Error Log - Specify error log to retrieve the system error (persistent) log, sometimes referred to as the event log. • Trap Log - Specify trap log to retrieve the system trap records. • Buffered Log - Specify buffered log to retrieve the system buffered (in-memory) log. • Tech Support - Specify Tech Support to retrieve the switch information needed for troubleshooting. The factory default is Archive. 341
-
 1
1 -
2
-
3
-
4
-
5
-
6
-
7
-
8
-
9
-
10
-
11
-
12
-
13
-
14
-
15
-
16
-
17
-
18
-
19
-
20
-
21
-
22
-
23
-
24
-
25
-
26
-
27
-
28
-
29
-
30
-
31
-
32
-
33
-
34
-
35
-
36
-
37
-
38
-
39
-
40
-
41
-
42
-
43
-
44
-
45
-
46
-
47
-
48
-
49
-
50
-
51
-
52
-
53
-
54
-
55
-
56
-
57
-
58
-
59
-
60
-
61
-
62
-
63
-
64
-
65
-
66
-
67
-
68
-
69
-
70
-
71
-
72
-
73
-
74
-
75
-
76
-
77
-
78
-
79
-
80
-
81
-
82
-
83
-
84
-
85
-
86
-
87
-
88
-
89
-
90
-
91
-
92
-
93
-
94
-
95
-
96
-
97
-
98
-
99
-
100
-
101
-
102
-
103
-
104
-
105
-
106
-
107
-
108
-
109
-
110
-
111
-
112
-
113
-
114
-
115
-
116
-
117
-
118
-
119
-
120
-
121
-
122
-
123
-
124
-
125
-
126
-
127
-
128
-
129
-
130
-
131
-
132
-
133
-
134
-
135
-
136
-
137
-
138
-
139
-
140
-
141
-
142
-
143
-
144
-
145
-
146
-
147
-
148
-
149
-
150
-
151
-
152
-
153
-
154
-
155
-
156
-
157
-
158
-
159
-
160
-
161
-
162
-
163
-
164
-
165
-
166
-
167
-
168
-
169
-
170
-
171
-
172
-
173
-
174
-
175
-
176
-
177
-
178
-
179
-
180
-
181
-
182
-
183
-
184
-
185
-
186
-
187
-
188
-
189
-
190
-
191
-
192
-
193
-
194
-
195
-
196
-
197
-
198
-
199
-
200
-
201
-
202
-
203
-
204
-
205
-
206
-
207
-
208
-
209
-
210
-
211
-
212
-
213
-
214
-
215
-
216
-
217
-
218
-
219
-
220
-
221
-
222
-
223
-
224
-
225
-
226
-
227
-
228
-
229
-
230
-
231
-
232
-
233
-
234
-
235
-
236
-
237
-
238
-
239
-
240
-
241
-
242
-
243
-
244
-
245
-
246
-
247
-
248
-
249
-
250
-
251
-
252
-
253
-
254
-
255
-
256
-
257
-
258
-
259
-
260
-
261
-
262
-
263
-
264
-
265
-
266
-
267
-
268
-
269
-
270
-
271
-
272
-
273
-
274
-
275
-
276
-
277
-
278
-
279
-
280
-
281
-
282
-
283
-
284
-
285
-
286
-
287
-
288
-
289
-
290
-
291
-
292
-
293
-
294
-
295
-
296
-
297
-
298
-
299
-
300
-
301
-
302
-
303
-
304
-
305
-
306
-
307
-
308
-
309
-
310
-
311
-
312
-
313
-
314
-
315
-
316
-
317
-
318
-
319
-
320
-
321
-
322
-
323
-
324
-
325
-
326
-
327
-
328
-
329
-
330
-
331
-
332
-
333
-
334
-
335
-
 336
336 -
 337
337 -
 338
338 -
 339
339 -
 340
340 -
 341
341 -
 342
342 -
 343
343 -
 344
344 -
 345
345 -
 346
346 -
347
-
348
-
349
-
350
-
351
-
352
-
353
-
354
-
355
-
356
-
357
-
358
-
359
-
360
-
361
-
362
-
363
-
364
-
365
-
366
-
367
-
368
-
369
-
370
-
371
-
372
-
373
-
374
-
375
-
376
-
377
-
378
-
379
-
380
-
381
-
382
-
383
-
384
-
385
 |
 |
