Samsung SGH-T879 User Manual Ver.lg2_f2 (English(north America)) - Page 115
SIM, Microsoft Exchange ActiveSync, Groups, Ringtone
 |
View all Samsung SGH-T879 manuals
Add to My Manuals
Save this manual to your list of manuals |
Page 115 highlights
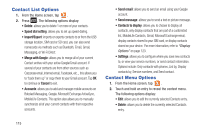
Note: When storing an entry into your SIM card, note that only the Name, and Number are saved. To save additional information for a particular contact, such as notes, email, dates, etc., it is important to save that Contact into your phone's onboard memory. 1. From the Home screen, tap (Contacts). 2. Tap to create a contact. Note: You can also add a new contact by entering a number from the keypad and pressing and then tap Add to Contacts ➔ Create contact. Continue with step 3. 3. Tap a destination type (MobileLife Contacts, Google, SIM, Microsoft Exchange ActiveSync, or Phone) (depending on where you want to save the new contact information). 4. Tap the Name field and enter a name for this contact using the displayed keypad. • Tap to access additional name entries such as: Name prefix, First name, Middle name, Last name, and Name suffix. 5. Tap the image icon and select a photo for this contact. Selections are: Take photo, Select picture from Gallery, or S Memo. Note: These label entries can change and are dependant on the selected destination type (ex: the Other and Custom might not appear with an Exchange ActiveSync account destination type). 6. Tap the label button (to the left of the Phone number field) and scroll through the list to select a category such as Mobile (default), Home, Work, Work Fax, Home Fax, Pager, Other, Custom, or Callback. 7. Tap a phone number field and enter a phone number. • Tap on the QWERTY keyboard to remove a previously entered phone number. • Tap to enter an additional phone number • Tap to remove a previously entered phone number. 8. Enter additional information such as: Email, Address, Events, Groups, Ringtone or tap Add another field to input additional category information. Contacts 110
-
 1
1 -
2
-
3
-
4
-
5
-
6
-
7
-
8
-
9
-
10
-
11
-
12
-
13
-
14
-
15
-
16
-
17
-
18
-
19
-
20
-
21
-
22
-
23
-
24
-
25
-
26
-
27
-
28
-
29
-
30
-
31
-
32
-
33
-
34
-
35
-
36
-
37
-
38
-
39
-
40
-
41
-
42
-
43
-
44
-
45
-
46
-
47
-
48
-
49
-
50
-
51
-
52
-
53
-
54
-
55
-
56
-
57
-
58
-
59
-
60
-
61
-
62
-
63
-
64
-
65
-
66
-
67
-
68
-
69
-
70
-
71
-
72
-
73
-
74
-
75
-
76
-
77
-
78
-
79
-
80
-
81
-
82
-
83
-
84
-
85
-
86
-
87
-
88
-
89
-
90
-
91
-
92
-
93
-
94
-
95
-
96
-
97
-
98
-
99
-
100
-
101
-
102
-
103
-
104
-
105
-
106
-
107
-
108
-
109
-
 110
110 -
 111
111 -
 112
112 -
 113
113 -
 114
114 -
 115
115 -
 116
116 -
 117
117 -
 118
118 -
 119
119 -
 120
120 -
121
-
122
-
123
-
124
-
125
-
126
-
127
-
128
-
129
-
130
-
131
-
132
-
133
-
134
-
135
-
136
-
137
-
138
-
139
-
140
-
141
-
142
-
143
-
144
-
145
-
146
-
147
-
148
-
149
-
150
-
151
-
152
-
153
-
154
-
155
-
156
-
157
-
158
-
159
-
160
-
161
-
162
-
163
-
164
-
165
-
166
-
167
-
168
-
169
-
170
-
171
-
172
-
173
-
174
-
175
-
176
-
177
-
178
-
179
-
180
-
181
-
182
-
183
-
184
-
185
-
186
-
187
-
188
-
189
-
190
-
191
-
192
-
193
-
194
-
195
-
196
-
197
-
198
-
199
-
200
-
201
-
202
-
203
-
204
-
205
-
206
-
207
-
208
-
209
-
210
-
211
-
212
-
213
-
214
-
215
-
216
-
217
-
218
-
219
-
220
-
221
-
222
-
223
-
224
-
225
-
226
-
227
-
228
-
229
-
230
-
231
-
232
-
233
-
234
-
235
-
236
-
237
-
238
-
239
-
240
-
241
-
242
-
243
-
244
-
245
-
246
-
247
-
248
-
249
-
250
-
251
-
252
-
253
-
254
-
255
-
256
-
257
-
258
-
259
-
260
-
261
-
262
-
263
-
264
-
265
-
266
-
267
-
268
-
269
-
270
-
271
-
272
-
273
-
274
-
275
-
276
-
277
-
278
-
279
-
280
-
281
-
282
-
283
-
284
-
285
-
286
-
287
-
288
-
289
-
290
-
291
-
292
-
293
-
294
-
295
-
296
-
297
-
298
-
299
-
300
-
301
-
302
-
303
-
304
-
305
-
306
-
307
-
308
-
309
-
310
-
311
-
312
-
313
-
314
-
315
-
316
-
317
-
318
-
319
-
320
-
321
-
322
-
323
-
324
-
325
-
326
-
327
-
328
-
329
-
330
-
331
-
332
-
333
-
334
-
335
-
336
-
337
-
338
-
339
-
340
-
341
-
342
-
343
-
344
-
345
-
346
-
347
-
348
-
349
-
350
-
351
-
352
-
353
-
354
-
355
-
356
-
357
-
358
-
359
-
360
-
361
-
362
-
363
-
364
-
365
-
366
-
367
-
368
-
369
 |
 |