Canon PC300 Instruction Manual - Page 106
Click [Import to ScanFront 300]., Click [Execute].
 |
View all Canon PC300 manuals
Add to My Manuals
Save this manual to your list of manuals |
Page 106 highlights
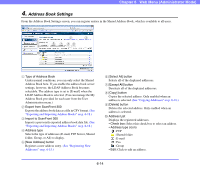
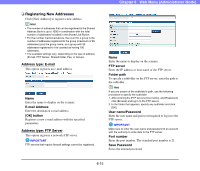
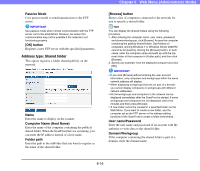
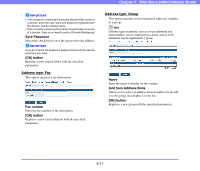
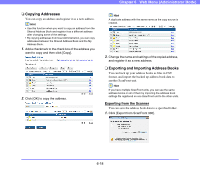
2. Click [Save], specify a save location, and save the address book data. Hint • You can open the saved CSV file with software that supports CSV files such as spread sheet software in order to check the structure of the file. • You can match the structure of a CSV file created in another mailer to that of a CSV file saved on the ScanFront, and then import the address book of the other mailer and use it on the ScanFront. Importing to the Scanner You can import previously exported address book data to the scanner. 1. Click [Import to ScanFront 300]. Chapter 6 Web Menu (Administrator Mode) 4. Click [Execute]. Confirm the message that appears, and click [OK] to import the data. Hint When importing is completed, the following message appears. Click [OK] to return to Address Book Settings and confirm the imported address data. 2. Click [Browse] and specify a previously exported address book settings file. 3. Select a processing method for importing the address book settings file. • Replaces the whole data: Deletes the currently registered address book and overwrites it with the imported address book data. • Appends data: Adds the imported address book data to the currently registered address book. 6-19
-
 1
1 -
2
-
3
-
4
-
5
-
6
-
7
-
8
-
9
-
10
-
11
-
12
-
13
-
14
-
15
-
16
-
17
-
18
-
19
-
20
-
21
-
22
-
23
-
24
-
25
-
26
-
27
-
28
-
29
-
30
-
31
-
32
-
33
-
34
-
35
-
36
-
37
-
38
-
39
-
40
-
41
-
42
-
43
-
44
-
45
-
46
-
47
-
48
-
49
-
50
-
51
-
52
-
53
-
54
-
55
-
56
-
57
-
58
-
59
-
60
-
61
-
62
-
63
-
64
-
65
-
66
-
67
-
68
-
69
-
70
-
71
-
72
-
73
-
74
-
75
-
76
-
77
-
78
-
79
-
80
-
81
-
82
-
83
-
84
-
85
-
86
-
87
-
88
-
89
-
90
-
91
-
92
-
93
-
94
-
95
-
96
-
97
-
98
-
99
-
100
-
 101
101 -
 102
102 -
 103
103 -
 104
104 -
 105
105 -
 106
106 -
 107
107 -
 108
108 -
 109
109 -
 110
110 -
 111
111 -
112
-
113
-
114
-
115
-
116
-
117
-
118
-
119
-
120
-
121
-
122
-
123
-
124
-
125
-
126
-
127
-
128
-
129
-
130
-
131
-
132
-
133
-
134
-
135
-
136
-
137
-
138
-
139
-
140
-
141
-
142
-
143
-
144
-
145
-
146
-
147
-
148
-
149
-
150
-
151
-
152
-
153
-
154
-
155
-
156
-
157
-
158
-
159
-
160
-
161
-
162
-
163
-
164
-
165
-
166
-
167
-
168
-
169
-
170
-
171
-
172
-
173
-
174
-
175
-
176
-
177
-
178
-
179
-
180
-
181
-
182
-
183
-
184
-
185
-
186
-
187
-
188
-
189
-
190
-
191
-
192
-
193
 |
 |