Canon PC300 Instruction Manual - Page 160
Editing Jobs, Exporting and Importing Job Buttons, Click [Export from ScanFront 300].
 |
View all Canon PC300 manuals
Add to My Manuals
Save this manual to your list of manuals |
Page 160 highlights
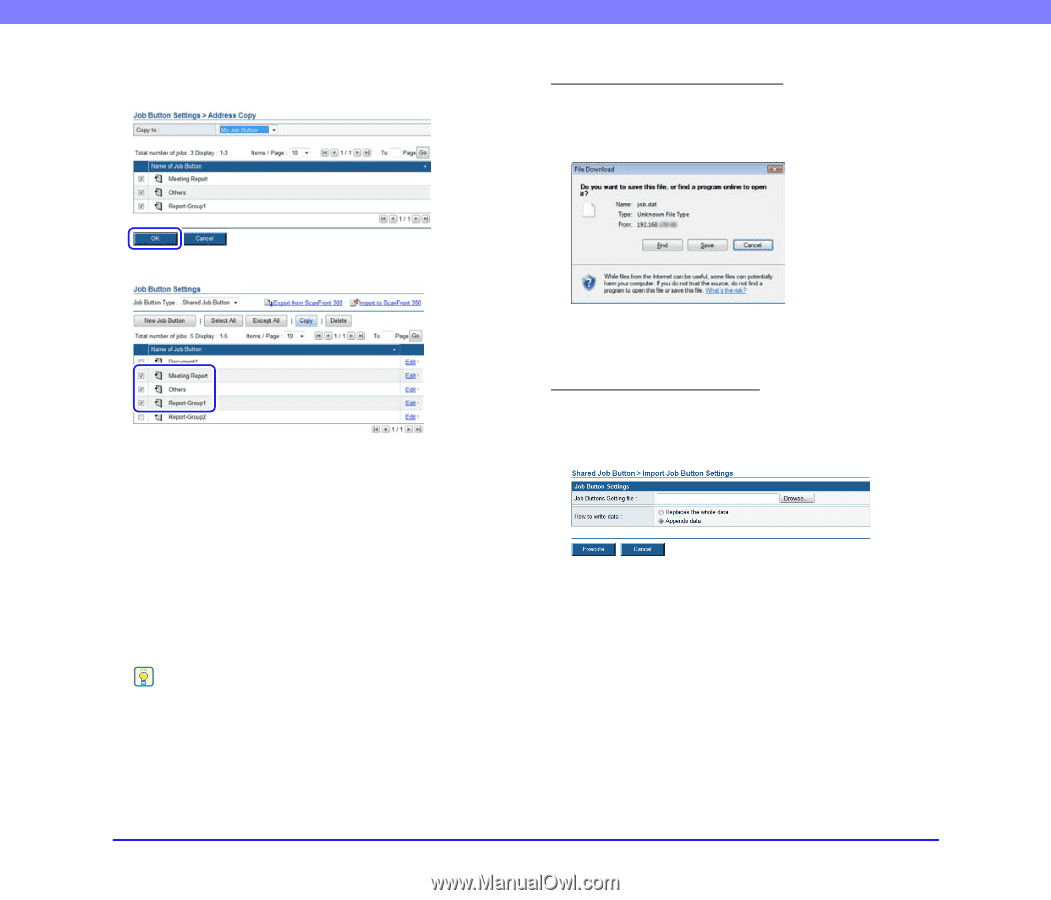
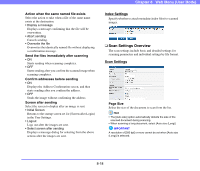
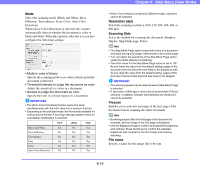
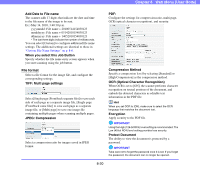
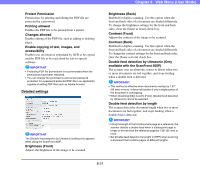
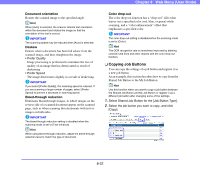
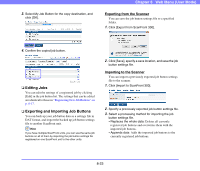
3. Select My Job Button for the copy destination, and click [OK]. Chapter 8 Web Menu (User Mode) Exporting from the Scanner You can save the job button settings file to a specified folder. 1. Click [Export from ScanFront 300]. 4. Confirm the copied job button. ❏ Editing Jobs You can edit the settings of a registered job by clicking [Edit] in the job button list. The settings that can be edited are identical to those in "Registering New Job Buttons" on p. 8-17. ❏ Exporting and Importing Job Buttons You can back up your job button data as a settings file in DAT format, and import the backed up job button settings file to another ScanFront unit. Hint If you have multiple ScanFront units, you can use the same job buttons on all of them by importing the job button settings file registered on one ScanFront unit to the other units. 2. Click [Save], specify a save location, and save the job button settings file. Importing to the Scanner You can import a previously exported job button settings file to the scanner. 1. Click [Import to ScanFront 300]. 2. Specify a previously exported job button settings file. 3. Select a processing method for importing the job button settings file. • Replaces the whole data: Deletes all currently registered job buttons and overwrites them with the imported job buttons. • Appends data: Adds the imported job buttons to the currently registered job buttons. 8-23
-
 1
1 -
2
-
3
-
4
-
5
-
6
-
7
-
8
-
9
-
10
-
11
-
12
-
13
-
14
-
15
-
16
-
17
-
18
-
19
-
20
-
21
-
22
-
23
-
24
-
25
-
26
-
27
-
28
-
29
-
30
-
31
-
32
-
33
-
34
-
35
-
36
-
37
-
38
-
39
-
40
-
41
-
42
-
43
-
44
-
45
-
46
-
47
-
48
-
49
-
50
-
51
-
52
-
53
-
54
-
55
-
56
-
57
-
58
-
59
-
60
-
61
-
62
-
63
-
64
-
65
-
66
-
67
-
68
-
69
-
70
-
71
-
72
-
73
-
74
-
75
-
76
-
77
-
78
-
79
-
80
-
81
-
82
-
83
-
84
-
85
-
86
-
87
-
88
-
89
-
90
-
91
-
92
-
93
-
94
-
95
-
96
-
97
-
98
-
99
-
100
-
101
-
102
-
103
-
104
-
105
-
106
-
107
-
108
-
109
-
110
-
111
-
112
-
113
-
114
-
115
-
116
-
117
-
118
-
119
-
120
-
121
-
122
-
123
-
124
-
125
-
126
-
127
-
128
-
129
-
130
-
131
-
132
-
133
-
134
-
135
-
136
-
137
-
138
-
139
-
140
-
141
-
142
-
143
-
144
-
145
-
146
-
147
-
148
-
149
-
150
-
151
-
152
-
153
-
154
-
 155
155 -
 156
156 -
 157
157 -
 158
158 -
 159
159 -
 160
160 -
 161
161 -
 162
162 -
 163
163 -
 164
164 -
 165
165 -
166
-
167
-
168
-
169
-
170
-
171
-
172
-
173
-
174
-
175
-
176
-
177
-
178
-
179
-
180
-
181
-
182
-
183
-
184
-
185
-
186
-
187
-
188
-
189
-
190
-
191
-
192
-
193
 |
 |