Canon PC300 Instruction Manual - Page 167
Cleaning the Feed Roller, original position.
 |
View all Canon PC300 manuals
Add to My Manuals
Save this manual to your list of manuals |
Page 167 highlights
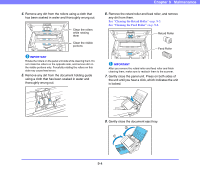
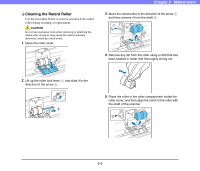
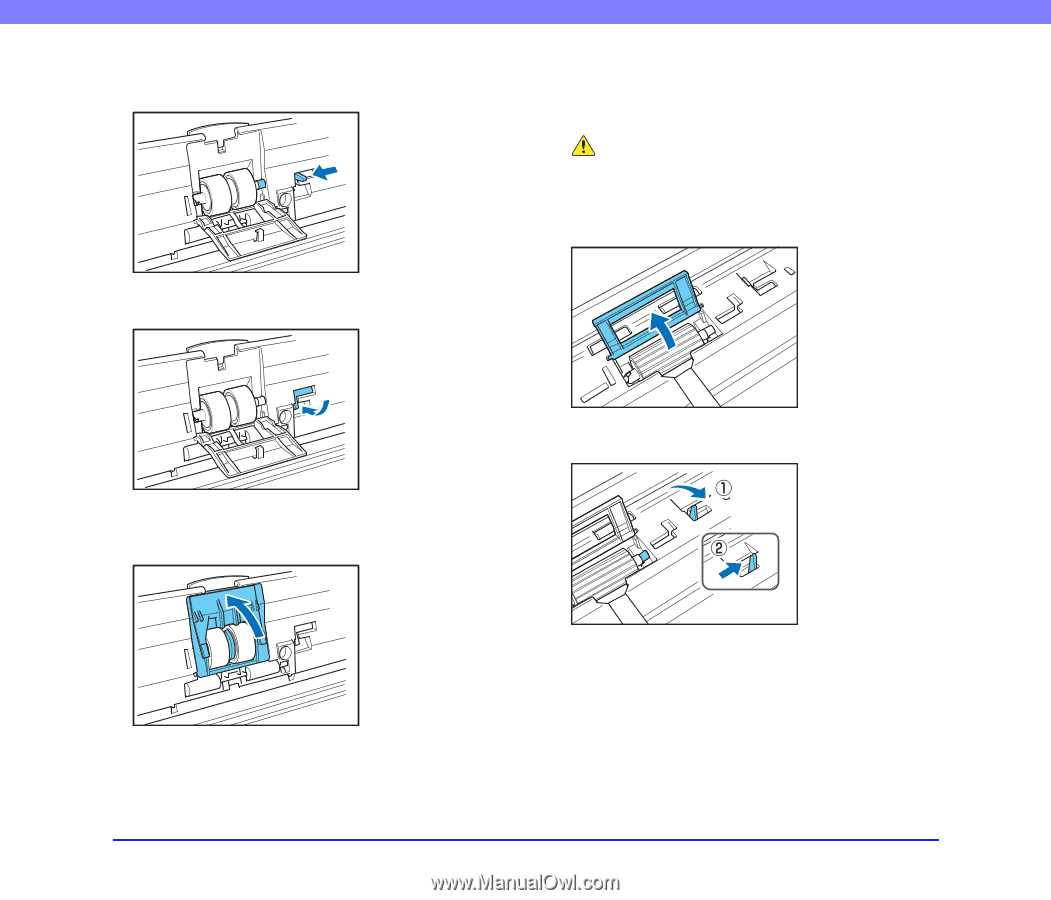
6. Slide the roller lock lever in the direction of the arrow, and then insert it into the hole of the retard roller. 7. Lower the lever to lock the shaft of the retard roller into position. Chapter 9 Maintenance ❏ Cleaning the Feed Roller Use the procedure below to remove and attach the feed roller during cleaning or replacement. CAUTION Do not use excessive force when removing or attaching the feed roller. Doing so may cause the roller to become deformed, resulting in feed errors. 1. Open the roller cover. 8. Close the roller cover. Make sure that you hear a click, which indicates the cover has returned to its original position. 2. Lift up the roller lock lever a, and slide it in the direction of the arrow b. 9-6
-
 1
1 -
2
-
3
-
4
-
5
-
6
-
7
-
8
-
9
-
10
-
11
-
12
-
13
-
14
-
15
-
16
-
17
-
18
-
19
-
20
-
21
-
22
-
23
-
24
-
25
-
26
-
27
-
28
-
29
-
30
-
31
-
32
-
33
-
34
-
35
-
36
-
37
-
38
-
39
-
40
-
41
-
42
-
43
-
44
-
45
-
46
-
47
-
48
-
49
-
50
-
51
-
52
-
53
-
54
-
55
-
56
-
57
-
58
-
59
-
60
-
61
-
62
-
63
-
64
-
65
-
66
-
67
-
68
-
69
-
70
-
71
-
72
-
73
-
74
-
75
-
76
-
77
-
78
-
79
-
80
-
81
-
82
-
83
-
84
-
85
-
86
-
87
-
88
-
89
-
90
-
91
-
92
-
93
-
94
-
95
-
96
-
97
-
98
-
99
-
100
-
101
-
102
-
103
-
104
-
105
-
106
-
107
-
108
-
109
-
110
-
111
-
112
-
113
-
114
-
115
-
116
-
117
-
118
-
119
-
120
-
121
-
122
-
123
-
124
-
125
-
126
-
127
-
128
-
129
-
130
-
131
-
132
-
133
-
134
-
135
-
136
-
137
-
138
-
139
-
140
-
141
-
142
-
143
-
144
-
145
-
146
-
147
-
148
-
149
-
150
-
151
-
152
-
153
-
154
-
155
-
156
-
157
-
158
-
159
-
160
-
161
-
 162
162 -
 163
163 -
 164
164 -
 165
165 -
 166
166 -
 167
167 -
 168
168 -
 169
169 -
 170
170 -
 171
171 -
 172
172 -
173
-
174
-
175
-
176
-
177
-
178
-
179
-
180
-
181
-
182
-
183
-
184
-
185
-
186
-
187
-
188
-
189
-
190
-
191
-
192
-
193
 |
 |
9-6
Chapter 9
Maintenance
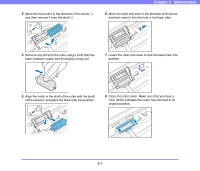
6.
Slide the roller lock lever in the direction of the arrow,
and then insert it into the hole of the retard roller.
7.
Lower the lever to lock the shaft of the retard roller
into position.
8.
Close the roller cover. Make sure that you hear a
click, which indicates the cover has returned to its
original position.
❏
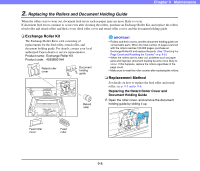
Cleaning the Feed Roller
Use the procedure below to remove and attach the feed
roller during cleaning or replacement.
CAUTION
Do not use excessive force when removing or attaching the feed
roller. Doing so may cause the roller to become deformed,
resulting in feed errors.
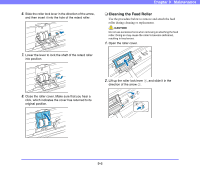
1.
Open the roller cover.
2.
Lift up the roller lock lever
a
, and slide it in the
direction of the arrow
b
.