Canon PC300 Instruction Manual - Page 157
OCR Optical Character Recognition, File format
 |
View all Canon PC300 manuals
Add to My Manuals
Save this manual to your list of manuals |
Page 157 highlights
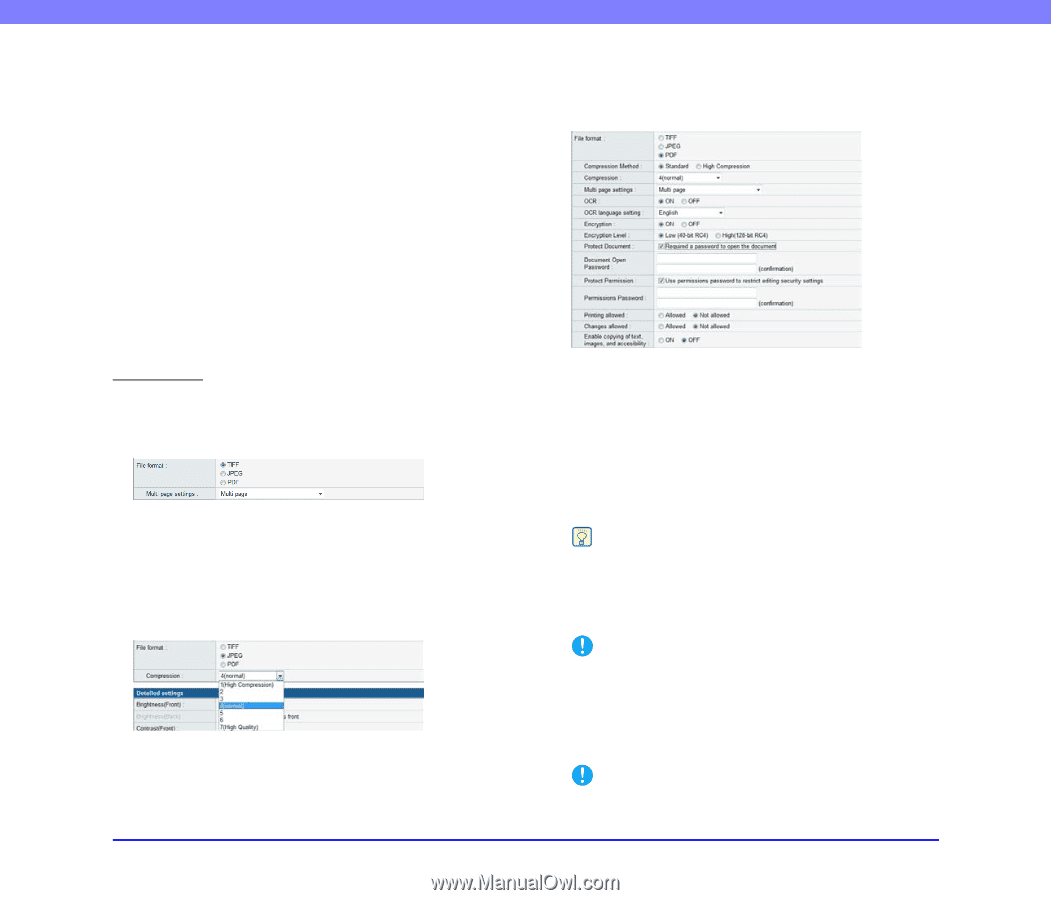
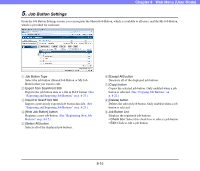
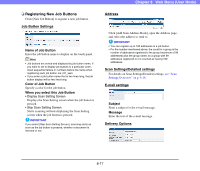
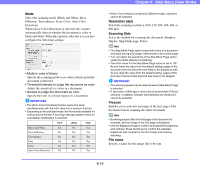
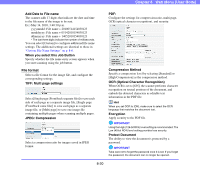
Chapter 8 Web Menu (User Mode) Add Date to File name The scanner adds 17 digits that indicate the date and time to the file name of the image to be sent. Ex.) May 14, 2010, 3:40:30 p.m. yyyymmdd: File name + 20100514154030123 mmddyyyy: File name + 05142010154030123 ddmmyyyy: File name + 14052010154030123 * The last three digits indicate the number of milliseconds. You can select [Custom] to configure additional file name settings. The additional settings are identical to those in "Custom File Name Settings" on p. 8-6. When you select this Job Button Specify whether the file name entry screen appears when you start scanning using the job button. File format Select a file format for the image file, and configure the corresponding settings. TIFF: Multi page settings Select [Single page (Front/back separate file)] to save each side of each page as a separate image file, [Single page (Front/back same file)] to save each page as a separate image file, or [Multi page] to save one image file containing multiple pages when scanning multiple pages. JPEG: Compression Select a compression ratio for images saved in JPEG format. PDF: Configure the settings for compression ratio, multi page, OCR (optical character recognition), and security. Compression Method Specify a compression level by selecting [Standard] or [High Compression] as the compression method. OCR (Optical Character Recognition) When OCR is set to [ON], the scanner performs character recognition on textual portions of the document, and embeds the detected characters as editable text information in the PDF file. Hint When you set OCR to [ON], make sure to select the OCR language that matches the document text. Encryption Apply security to the PDF file. IMPORTANT Using the High (128-bit RC4) level setting is recommended. The Low (40-bit RC4) level setting provides less security. Protect Document The ability to view the document is protected by a password. IMPORTANT Take care not to forget the password once it is set. If you forget the password, the document can no longer be opened. 8-20
-
 1
1 -
2
-
3
-
4
-
5
-
6
-
7
-
8
-
9
-
10
-
11
-
12
-
13
-
14
-
15
-
16
-
17
-
18
-
19
-
20
-
21
-
22
-
23
-
24
-
25
-
26
-
27
-
28
-
29
-
30
-
31
-
32
-
33
-
34
-
35
-
36
-
37
-
38
-
39
-
40
-
41
-
42
-
43
-
44
-
45
-
46
-
47
-
48
-
49
-
50
-
51
-
52
-
53
-
54
-
55
-
56
-
57
-
58
-
59
-
60
-
61
-
62
-
63
-
64
-
65
-
66
-
67
-
68
-
69
-
70
-
71
-
72
-
73
-
74
-
75
-
76
-
77
-
78
-
79
-
80
-
81
-
82
-
83
-
84
-
85
-
86
-
87
-
88
-
89
-
90
-
91
-
92
-
93
-
94
-
95
-
96
-
97
-
98
-
99
-
100
-
101
-
102
-
103
-
104
-
105
-
106
-
107
-
108
-
109
-
110
-
111
-
112
-
113
-
114
-
115
-
116
-
117
-
118
-
119
-
120
-
121
-
122
-
123
-
124
-
125
-
126
-
127
-
128
-
129
-
130
-
131
-
132
-
133
-
134
-
135
-
136
-
137
-
138
-
139
-
140
-
141
-
142
-
143
-
144
-
145
-
146
-
147
-
148
-
149
-
150
-
151
-
 152
152 -
 153
153 -
 154
154 -
 155
155 -
 156
156 -
 157
157 -
 158
158 -
 159
159 -
 160
160 -
 161
161 -
 162
162 -
163
-
164
-
165
-
166
-
167
-
168
-
169
-
170
-
171
-
172
-
173
-
174
-
175
-
176
-
177
-
178
-
179
-
180
-
181
-
182
-
183
-
184
-
185
-
186
-
187
-
188
-
189
-
190
-
191
-
192
-
193
 |
 |