Epson Expression 1680 Special Edition User Manual (w/EPSON TWAIN software) - Page 104
Removing the Shipping Screw, Installing the Transparency Unit, Transporting the Scanner
 |
View all Epson Expression 1680 Special Edition manuals
Add to My Manuals
Save this manual to your list of manuals |
Page 104 highlights
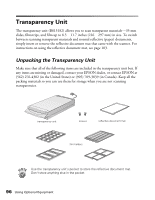
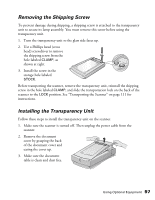
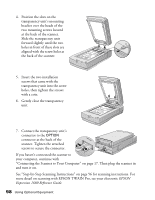
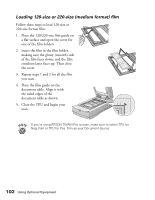
Removing the Shipping Screw To prevent damage during shipping, a shipping screw is attached to the transparency unit to secure its lamp assembly. You must remove this screw before using the transparency unit. 1. Turn the transparency unit so the glass side faces up. 2. Use a Phillips head (cross head) screwdriver to remove the shipping screw from the hole labeled CLAMP, as shown at right. 3. Install the screw in the storage hole labeled STOCK. Before transporting the scanner, remove the transparency unit, reinstall the shipping screw in the hole labeled CLAMP, and slide the transportation lock on the back of the scanner to the LOCK position. See "Transporting the Scanner" on page 111 for instructions. Installing the Transparency Unit Follow these steps to install the transparency unit on the scanner. 1. Make sure the scanner is turned off. Then unplug the power cable from the scanner. 2. Remove the document cover by grasping the back of the document cover and easing the cover up. 3. Make sure the document table is clean and dust free. Using Optional Equipment 97
-
 1
1 -
2
-
3
-
4
-
5
-
6
-
7
-
8
-
9
-
10
-
11
-
12
-
13
-
14
-
15
-
16
-
17
-
18
-
19
-
20
-
21
-
22
-
23
-
24
-
25
-
26
-
27
-
28
-
29
-
30
-
31
-
32
-
33
-
34
-
35
-
36
-
37
-
38
-
39
-
40
-
41
-
42
-
43
-
44
-
45
-
46
-
47
-
48
-
49
-
50
-
51
-
52
-
53
-
54
-
55
-
56
-
57
-
58
-
59
-
60
-
61
-
62
-
63
-
64
-
65
-
66
-
67
-
68
-
69
-
70
-
71
-
72
-
73
-
74
-
75
-
76
-
77
-
78
-
79
-
80
-
81
-
82
-
83
-
84
-
85
-
86
-
87
-
88
-
89
-
90
-
91
-
92
-
93
-
94
-
95
-
96
-
97
-
98
-
 99
99 -
 100
100 -
 101
101 -
 102
102 -
 103
103 -
 104
104 -
 105
105 -
 106
106 -
 107
107 -
 108
108 -
 109
109 -
110
-
111
-
112
-
113
-
114
-
115
-
116
-
117
-
118
-
119
-
120
-
121
-
122
-
123
-
124
-
125
-
126
-
127
-
128
-
129
-
130
-
131
-
132
-
133
-
134
-
135
-
136
-
137
-
138
-
139
-
140
-
141
-
142
-
143
-
144
-
145
-
146
-
147
-
148
-
149
-
150
-
151
-
152
-
153
-
154
-
155
-
156
-
157
-
158
-
159
 |
 |
