Epson Expression 1680 Special Edition User Manual (w/EPSON TWAIN software) - Page 113
the Scanner to Your Computer, Close the ADF.
 |
View all Epson Expression 1680 Special Edition manuals
Add to My Manuals
Save this manual to your list of manuals |
Page 113 highlights
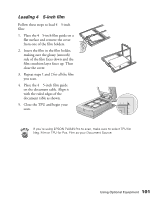
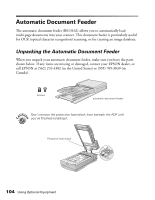
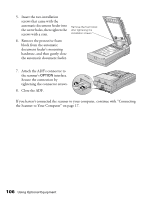
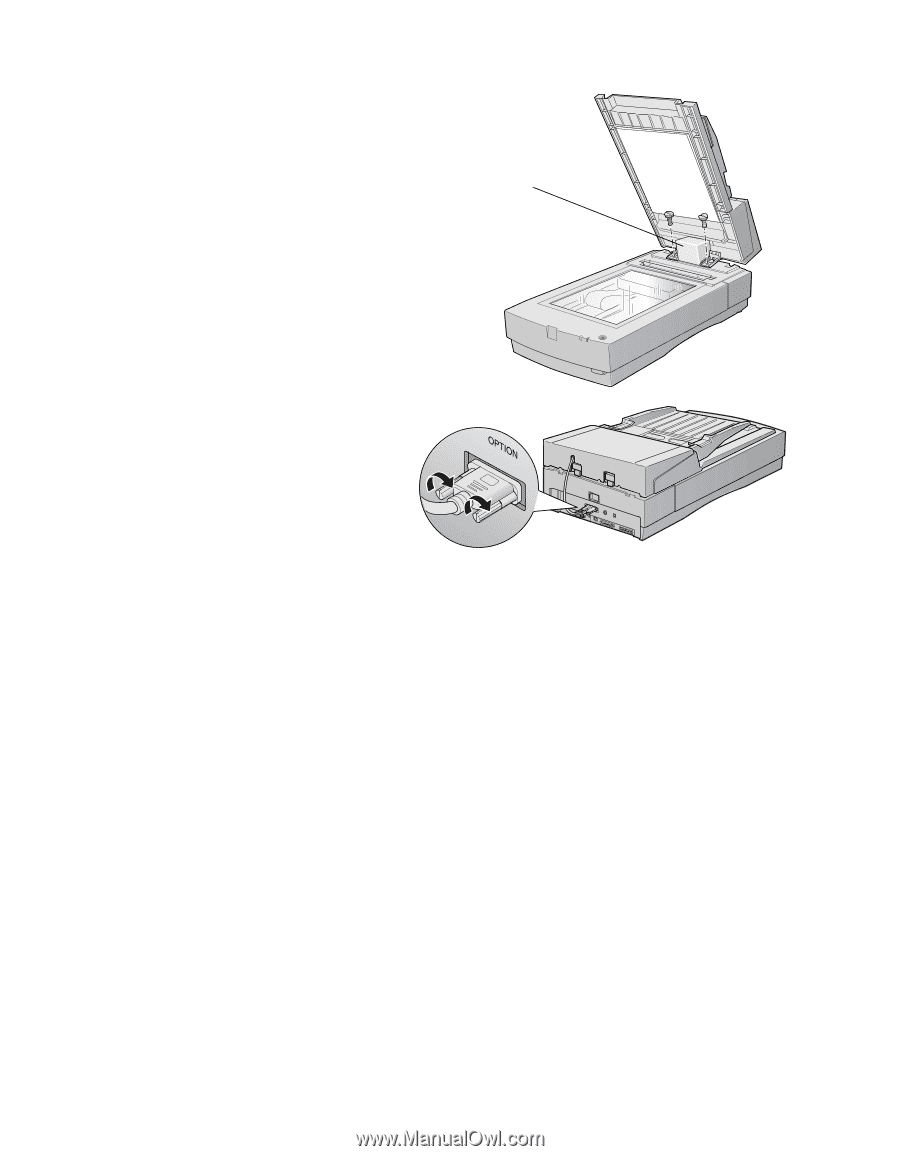
5. Insert the two installation screws that came with the automatic document feeder into the screw holes, then tighten the screws with a coin. Remove the foam block after tightening the installation screws. 6. Remove the protective foam block from the automatic document feeder's mounting hardware, and then gently close the automatic document feeder. 7. Attach the ADF's connector to the scanner's OPTION interface. Secure the connection by tightening the connector screws. 8. Close the ADF. If you haven't connected the scanner to your computer, continue with "Connecting the Scanner to Your Computer" on page 17. 106 Using Optional Equipment
-
 1
1 -
2
-
3
-
4
-
5
-
6
-
7
-
8
-
9
-
10
-
11
-
12
-
13
-
14
-
15
-
16
-
17
-
18
-
19
-
20
-
21
-
22
-
23
-
24
-
25
-
26
-
27
-
28
-
29
-
30
-
31
-
32
-
33
-
34
-
35
-
36
-
37
-
38
-
39
-
40
-
41
-
42
-
43
-
44
-
45
-
46
-
47
-
48
-
49
-
50
-
51
-
52
-
53
-
54
-
55
-
56
-
57
-
58
-
59
-
60
-
61
-
62
-
63
-
64
-
65
-
66
-
67
-
68
-
69
-
70
-
71
-
72
-
73
-
74
-
75
-
76
-
77
-
78
-
79
-
80
-
81
-
82
-
83
-
84
-
85
-
86
-
87
-
88
-
89
-
90
-
91
-
92
-
93
-
94
-
95
-
96
-
97
-
98
-
99
-
100
-
101
-
102
-
103
-
104
-
105
-
106
-
107
-
 108
108 -
 109
109 -
 110
110 -
 111
111 -
 112
112 -
 113
113 -
 114
114 -
 115
115 -
 116
116 -
 117
117 -
 118
118 -
119
-
120
-
121
-
122
-
123
-
124
-
125
-
126
-
127
-
128
-
129
-
130
-
131
-
132
-
133
-
134
-
135
-
136
-
137
-
138
-
139
-
140
-
141
-
142
-
143
-
144
-
145
-
146
-
147
-
148
-
149
-
150
-
151
-
152
-
153
-
154
-
155
-
156
-
157
-
158
-
159
 |
 |
106
Using Optional Equipment
5.
Insert the two installation
screws that came with the
automatic document feeder into
the screw holes, then tighten the
screws with a coin.
6.
Remove the protective foam
block from the automatic
document feeder
’
s mounting
hardware, and then gently close
the automatic document feeder.
7.
Attach the ADF
’
s connector to
the scanner
’
s
OPTION
interface.
Secure the connection by
tightening the connector screws.
8.
Close the ADF.
If you haven
’
t connected the scanner to your computer, continue with
“
Connecting
the Scanner to Your Computer
”
on page 17.
Remove the foam block
after tightening the
installation screws.