Epson Expression 1680 Special Edition User Manual (w/EPSON TWAIN software) - Page 98
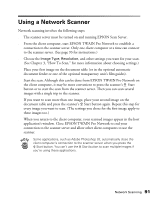
Using a Network Scanner
 |
View all Epson Expression 1680 Special Edition manuals
Add to My Manuals
Save this manual to your list of manuals |
Page 98 highlights
Using a Network Scanner Network scanning involves the following steps: s The scanner server must be turned on and running EPSON Scan Server. s From the client computer, start EPSON TWAIN Pro Network to establish a connection to the scanner server. Only one client computer at a time can connect to the scanner server. (See page 93 for instructions.) s Choose the Image Type, Resolution, and other settings you want for your scan. (See Chapter 3, "How To Scan," for more information about choosing settings.) s Place your first image on the document table (or in the optional automatic document feeder or one of the optional transparency unit's film guides). s Start the scan. Although this can be done from EPSON TWAIN Pro Network on the client computer, it may be more convenient to press the scanner's a Start button or to start the scan from the scanner server. Then you can scan several images with a single trip to the scanner. s If you want to scan more than one image, place your second image on the document table and press the scanner's a Start button again. Repeat this step for every image you want to scan. (The settings you chose for the first image apply to these images too.) s When you return to the client computer, your scanned images appear in the host application's window. Close EPSON TWAIN Pro Network to end your connection to the scanner server and allow other client computers to use the scanner. Some applications, such as Adobe Photoshop LE, automatically close the client computer's connection to the scanner server when you press the a Start button. You can't use the a Start button to scan multiple images if you're using these applications. Network Scanning 91
-
 1
1 -
2
-
3
-
4
-
5
-
6
-
7
-
8
-
9
-
10
-
11
-
12
-
13
-
14
-
15
-
16
-
17
-
18
-
19
-
20
-
21
-
22
-
23
-
24
-
25
-
26
-
27
-
28
-
29
-
30
-
31
-
32
-
33
-
34
-
35
-
36
-
37
-
38
-
39
-
40
-
41
-
42
-
43
-
44
-
45
-
46
-
47
-
48
-
49
-
50
-
51
-
52
-
53
-
54
-
55
-
56
-
57
-
58
-
59
-
60
-
61
-
62
-
63
-
64
-
65
-
66
-
67
-
68
-
69
-
70
-
71
-
72
-
73
-
74
-
75
-
76
-
77
-
78
-
79
-
80
-
81
-
82
-
83
-
84
-
85
-
86
-
87
-
88
-
89
-
90
-
91
-
92
-
 93
93 -
 94
94 -
 95
95 -
 96
96 -
 97
97 -
 98
98 -
 99
99 -
 100
100 -
 101
101 -
 102
102 -
 103
103 -
104
-
105
-
106
-
107
-
108
-
109
-
110
-
111
-
112
-
113
-
114
-
115
-
116
-
117
-
118
-
119
-
120
-
121
-
122
-
123
-
124
-
125
-
126
-
127
-
128
-
129
-
130
-
131
-
132
-
133
-
134
-
135
-
136
-
137
-
138
-
139
-
140
-
141
-
142
-
143
-
144
-
145
-
146
-
147
-
148
-
149
-
150
-
151
-
152
-
153
-
154
-
155
-
156
-
157
-
158
-
159
 |
 |