Epson RX500 User's Guide - Page 73
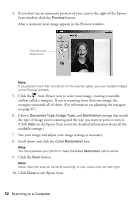
Restoring and Printing Photos, For Image Type, make sure - stylus photo support
 |
UPC - 010343848467
View all Epson RX500 manuals
Add to My Manuals
Save this manual to your list of manuals |
Page 73 highlights
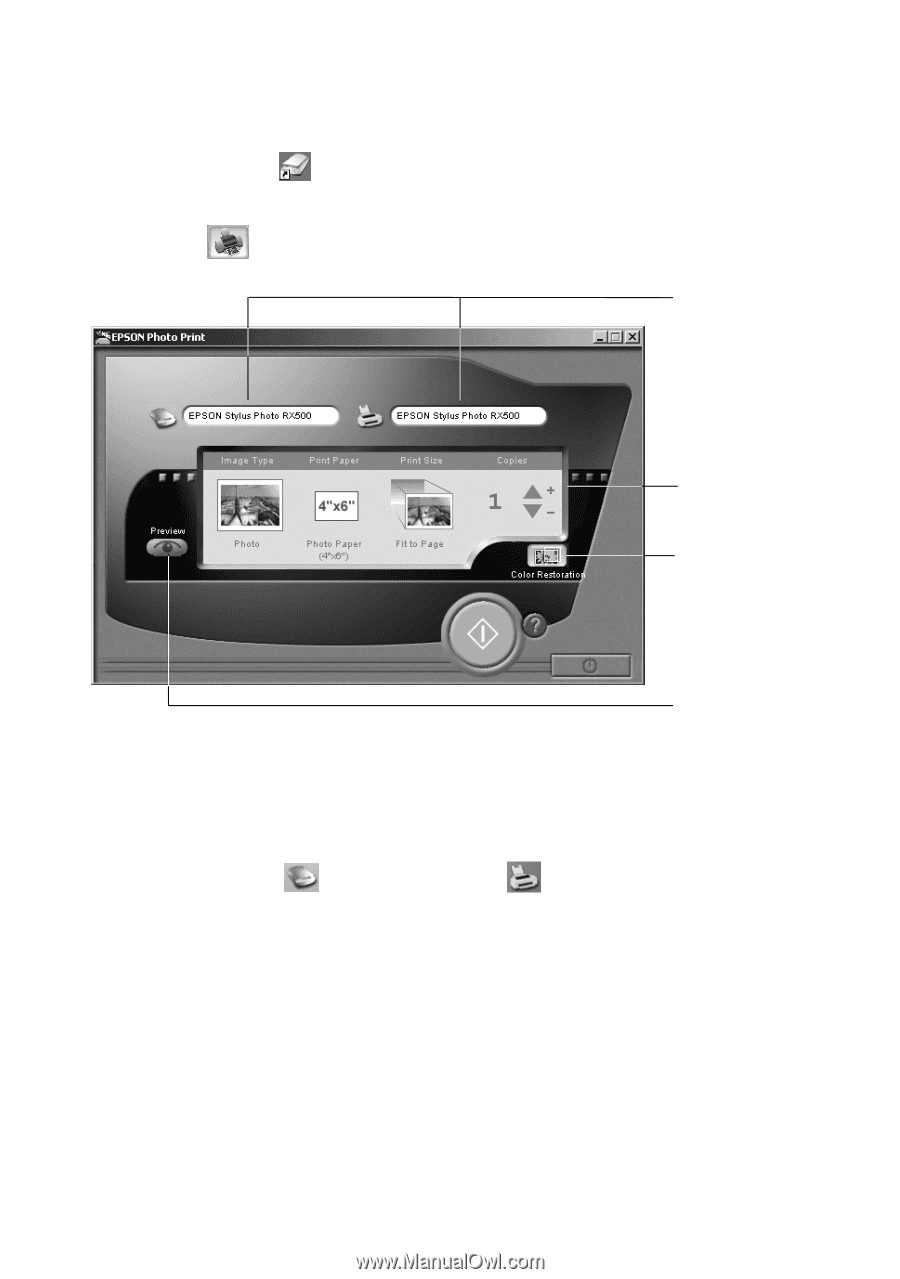
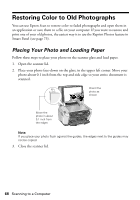
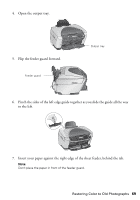
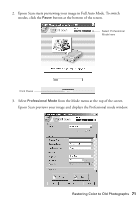
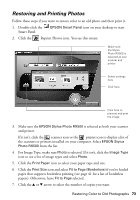
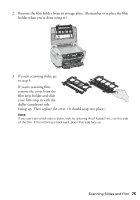
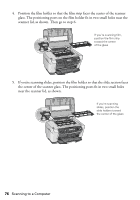
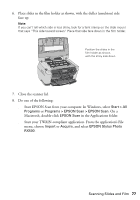
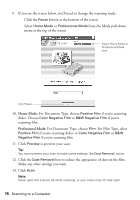
Restoring and Printing Photos Follow these steps if you want to restore color to an old photo and then print it. 1. Double-click the Smart Panel. EPSON Smart Panel icon on your desktop to start 2. Click the Reprint Photos icon. You see this screen: Make sure the Stylus Photo RX500 is selected as your scanner and printer Select settings here Click here Click here to preview and print the image 3. Make sure the EPSON Stylus Photo RX500 is selected as both your scanner and printer. If it isn't, click the scanner icon or the printer icon to display a list of the scanners or printers installed on your computer. Select EPSON Stylus Photo RX500 from the list. 4. For Image Type, make sure Photo is selected. If it isn't, click the Image Type icon to see a list of image types and select Photo. 5. Click the Print Paper icon to select your paper type and size. 6. Click the Print Size icon and select Fit to Page (Borderless) if you've loaded paper that supports borderless printing (see page 41 for a list of borderless papers). Otherwise, leave Fit to Page selected. 7. Click the u or d arrow to select the number of copies you want. Restoring Color to Old Photographs 73
-
 1
1 -
2
-
3
-
4
-
5
-
6
-
7
-
8
-
9
-
10
-
11
-
12
-
13
-
14
-
15
-
16
-
17
-
18
-
19
-
20
-
21
-
22
-
23
-
24
-
25
-
26
-
27
-
28
-
29
-
30
-
31
-
32
-
33
-
34
-
35
-
36
-
37
-
38
-
39
-
40
-
41
-
42
-
43
-
44
-
45
-
46
-
47
-
48
-
49
-
50
-
51
-
52
-
53
-
54
-
55
-
56
-
57
-
58
-
59
-
60
-
61
-
62
-
63
-
64
-
65
-
66
-
67
-
 68
68 -
 69
69 -
 70
70 -
 71
71 -
 72
72 -
 73
73 -
 74
74 -
 75
75 -
 76
76 -
 77
77 -
 78
78 -
79
-
80
-
81
-
82
-
83
-
84
-
85
-
86
-
87
-
88
-
89
-
90
-
91
-
92
-
93
-
94
-
95
-
96
-
97
-
98
-
99
-
100
-
101
-
102
-
103
-
104
-
105
-
106
-
107
-
108
-
109
-
110
-
111
-
112
-
113
-
114
-
115
-
116
-
117
-
118
-
119
-
120
-
121
-
122
-
123
-
124
-
125
-
126
-
127
-
128
-
129
-
130
-
131
-
132
-
133
-
134
-
135
-
136
-
137
-
138
 |
 |