Epson RX500 User's Guide - Page 91
Found Images.., Total XXX, it. Continue with the next
 |
UPC - 010343848467
View all Epson RX500 manuals
Add to My Manuals
Save this manual to your list of manuals |
Page 91 highlights
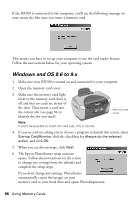
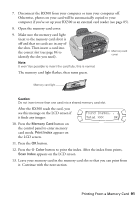
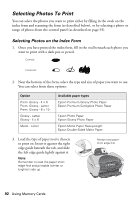
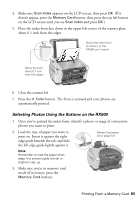
7. Disconnect the RX500 from your computer or turn your computer off. Otherwise, photos on your card will be automatically copied to your computer if you've set up your RX500 as an external card reader (see page 85). 8. Open the memory card cover: 9. Make sure the memory card light (next to the memory card slots) is off and that no cards are in any of the slots. Then insert a card into the correct slot (see page 84 to identify the slot you need). Memory card cover Note: It won't be possible to insert the card fully; this is normal. The memory card light flashes, then turns green. Memory card light Caution: Do not insert more than one card into a shared memory card slot. After the RX500 reads the card, you see this message on the LCD screen if it finds any images: Found Images. . . Total XXX OK 10. Press the Memory Card button on the control panel to enter memory card mode. Print Index appears on the LCD screen. 11. Press the OK button. 12. Press the x Color button to print the index. After the index form prints, Scan Index appears on the LCD screen. 13. Leave your memory card in the memory card slot so that you can print from it. Continue with the next section. Printing From a Memory Card 91
-
 1
1 -
2
-
3
-
4
-
5
-
6
-
7
-
8
-
9
-
10
-
11
-
12
-
13
-
14
-
15
-
16
-
17
-
18
-
19
-
20
-
21
-
22
-
23
-
24
-
25
-
26
-
27
-
28
-
29
-
30
-
31
-
32
-
33
-
34
-
35
-
36
-
37
-
38
-
39
-
40
-
41
-
42
-
43
-
44
-
45
-
46
-
47
-
48
-
49
-
50
-
51
-
52
-
53
-
54
-
55
-
56
-
57
-
58
-
59
-
60
-
61
-
62
-
63
-
64
-
65
-
66
-
67
-
68
-
69
-
70
-
71
-
72
-
73
-
74
-
75
-
76
-
77
-
78
-
79
-
80
-
81
-
82
-
83
-
84
-
85
-
 86
86 -
 87
87 -
 88
88 -
 89
89 -
 90
90 -
 91
91 -
 92
92 -
 93
93 -
 94
94 -
 95
95 -
 96
96 -
97
-
98
-
99
-
100
-
101
-
102
-
103
-
104
-
105
-
106
-
107
-
108
-
109
-
110
-
111
-
112
-
113
-
114
-
115
-
116
-
117
-
118
-
119
-
120
-
121
-
122
-
123
-
124
-
125
-
126
-
127
-
128
-
129
-
130
-
131
-
132
-
133
-
134
-
135
-
136
-
137
-
138
 |
 |
