Kyocera KM-3530 2530/3530/4030 Operation Guide Rev 2C - Page 38
Making a margin space for binding [Margin mode]
 |
View all Kyocera KM-3530 manuals
Add to My Manuals
Save this manual to your list of manuals |
Page 38 highlights
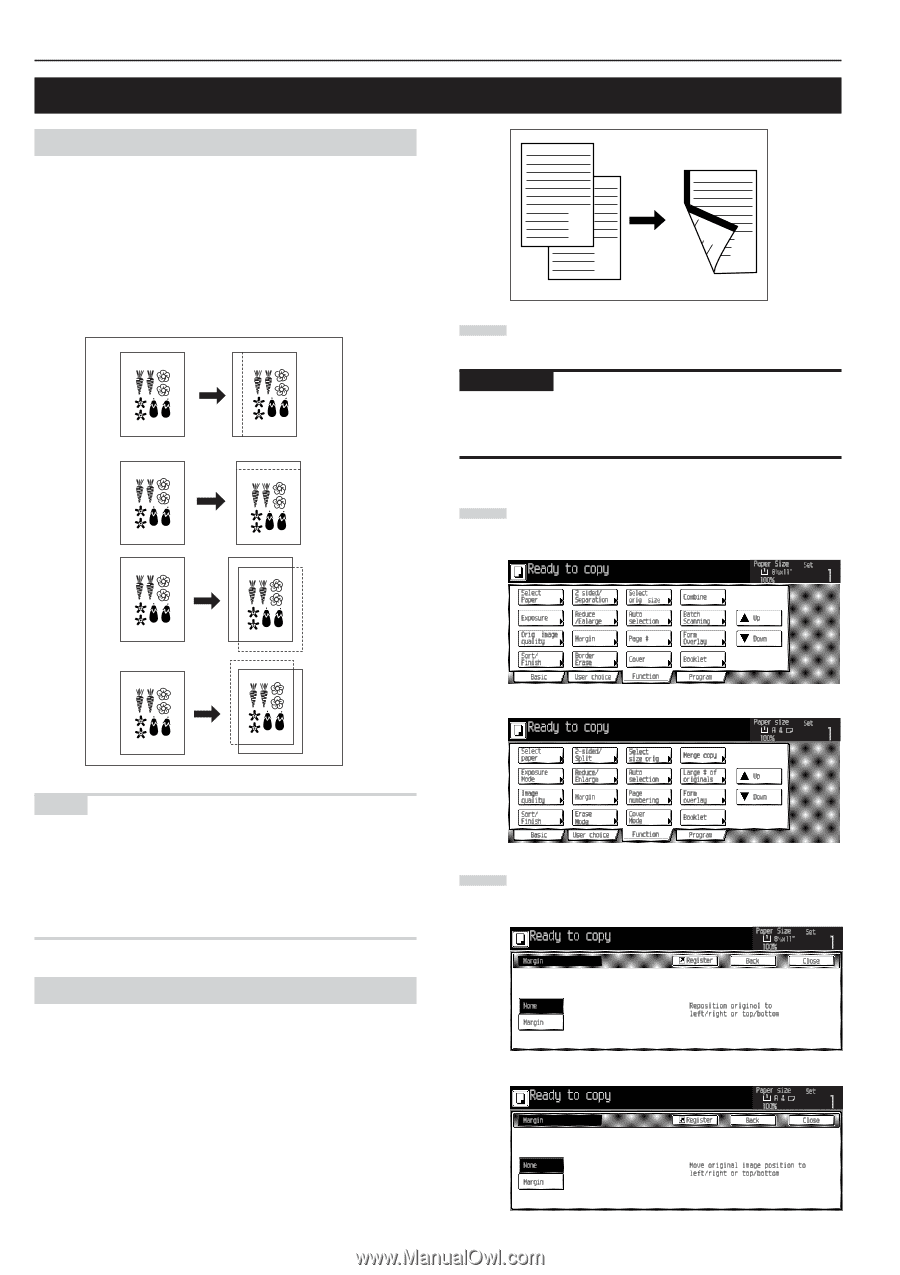
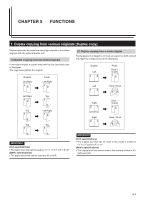
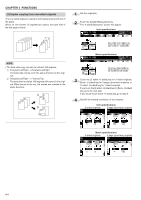
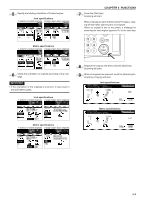
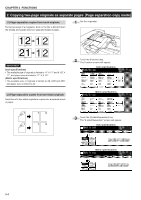
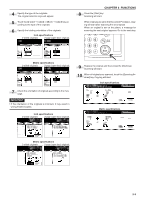
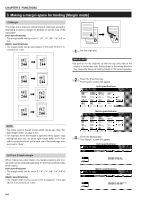
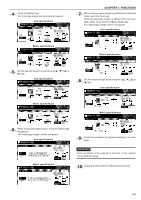
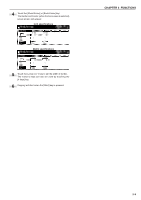
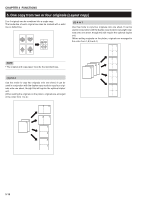
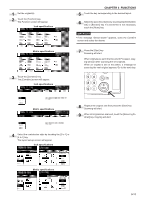
CHAPTER 5 FUNCTIONS 3. Making a margin space for binding [Margin mode] (1) Margin The image of the original is shifted leftward, rightward, upward or downward to make a margin for binding on the left side of the copy paper. (Inch specifications) A B • The margin width can be set to 0", 1/8", 1/4", 3/8", 1/2", 5/8" or 3/4". B A (Metric specifications) • The margin width can be set between 0 mm and 18 mm in in- crements of 1 mm. 1 Set the original(s). IMPORTANT • Be sure to set the originals so that the top (left) side of the original is at the rear side. Setting them in the wrong direction may cause the failure of making margin in the correct position. 2 Touch the [Function] key. The Function screen will appear. Inch specifications Metric specifications NOTE • The initial value of the left margin width can be set. (See "Default margin width" on page 6-32.) • For example, when left margin is specified while duplex copy setting has been set, the same right margin width as the front side is automatically set to the back side if the back page margin is set to "Auto". 3 Touch the [Margin] key. The "Margin" screen will appear. Inch specifications (2) Front & back margin When making two-sided copies, the margin positions and margin width can be selected separately for the front and back sides of the copies. (Inch specifications) • The margin width can be set to 0, 1/8", 1/4", 3/8", 1/2", 5/8" or 3/4". (Metric specifications) • The margin width can be set to 0 mm or between 1 mm and 18 mm in increments of 1 mm. Metric specifications 5-6
-
 1
1 -
2
-
3
-
4
-
5
-
6
-
7
-
8
-
9
-
10
-
11
-
12
-
13
-
14
-
15
-
16
-
17
-
18
-
19
-
20
-
21
-
22
-
23
-
24
-
25
-
26
-
27
-
28
-
29
-
30
-
31
-
32
-
 33
33 -
 34
34 -
 35
35 -
 36
36 -
 37
37 -
 38
38 -
 39
39 -
 40
40 -
 41
41 -
 42
42 -
 43
43 -
44
-
45
-
46
-
47
-
48
-
49
-
50
-
51
-
52
-
53
-
54
-
55
-
56
-
57
-
58
-
59
-
60
-
61
-
62
-
63
-
64
-
65
-
66
-
67
-
68
-
69
-
70
-
71
-
72
-
73
-
74
-
75
-
76
-
77
-
78
-
79
-
80
-
81
-
82
-
83
-
84
-
85
-
86
-
87
-
88
-
89
-
90
-
91
-
92
-
93
-
94
-
95
-
96
-
97
-
98
-
99
-
100
-
101
-
102
-
103
-
104
-
105
-
106
-
107
-
108
-
109
-
110
-
111
-
112
-
113
-
114
-
115
-
116
-
117
-
118
-
119
-
120
-
121
-
122
-
123
-
124
-
125
-
126
-
127
-
128
-
129
-
130
-
131
-
132
-
133
-
134
-
135
-
136
-
137
-
138
-
139
-
140
-
141
-
142
-
143
-
144
-
145
-
146
 |
 |