Kyocera KM-3530 Fax System (F) Operation Guide Rev1
Kyocera KM-3530 Manual
 |
View all Kyocera KM-3530 manuals
Add to My Manuals
Save this manual to your list of manuals |
Kyocera KM-3530 manual content summary:
- Kyocera KM-3530 | Fax System (F) Operation Guide Rev1 - Page 1
FAX System (F) Operation Guide ALWAYS read this Operation Guide thoroughly before use. After reading, maintain it in good condition and keep it together with the Operation Guide for your copier. - Kyocera KM-3530 | Fax System (F) Operation Guide Rev1 - Page 2
types of machine in the section herein titled Names of Parts. However, in the main text of this handbook, when the difference in a name or message is only one of upper- and lowercase spelling, we have listed the information as it specifically pertains to the inch version of this machine. When there - Kyocera KM-3530 | Fax System (F) Operation Guide Rev1 - Page 3
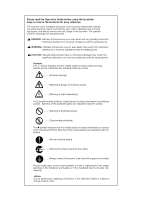
Guide before using the facsimile. Keep it close to the facsimile for easy reference. The sections of this handbook and parts of the facsimile marked with symbols are safety warnings meant to protect the user a ground connection] Please contact your service representative to order a replacement if the - Kyocera KM-3530 | Fax System (F) Operation Guide Rev1 - Page 4
Guide for your copier as well. Section 1 Basic Use of this Fax This section contains explanations on the names of parts and their functions, as well as basic instructions on fax 3 Troubleshooting This section contains explanations on handling problems that may occur during operation of this fax. - Kyocera KM-3530 | Fax System (F) Operation Guide Rev1 - Page 5
the Network FAX functions available when the optional Printer/Scanner Kit is installed on this fax machine. Be sure to read the On-Line Manual on the included CD-ROM as well. Section 9 Reference Information This section contains information on the specifications for this fax machine, a flowchart - Kyocera KM-3530 | Fax System (F) Operation Guide Rev1 - Page 6
Fax Operation (Basic Use 1-1 Names of Parts 1-1 (1) Main Body Parts and their Functions 1-1 (2) Operation Panel Parts and their Functions 1-2 (3) Basic fax screen on the touch 2-12 Manual Fax Transmission 2-14 Manual Fax Reception 2-15 Section 3 Troubleshooting 3-1 When the Fax Data Indicator - Kyocera KM-3530 | Fax System (F) Operation Guide Rev1 - Page 7
computer 8-3 Initial settings on the fax machine 8-3 (1) Network FAX Reception Setting 8-3 (2) Setting for Saving the Documents for Transmission 8-4 (3) File Type Setting 8-4 Network FAX Registration 8-5 Printing Out a Network FAX Settings List 8-7 Section 5 Managing Information About Your - Kyocera KM-3530 | Fax System (F) Operation Guide Rev1 - Page 8
Guide for your copier for information regarding the sections listed at right. Caution Labels INSTALLATION PRECAUTIONS PRECAUTIONS FOR USE How to load paper Replacing the toner cartridge and waste toner tank When paper misfeeds Troubleshooting Cleaning the copier company optional services that - Kyocera KM-3530 | Fax System (F) Operation Guide Rev1 - Page 9
facsimile. Refer to the Operation Guide for your copier for information on other parts of this machine. Main Body + Duplex Document Processor attached 1 Operation panel...Use the operation panel to perform the procedures required for fax communication. 2 Fax storage section...Received documents are - Kyocera KM-3530 | Fax System (F) Operation Guide Rev1 - Page 10
is used as a facsimile. Refer to the Operation Guide for your copier for information on the keys and indicators that are utilized when this machine is used as a copier. 1 Touch panel...Indicates operation procedures as well as trouble with the machine. Keys related to operational procedures which - Kyocera KM-3530 | Fax System (F) Operation Guide Rev1 - Page 11
fax screen on the touch panel The initial screen that appears in the touch panel when you press the Fax key in any other mode in order to change to the Fax Operation mode is called the "basic fax screen screen where you can select the desired reception mode by touching the "Auto RX", "Manual - Kyocera KM-3530 | Fax System (F) Operation Guide Rev1 - Page 12
is in the initial mode for fax operation. (Refer to "(2) Initial Mode" on page 1-7.) * If you want to cancel the procedure part way through, press the Reset key. The touch panel will return to the basic copy screen. 1 Press the Default key. The Default Setting screen will appear. (Inch) (Metric - Kyocera KM-3530 | Fax System (F) Operation Guide Rev1 - Page 13
panel is in the initial mode for fax operation. (Refer to "(2) Initial Mode" on page 1-7.) * If you want to cancel the procedure part way through, press the Reset key. (Metric) 1 Touch the "Register" ["Registration"] key. The Registration Select screen will appear. (Inch) 4 If you want your TTI - Kyocera KM-3530 | Fax System (F) Operation Guide Rev1 - Page 14
. The message display will return to the same screen as was displayed in step 2. 8 Touch the "Confirm" key. The message display will return to the same screen as was displayed in step 2. 9 If you are finished making settings, press the Reset key. 5 G Registering your station name Enter the desired - Kyocera KM-3530 | Fax System (F) Operation Guide Rev1 - Page 15
The message display will return to the same screen as was displayed in step 2. 6 If you are finished making settings, press the Reset key. (2) Initial Mode The initial screen that appears in the touch panel when you press the Fax key and change to the Fax Operation mode, or that normally appears in - Kyocera KM-3530 | Fax System (F) Operation Guide Rev1 - Page 16
ON/OFF" on page 6-1.) (Inch) (Metric) (3) When You Press the Reset Key... When you want to cancel a procedure part way through, simply press the Reset key. The touch panel will automatically return to the initial mode for fax operation. * If, however, documents have already been set when you press - Kyocera KM-3530 | Fax System (F) Operation Guide Rev1 - Page 17
., will be received by this fax and saved via the Printer/Scanner Kit into a designated folder on the network's server computer (the computer on which the included Scanner File Utility is installed). In this case, the received document will be saved as a PDF or a TIFF file. * Once the Auto Shut-Off - Kyocera KM-3530 | Fax System (F) Operation Guide Rev1 - Page 18
Report, or an Activity Report, AFTER a communication ! During manual print out of a Report or List @ During procedures for fax-related settings or registration # During use of both the Scanning and Printing sections when the machine is used as a copier $ During use of the Printing section when the - Kyocera KM-3530 | Fax System (F) Operation Guide Rev1 - Page 19
use the message display but are not included in the initial procedures listed in the table above, the procedure will work just like this made in the Fax Operation mode will be deleted once the machine is switched to the Copy Operation mode. 5 : It is possible to add fax default settings, but - Kyocera KM-3530 | Fax System (F) Operation Guide Rev1 - Page 20
Code Based Communication, the other party's fax must have F-Code Based capabilities specific to the communication you are attempting. in the Document Processor or on the platen, this function will automatically rotate the scanned data 90˚ counter-clockwise and transmitted them as 8 1/2" x 11" [A4 - Kyocera KM-3530 | Fax System (F) Operation Guide Rev1 - Page 21
restored to the fax within that time restored to the fax. * The actual Fax Priority key. The copy operation will continue after the fax documents are printed out. (16) Abbreviated numbers 600 speed-dial keys are available and each of these keys can be designated to function as either a one-touch - Kyocera KM-3530 | Fax System (F) Operation Guide Rev1 - Page 22
display to make sure that the touch panel is in the initial mode for fax operation (the basic fax screen is displayed). If the touch panel is not in the initial mode, press the Reset key. (Inch) (Metric) 2 Check the transmission mode Make sure that the fax machine is in the desired transmission - Kyocera KM-3530 | Fax System (F) Operation Guide Rev1 - Page 23
guide when transmitting documents of a large size such as 8 1/2" x 14" [B4] or 11" x 17" [A3]. 3 Set the documents face-up on the document table. * If the documents are set properly, the document set indicator will be lit green. 2 Set the documents face-up on the document table. Section 1 Fax - Kyocera KM-3530 | Fax System (F) Operation Guide Rev1 - Page 24
. * If a mistake is made at any point in entering the fax number, touch the "r" or "R" cursor key to move the cursor to the desired among the 5 available settings. * The default setting is for Normal resolution. 1 If you want to change the resolution, touch the "Orig image quality" ["Quality Original - Kyocera KM-3530 | Fax System (F) Operation Guide Rev1 - Page 25
) Saving a document for transmission When the optional Printer/Scanner Kit is installed... Perform the following procedure in order to save a document for transmission on the administrator's network computer. The document can be saved as a PDF file or a TIFF file. * In order to save a document for - Kyocera KM-3530 | Fax System (F) Operation Guide Rev1 - Page 26
Processor, it is necessary to indicate the document size manually. (Refer to page 1-17.) * In addition, any touching the "Stop"key in the confirmation screen that was accessed above. * Touch the "Close" key to return to the previous screen. > Once there are no further pages to be scanned... 1 Touch - Kyocera KM-3530 | Fax System (F) Operation Guide Rev1 - Page 27
region of use) ways to receive a fax. • Automatic Fax Reception • Manual Fax Reception • Auto FAX/TEL Switching • TAD Reception • D.R.D. Reception Checking the reception mode Make sure that "Auto RX" is displayed. (Inch) G Changing the reception mode Touch the reception mode select key when you - Kyocera KM-3530 | Fax System (F) Operation Guide Rev1 - Page 28
will begin automatically after the amount of time equal to a designated number of rings. * Once fax reception begins, the "Status" ["Act status"] key will appear in the bottom right of the touch panel. (Inch) G Making copies during a reception It is possible to make copies even during a reception - Kyocera KM-3530 | Fax System (F) Operation Guide Rev1 - Page 29
differ depending on whether that communication is a fax transmission or a fax reception, and whether that transmission was initiated display to confirm the cancel appears, touch the "Yes" key. The document that is currently being scanned will be ejected and the touch panel will return to the initial - Kyocera KM-3530 | Fax System (F) Operation Guide Rev1 - Page 30
"Stop" key or press the Stop/Clear key. The touch panel will return to the initial mode settings. * If you attempt to cancel a reception that is scheduled from multiple transmitting faxes (such as a Polling Reception) and there were fax machines still remaining to be received from, a message will - Kyocera KM-3530 | Fax System (F) Operation Guide Rev1 - Page 31
this key when you want to delete the character to the left of the cursor. "Back" key: Touch this key when you want to return to the screen prior to character input. "End" key: Touch this key when you want to register the entered information. Numbers & Special characters input Metric version The - Kyocera KM-3530 | Fax System (F) Operation Guide Rev1 - Page 32
Section 1 Fax Operation (Basic Use) (2) Procedure Inch Version [Ex.] To enter "Km@4" 1 Verify that the "Capital" key is highlighted and touch the "K" key. Metric Version [Ex.] To enter "Km-4" 1 Touch the "q Shift" key to switch from lowercase input to uppercase input. 2 Touch the "Letter" key to - Kyocera KM-3530 | Fax System (F) Operation Guide Rev1 - Page 33
operation, check the message display to make sure that the touch panel is in the initial mode for fax operation. (Refer to "(2) Initial Mode" on page 1-7.) * If you want to cancel the procedure part way through, press the Reset key. The touch panel will return to the initial mode settings. (Metric - Kyocera KM-3530 | Fax System (F) Operation Guide Rev1 - Page 34
directly to step 15. If you want to register this one-touch key with the entered information as is, touch the "Close" key and proceed directly to step 20. 12 To use this key for F-Code Based Communication, touch the "On" key. The Subaddress/Password Input screen will appear. (Inch) (Metric) 1-26 - Kyocera KM-3530 | Fax System (F) Operation Guide Rev1 - Page 35
password here if you have determined in advance with the other party not to use one. Section 1 Fax Operation (Basic Use) 18 Touch the finished registering one-touch keys, press the Reset key. 16 To use this key for Encrypted Transmission, touch the "On" key. The Key Code/Box Number Input screen - Kyocera KM-3530 | Fax System (F) Operation Guide Rev1 - Page 36
Section 1 Fax Operation (Basic Use) (2) Modifying and Deleting * If the one-touch key that you want to screen as was displayed in step 3. If you want to continue deleting other one-touch keys, repeat steps 3 through 5. If you are finished deleting one-touch keys, press the Reset key. 2 Touch - Kyocera KM-3530 | Fax System (F) Operation Guide Rev1 - Page 37
you are finished changing transmission conditions, touch the "One touch destinat." key. 1 Touch the "Print Report" key. The Report Select screen will appear. (Inch) (Metric) 5 Touch the one-touch key under which the desired fax number is registered. 2 Touch the "One-touch key list" key. (Inch - Kyocera KM-3530 | Fax System (F) Operation Guide Rev1 - Page 38
touch panel is in the initial mode for fax operation. (Refer to "(2) Initial Mode" on page 1-7.) * If you want to cancel the procedure part way through, press the Reset key. The touch "-" keys. 7 Touch the "Close" key. The touch panel will return to the basic fax screen and the corresponding speed - Kyocera KM-3530 | Fax System (F) Operation Guide Rev1 - Page 39
Once you are finished changing transmission conditions, touch the "Address touch panel is in the initial mode for fax operation. (Refer to "(2) Initial Mode" on page 1-7.) * If you want to cancel the procedure part way through, press the Reset key. 1 Set the documents you want to transmit. 5 Touch - Kyocera KM-3530 | Fax System (F) Operation Guide Rev1 - Page 40
panel is in the initial mode for fax operation. (Refer to "(2) Initial Mode" on page 1-7.) * If you want to cancel the procedure part way through, press the Reset key. 1 Touch the "Print Report" key. The Report Select screen will appear. (Inch) 8 Touch the speed-dial key under which the desired - Kyocera KM-3530 | Fax System (F) Operation Guide Rev1 - Page 41
Use) 3 (2) Manual Redialing What if you try to transmit documents but the other party's fax line is busy and can't answer your call? In this type of situation, you will be able to redial that last number dialed once again by simply touching the "Re-dial" key. Touch the "Re-dial" key. The fax will - Kyocera KM-3530 | Fax System (F) Operation Guide Rev1 - Page 42
with each of the other various types of fax communication available in this fax. The following method explains the procedure for sending Size for Scanning from the Document Processor" on page 6-4.) * If you want to cancel the procedure part way through, press the Reset key. The touch panel will - Kyocera KM-3530 | Fax System (F) Operation Guide Rev1 - Page 43
rest of the 2-sided documents, select "Yes". In this case, the fax will transmit the documents WITHOUT scanning the back side of the first page. > If you want to transmit the 2-sided documents WITHOUT a cover page, select "No". 9. Touch the "Close" key. 10. Press the Start key. The documents will - Kyocera KM-3530 | Fax System (F) Operation Guide Rev1 - Page 44
fax communication available in this fax such as Broadcast Transmission as a Standby Transmission. * If you want to cancel the procedure part way through, press the Reset key. The touch , touch the "Yes" key. 3. Press the Start key. The documents will be scanned into memory. * If the fax is - Kyocera KM-3530 | Fax System (F) Operation Guide Rev1 - Page 45
, documents will be transmitted using the Memory Transmission mode even if the fax is currently in the Direct Feed Transmission mode. * If you want to cancel the procedure part way through, press the Reset key. The touch panel will return to the initial mode settings. 1. Set the documents you - Kyocera KM-3530 | Fax System (F) Operation Guide Rev1 - Page 46
transmission in the Direct Feed Transmission mode..." on page 2-3. * If you want to cancel the procedure part way through, press the Reset key. The touch panel will return to the initial mode settings. 11. Touch the "Memory TX" key until it changes to "Dir. Feed Tx". 3. Enter the destination - Kyocera KM-3530 | Fax System (F) Operation Guide Rev1 - Page 47
each page is scanned, to select whether or not you want to transmit more pages and to select the size of each page. (Refer to page 1-18.) 3. Touch the "Delayed TX" key. 4. Touch the "On" key and the Time Entry screen will appear. (Inch) (Metric) 2. Enter the destination fax number. * You can - Kyocera KM-3530 | Fax System (F) Operation Guide Rev1 - Page 48
to enter the initial portion of the other party's fax number. Example: If the number "0123" is part way through, press the Reset key. The touch panel will return to the initial mode settings. 1. Touch the "Register" ["Registration"] key. The Registration Select screen will appear. (Inch) 3. Touch - Kyocera KM-3530 | Fax System (F) Operation Guide Rev1 - Page 49
OK" key. The message display will return to the same screen as was displayed in step 3. If you want to continue registering other one-touch keys, repeat steps 3 through 9. (Inch) (Metric) 10. Once you are finished registering chain dial keys, press the Reset key. 2-8 4. If you want to delete the - Kyocera KM-3530 | Fax System (F) Operation Guide Rev1 - Page 50
you want, touch the "OK" key. The message display will return to the same screen as was displayed in step 3. If you want to continue modifying other chain dial keys, repeat steps 3 through 9. If you are finished deleting chain dial keys, press the Reset key. 3. Enter the other party's fax number - Kyocera KM-3530 | Fax System (F) Operation Guide Rev1 - Page 51
will be carried out on schedule. * If you want to cancel the procedure part way through, press the Reset key. The touch panel will return to the initial mode settings. 1. Touch the "Application" key. The Application screen will appear. (Inch) (2) Force-Starting the Communication You can force-start - Kyocera KM-3530 | Fax System (F) Operation Guide Rev1 - Page 52
want to cancel the procedure part way through, press the Reset key. The touch panel will return to the initial mode settings. Section 2 Fax Operation (Various Functions) 4. Touch the "Delete" key. (Inch) 1. Touch the "Application" key. The Application screen will appear. (Inch) (Metric) (Metric - Kyocera KM-3530 | Fax System (F) Operation Guide Rev1 - Page 53
a scheduled Polling Communication, a scheduled transmission using the optional Network FAX functions, a scheduled Broadcast Transmission, or an F-code Transmission. * If you want to cancel the procedure part way through, press the Reset key. The touch panel will return to the initial mode settings - Kyocera KM-3530 | Fax System (F) Operation Guide Rev1 - Page 54
you can continue to delete, add or change other fax numbers. If you are finished with this procedure, touch the "Close" key and go to the next step. 12. Touch the "Finish dest. Set" ["Dest. set"] key. The message display will return to the same screen as was displayed in step 8 and you can continue - Kyocera KM-3530 | Fax System (F) Operation Guide Rev1 - Page 55
reception. * Speaking to the other party and/or performing Manual Fax Transmission is only possible if a separately purchased telephone is connected to this fax machine. * If you want to cancel the procedure part way through, touch the "Onhook" key or hang up the receiver. 1. Set the documents you - Kyocera KM-3530 | Fax System (F) Operation Guide Rev1 - Page 56
to this fax machine. * Auto Fax Reception is the default setting in this fax, so, in order to manually initiate reception, it is usually necessary to change the reception mode to Manual Fax Reception. G Preparation * Make sure that "Manual RX" is displayed. If it is not, touch the reception - Kyocera KM-3530 | Fax System (F) Operation Guide Rev1 - Page 57
up to 60 minutes (8 MB of optional memory must be installed) even if, for any reason, power to the fax is disconnected or lost. If an Error Occurs... In the event of trouble, an explanation in regard to the error will appear in the message display. Refer to "When One of These - Kyocera KM-3530 | Fax System (F) Operation Guide Rev1 - Page 58
that drawer. If a specific size is indicated as well in the message display, load paper of that particular size. "Add toner" There is insufficient toner left in the toner cartridge. Refer to the Operation Guide for your copier and replace the toner cartridge, and the waste toner tank as well, as - Kyocera KM-3530 | Fax System (F) Operation Guide Rev1 - Page 59
"Call for Service" Procedure Section 3 Troubleshooting Page Maintenance by qualified service personnel is required. Contact your service representative, an authorized service center or the place of purchase. If "C" and a 4-digit _ number are displayed as well, inform the service personnel of - Kyocera KM-3530 | Fax System (F) Operation Guide Rev1 - Page 60
Section 3 Troubleshooting Troubleshooting Tables If you experience trouble with your fax machine, refer to the tables below for the appropriate corrective procedures. If the trouble persists, contact your service representative, an authorized service center or the place of purchase. Problem Check - Kyocera KM-3530 | Fax System (F) Operation Guide Rev1 - Page 61
by simply pushing the appropriate buttons. Refer to the Instruction _ Manual for the telephone being used. Did you use the correct Remote Switching Check the registered number. (Factory 4-4 number? default setting: 55) I was able to receive a fax, but it was not printed out and the documents - Kyocera KM-3530 | Fax System (F) Operation Guide Rev1 - Page 62
Troubleshooting Problem Check point Corrective procedure I am not able to perform Polling Reception. Did the transmitting party perform the Check with the transmitting party. Polling Transmission procedure correctly? Reference page _ I am not able to perform F-Code If the relay station fax - Kyocera KM-3530 | Fax System (F) Operation Guide Rev1 - Page 63
Troubleshooting Problem Check point Corrective procedure Reference page I am not able to print out documents from my F-Code Confidential Box. Are the subaddress and the F-Code password as your machine, F-Code Based Bulletin Board _ fax machine? Reception will NOT be possible. Check with - Kyocera KM-3530 | Fax System (F) Operation Guide Rev1 - Page 64
Preparation * Refer to "Selecting the Automatic Reception Mode" on page 6-5, and select "Auto Fax/Tel. SW". * Make sure that "Auto RX" is displayed on the basic fax screen. If it is not, touch the reception mode select key and then touch the "Auto RX" key. > If the call is from a telephone... 1 The - Kyocera KM-3530 | Fax System (F) Operation Guide Rev1 - Page 65
with answering machine capabilities is connected to this fax machine. * Refer to the Instruction Manual for the telephone in use for details on Machine" is displayed on the basic fax screen. If it is not, touch the reception mode select key and then touch the "Answering Machine" key. 1. The - Kyocera KM-3530 | Fax System (F) Operation Guide Rev1 - Page 66
for further information on the Distinctive Ring Pattern service available. G Preparation * Refer to "Selecting the Automatic Reception Mode" on page 6-5, and select "D.R.D.". * Make sure that "Auto RX" is displayed on the basic fax screen. If it is not, touch the reception mode select key and then - Kyocera KM-3530 | Fax System (F) Operation Guide Rev1 - Page 67
is connected to this fax machine. (1) Changing the Remote Switching Number The factory default setting for the Remote Switching Number is "55", but you can change this if you want. * If you want to cancel the procedure part way through, press the Reset key. The touch panel will return to - Kyocera KM-3530 | Fax System (F) Operation Guide Rev1 - Page 68
telephone will ring. Section 4 Other Features of this Fax 3 1 2. Pick up the telephone receiver. 4 2 3. If you hear a fax tone, use the tone signal capabilities of the telephone to enter the 2-digit Remote Switching Number. * The factory default setting for the Remote Switching Number is "55 - Kyocera KM-3530 | Fax System (F) Operation Guide Rev1 - Page 69
number of receiving parties. (Refer to "Turning the Bulletin Board ON/OFF" on page 6-2.) * If you want to cancel the procedure part way through, press the Reset key. The touch panel will return to the initial mode settings. 1. Set the documents you want to transmit. * When the documents are set on - Kyocera KM-3530 | Fax System (F) Operation Guide Rev1 - Page 70
the procedure part way through, press the Reset key. The touch panel will return to the initial mode settings. 9. Press the Start key. The documents will be scanned and stored in memory where they will awaiting the polling request. 1. Touch the "Application" key. The Application screen will appear - Kyocera KM-3530 | Fax System (F) Operation Guide Rev1 - Page 71
Section 4 Other Features of this Fax 3. Enter the fax number of the transmitting party. * You can enter the fax number using the keypad, abbreviated numbers, one-touch keys, group dial keys or the address book. Chain dial keys can be used as well. 4. If you want to designate a time for the reception - Kyocera KM-3530 | Fax System (F) Operation Guide Rev1 - Page 72
Based capabilities specific to the communication you are attempting. * F-Code Based Communication can be used in combination with the other various types of fax communication available in this fax. In addition, if you register, in advance, the appropriate subaddress and F-Code password under a speed - Kyocera KM-3530 | Fax System (F) Operation Guide Rev1 - Page 73
will not be necessary to enter a password when you print out documents from that F-Code Confidential Box. 7. If the optional Printer/Scanner Kit is installed and you want to use the NW-FAX Reception function, touch the "On" key. If the optional Printer/ Scanner Kit is not installed, go to the next - Kyocera KM-3530 | Fax System (F) Operation Guide Rev1 - Page 74
F-Code Confidential Boxes" on page 4-10.) 3. Enter the F-Code password (4-digits) for that F-Code Confidential Box. 8. Touch the "Confirm" key. The message display will return to the same screen as was displayed in setp 2. If you are finished F-Code Confidential Boxes, press the Reset key. 4-11 - Kyocera KM-3530 | Fax System (F) Operation Guide Rev1 - Page 75
this fax, called the "F-Code Confidential Box") in the receiving party's fax and enter that, AND the related F-Code password, Touch the "Subadd." key. * If you want to cancel the procedure part way through, press the Reset key. The touch panel will return to the initial mode settings. 4. Touch - Kyocera KM-3530 | Fax System (F) Operation Guide Rev1 - Page 76
in order to designate the box in the destination party's fax. It can be up to 20 digits in length and part way through, press the Reset key. The touch panel will return to the initial mode settings. 7. If necessary, use the keypad to enter the predetermined F-Code password. * The password - Kyocera KM-3530 | Fax System (F) Operation Guide Rev1 - Page 77
registered in this fax, an F-Code Confidential Box List will not be printed out. * If you want to cancel the procedure part way through, press the Reset key. The touch panel will return to the initial mode settings. 1. Touch the "Print Report" key. The Report Selection screen will appear. (Inch - Kyocera KM-3530 | Fax System (F) Operation Guide Rev1 - Page 78
screen will appear. (Inch) (Metric) 3. Touch the "Scan orig. to box" key. (Inch) (Metric) Section 4 Other Features of this Fax (7) F-Code Based Bulletin Board Reception F-Code Based Bulletin Board Communication involves fax in this fax) and password (called the F-Code password in this fax) for that - Kyocera KM-3530 | Fax System (F) Operation Guide Rev1 - Page 79
password is not required if you agree in advance with the destination party not to use one. 9. Touch the "Close" key. The message display will return to the same screen keypad to enter the fax number of the transmitting party. * You can also enter the fax number using one-touch keys that have been - Kyocera KM-3530 | Fax System (F) Operation Guide Rev1 - Page 80
List. (Refer to "(4) Printing Out an F-Code Relay Box List in this fax machine. Code password that part way through, press the Reset key. The touch panel will return to the initial mode settings. 1. Touch the "Register" ["Registration"] key. The Registration Select screen will appear. (Inch) 4. Touch - Kyocera KM-3530 | Fax System (F) Operation Guide Rev1 - Page 81
delete an F-Code Relay Box, it is necessary to enter the corresponding F-Code password during the procedure. * If you want to cancel the procedure part way through, press the Reset key. The touch panel will return to the initial mode settings. 1. Perform steps 1 through 3 of "(1) Registering - Kyocera KM-3530 | Fax System (F) Operation Guide Rev1 - Page 82
F-Code Relay Boxes" on page 4-17.) 8. Touch the "Confirm" key. The message display will return to the same screen as was displayed in setp 2. If you are finished F-Code Relay Boxes, press the Reset key. Section 4 Other Features of this Fax G In the initial transmitting station... As - Kyocera KM-3530 | Fax System (F) Operation Guide Rev1 - Page 83
Relay Boxes registered in this fax, an F-Code Relay Box List will not be printed out. * If you want to cancel the procedure part way through, press the Reset key. The touch panel will return to the initial mode settings. 1. Touch the "Print Report" key. The Report Selection screen will appear. (Inch - Kyocera KM-3530 | Fax System (F) Operation Guide Rev1 - Page 84
* If you want to cancel the procedure part way through, press the Reset key. The touch panel will return to the initial mode settings. 4. Touch the "Finish dest. Set" ["Dest. set"] key. (Inch) 1. Touch the "Register" ["Registration"] key. The Registration Select screen will appear. (Inch) (Metric - Kyocera KM-3530 | Fax System (F) Operation Guide Rev1 - Page 85
want to cancel the procedure part way through, press the Reset key. The touch panel will return to the initial mode settings. (Metric) 1. Touch the "Register" ["Registration"] key. The Registration Select screen will appear. (Inch) 2. Touch the "Fax default" key. 3. Touch the "M" cursor key until - Kyocera KM-3530 | Fax System (F) Operation Guide Rev1 - Page 86
search for the related fax numbers. * If you want to cancel the procedure part way through, press the Reset key. The touch panel will return to the initial mode settings. 1. Touch the "Register" ["Registration"] key. The Registration Select screen will appear. (Inch) 3. Touch an unregistered speed - Kyocera KM-3530 | Fax System (F) Operation Guide Rev1 - Page 87
Features of this Fax 9. Touch the "OK" key. The message display will return to the same screen as was displayed in step 3. If you want to continue registering other group dial keys, repeat steps 3 through 9. If you are finished registering group dial keys, press the Reset key. (2) Modifying and - Kyocera KM-3530 | Fax System (F) Operation Guide Rev1 - Page 88
dial keys registered in this fax, a Group Dial List will not be printed out. * If you want to cancel the procedure part way through, press the Reset key. The touch panel will return to the initial mode settings. 1. Touch the "Print Report" key. The Report Select screen will appear. (Inch) 2. If - Kyocera KM-3530 | Fax System (F) Operation Guide Rev1 - Page 89
. * If you want to cancel the procedure part way through, press the Reset key. The touch panel will return to the initial mode settings. 1. Touch the "Register" ["Registration"] key. The Registration Select screen will appear. (Inch) (Metric) 4. Touch the "Program" key. (Inch) (Metric) 5. If you - Kyocera KM-3530 | Fax System (F) Operation Guide Rev1 - Page 90
same screen as was displayed in step 3. If you want to continue registering other program keys, repeat steps 3 through 13. If you are finished registering program keys, press the Reset key. Section 4 Other Features of this Fax 4. If you want to delete the registered program key, touch the "Delete - Kyocera KM-3530 | Fax System (F) Operation Guide Rev1 - Page 91
the content of program keys currently registered in this fax. * If there are no program keys registered in this fax, a Program Dial List will not be printed out. * If you want to cancel the procedure part way through, press the Reset key. The touch panel will return to the initial mode settings - Kyocera KM-3530 | Fax System (F) Operation Guide Rev1 - Page 92
Touch the "Password check" key. 3. Touch the "Permit Tel No." ["Permit tel. nr."] key. (Inch) (1) Registering Permit Telephone Numbers * You can register up to 5 numbers as Permit Telephone Numbers in this fax. * If you want to cancel the procedure part way through, press the Reset key. The touch - Kyocera KM-3530 | Fax System (F) Operation Guide Rev1 - Page 93
register up to 5 numbers as Permit IDs in this fax. * If you want to cancel the procedure part way through, press the Reset key. The touch panel will return to the initial mode settings. 1. Touch the "Register" ["Registration"] key. The Registration Select screen will appear. (Inch) (Metric) 4-30 - Kyocera KM-3530 | Fax System (F) Operation Guide Rev1 - Page 94
want to cancel the procedure part way through, press the Reset key. The touch panel will return to the initial mode settings. (Metric) 6. Touch the "Confirm" key. The message display will return to the same screen as was displayed in step 2. Once you are finished modifying and/or deleting Permit - Kyocera KM-3530 | Fax System (F) Operation Guide Rev1 - Page 95
message display will return to the same screen as was displayed in step 3. If you are finished making settings, press the Reset key. (Metric) 2. Touch the "Fax default" key. 3. Touch the "M" cursor key until "Password Check Comm." is highlighted. 4. Touch the "Change #" key. (Inch) (Metric) 4-32 - Kyocera KM-3530 | Fax System (F) Operation Guide Rev1 - Page 96
this Fax * To accomplish Encrypted Communication, the other party's fax machine password before you can register Encryption Keys. * You can also modify a registered Encryption Key by following the procedure below. * If you want to cancel the procedure part way through, press the Reset key. The touch - Kyocera KM-3530 | Fax System (F) Operation Guide Rev1 - Page 97
Encryption Box in the receiving party's fax, it is not necessary that the part way through, press the Reset key. The touch panel will return to the initial mode settings. 6. Touch the "OK" key. The message display will return to the same screen as was displayed in step 2. Once you are finished - Kyocera KM-3530 | Fax System (F) Operation Guide Rev1 - Page 98
part way through, press the Reset key. The touch FAX Reception function, make sure that the "On" key is highlighted. If the optional Printer/Scanner Kit is not installed, go to the next step. (Inch) (Metric) (Metric) 10. Touch the "Confirm" key. The message display will return to the same screen - Kyocera KM-3530 | Fax System (F) Operation Guide Rev1 - Page 99
display will return to the same screen as was displayed in step 2. Once you are finished modifying and/or deleting Encryption Boxes, press the Reset key. (5) Required Operation (Transmitting party) Encrypted Transmission is accomplished by dialing with a one-touch key that has been designated in - Kyocera KM-3530 | Fax System (F) Operation Guide Rev1 - Page 100
touch key is no longer registered in this fax, an error will occur and the transmission will not be completed. Section 4 Other Features of this Fax procedure part way through, press the Reset key. The touch panel will the Encryption Box has been registered for manual print out of the documents, go - Kyocera KM-3530 | Fax System (F) Operation Guide Rev1 - Page 101
Fax the procedure part way through, press the Reset key. The touch panel will return Touch the "Application" key. The Application screen will appear. (Inch) 5. Touch the "Confirm" key. The documents that are in that Encryption Box will be printed out. (Metric) > If the Box ID is "0000"... 6. Touch - Kyocera KM-3530 | Fax System (F) Operation Guide Rev1 - Page 102
the procedure part way through, press the Reset key. The touch panel will return to the initial mode settings. 1. Touch the "Print Report" key. The Report Selection screen will appear. (Inch) Section 4 Other Features of this Fax (9) Printing Out an Encryption Box List Print out this list in order - Kyocera KM-3530 | Fax System (F) Operation Guide Rev1 - Page 103
Manual transmission/reception when dialing is initiated from this fax registered self-station name will be displayed as part of the TTI, but, if Restricted Access is fax be the one to register that password. * The factory default management password is "6482". 1 You must enter the management password - Kyocera KM-3530 | Fax System (F) Operation Guide Rev1 - Page 104
digits). * The factory default management password is "6482". * If you want to change the entered number, use the "r" and/or "R" keys to move the cursor to the desired location. (Inch) (Metric) * If you want to cancel the procedure part way through, press the Reset key. The touch panel will return - Kyocera KM-3530 | Fax System (F) Operation Guide Rev1 - Page 105
key. The message display will return to the same screen as was displayed in step 5. If you want to continue registering other access codes, repeat steps 5 through 10. If you are finished registering access codes, press the Reset key. (Metric) 5. Touch an unregistered key. * The information will be - Kyocera KM-3530 | Fax System (F) Operation Guide Rev1 - Page 106
or OFF. (Refer to "(2) Changing the Management Password" on page 4-40.) * If you want to cancel the procedure part way through, press the Reset key. The touch panel will return to the initial mode settings. 1. Press the Default key. The Default Setting screen will appear. (Inch) (Metric) 5. Use the - Kyocera KM-3530 | Fax System (F) Operation Guide Rev1 - Page 107
Section 4 Other Features of this Fax 2. Touch the "Print Report" key. The Report Selection screen will appear. > If you entered the management password... (Inch) (Metric) > If you entered your access code... 4. Touch the "Yes" key. A Restricted Access report will be printed out for that department. - Kyocera KM-3530 | Fax System (F) Operation Guide Rev1 - Page 108
List will not be printed out. * If you want to cancel the procedure part way through, press the Reset key. The touch panel will return to the initial mode settings. 1. Use the keypad to enter the currently registered management password (4 digits). (Inch) Section 4 Other Features of this Fax - Kyocera KM-3530 | Fax System (F) Operation Guide Rev1 - Page 109
Network FAX functions will also appear in the Transmission Result Display. * If you want to cancel the procedure part way through, press the Reset key. The touch panel will return to the initial mode settings. 1. Touch the "Application" key. The Application screen will appear. (Inch) 3. Touching - Kyocera KM-3530 | Fax System (F) Operation Guide Rev1 - Page 110
up to 10 of the most recent fax receptions can be checked in the message display. * If you want to cancel the procedure part way through, press the Reset key. The touch panel will return to the initial mode settings. 1. Touch the "Application" key. The Application screen will appear. (Inch) (Metric - Kyocera KM-3530 | Fax System (F) Operation Guide Rev1 - Page 111
will not be printed out. * If you want to cancel the procedure part way through, press the Reset key. The touch panel will return to the initial mode settings. 1. Touch the "Print Report" key. The Report Selection screen will appear. (Inch) 1. Touch the "Print Report" key. The Report Selection - Kyocera KM-3530 | Fax System (F) Operation Guide Rev1 - Page 112
own name, etc.) in this fax. * If you want to cancel the procedure part way through, press the Reset key. The touch panel will return to the initial mode settings. 1. Touch the "Print Report" key. The Report Selection screen will appear. 2. Touch the "User set. list" key. (Inch) (Metric) 3. To print - Kyocera KM-3530 | Fax System (F) Operation Guide Rev1 - Page 113
Default key. The Default Setting screen will appear. (Inch) (Metric) 2. Touch the "Fax default" key. 3. Touch the "M" cursor key until "Print Report" is highlighted. 4. Touch the "Change #" key. (Inch) (Metric) * If you want to cancel the procedure part way through, press the Reset key. The touch - Kyocera KM-3530 | Fax System (F) Operation Guide Rev1 - Page 114
If you want to cancel the procedure part way through, press the Reset key. The touch panel will return to the initial mode settings. 1. Press the Default key. The Default Setting screen will appear. (Inch) (Metric) 2. Touch the "Fax default" key. 3. Touch the "M" cursor key until "Bulletin Board" is - Kyocera KM-3530 | Fax System (F) Operation Guide Rev1 - Page 115
you want to cancel the procedure part way through, press the Reset key. The touch panel will return to the initial mode settings. 1. Press the Default key. The Default Setting screen will appear. (Inch) (Metric) (Metric) 2. Touch the "Fax default" key. 3. Touch the "M" cursor key until "Set Volume - Kyocera KM-3530 | Fax System (F) Operation Guide Rev1 - Page 116
Large", "Medium", "Small" and "Off". (Metric) 8. Touch the "Close" key. If you are finished making settings, press the Reset key. 2. Touch the "Fax default" key. 3. Touch the "M" key until "Scan from DP" ["DP scanning"] is highlighted. 4. Touch the "Change #" key. (Inch) (Metric) 6-4 5. Select - Kyocera KM-3530 | Fax System (F) Operation Guide Rev1 - Page 117
want to cancel the procedure part way through, press the Reset key. The touch panel will return to the initial mode settings. 1. Press the Default key. The Default Setting screen will appear. (Inch) (Metric) (Metric) 2. Touch the "Fax default setting" key. 3. Touch the "M" cursor key until "TX - Kyocera KM-3530 | Fax System (F) Operation Guide Rev1 - Page 118
part way through, press the Reset key. The touch panel will return to the initial mode settings. 8. Touch the "Close" key. If you are finished making settings, press the Reset key. 1. Press the Default key. The Default Setting screen will appear. (Inch) (Metric) 2. Touch the "Fax default - Kyocera KM-3530 | Fax System (F) Operation Guide Rev1 - Page 119
select more than one drawer in this setting. * If you want to cancel the procedure part way through, press the Reset key. The touch panel will return to the initial mode settings. 1. Press the Default key. The Default Setting screen will appear. (Inch) (Metric) 2. Touch the "Fax default" key. 6-7 - Kyocera KM-3530 | Fax System (F) Operation Guide Rev1 - Page 120
the "Close" key. If you are finished making settings, press the Reset key. 2. Touch the "Fax default" key. 3. Touch the "M" key until "Bypass feeding" is highlighted. 4. Touch the "Change #" key. (Inch) (Metric) 6-8 5. Select whether you want to turn the Manual Paper Feed function ON or OFF by - Kyocera KM-3530 | Fax System (F) Operation Guide Rev1 - Page 121
an authorized service center or the place of purchase. * If you want to cancel the procedure part way through, press the Reset key. The touch panel will return to the initial mode settings. 1. Press the Default key. The Default Setting screen will appear. (Metric) (Inch) 2. Touch the "Fax default - Kyocera KM-3530 | Fax System (F) Operation Guide Rev1 - Page 122
with an authorized service center for their Remote Diagnosis service, it is necessary part way through, press the Reset key. The touch panel will return to the initial mode settings. 1. Touch the "Register" ["Registration"] key. The Registration Select screen will appear. (Inch) (Metric) 2. Touch - Kyocera KM-3530 | Fax System (F) Operation Guide Rev1 - Page 123
the Duplex Reception function is turned ON, all pages of a fax reception will be temporarily stored in memory - regardless of the reception mode part way through, press the Reset key. The touch panel will return to the initial mode settings. 1. Press the Default key. (Inch) (Metric) 4. Touch - Kyocera KM-3530 | Fax System (F) Operation Guide Rev1 - Page 124
on the Network FAX functions available when the optional Printer/Scanner Kit is installed on this FAX machine and in Manual Perform the following procedure in order to open the On-Line Manual. 1. Insert the provided Network FAX CD-ROM in the CD-ROM drive of your computer. The Main Menu screen - Kyocera KM-3530 | Fax System (F) Operation Guide Rev1 - Page 125
(Network FAX Reception setting, setting for saving the documents for transmission, file type setting, Network FAX registration) on the FAX machine. See pages 8-3 ~ 8-6. 3 Procedure on the computer PC Install the required software (included in the provided CD- ROM). Refer to the On-Line Manual - Kyocera KM-3530 | Fax System (F) Operation Guide Rev1 - Page 126
to perform Network FAX Reception. The received documents can also be printed with this machine. * If you want to cancel the procedure part way through, press the Reset key. The touch panel will return to the initial mode settings. 1 Press the Default key. The Default Setting screen will appear - Kyocera KM-3530 | Fax System (F) Operation Guide Rev1 - Page 127
the provided Scanner File Utility is installed). The document can be saved as a PDF file or a TIFF file. * If you want to cancel the procedure part way through, press the Reset key. The touch panel will return to the initial mode settings. 1 Press the Default key. The Default Setting screen will - Kyocera KM-3530 | Fax System (F) Operation Guide Rev1 - Page 128
in the Scanner File Utility. * If you want to cancel the procedure part way through, press the Reset key. The touch panel will return to the initial mode settings. 1 Touch the "Register" ["Registration"] key. The Registration Select screen will appear. (Inch) Section 8 Network FAX Settings (Option - Kyocera KM-3530 | Fax System (F) Operation Guide Rev1 - Page 129
number in which documents which have been received using the Network FAX functions will be saved. (Inch) 9 Once you are finished entering the IP address or host name, touch the "End" key. The message display will return to the same screen as was displayed in step 2. G Registering the administrator - Kyocera KM-3530 | Fax System (F) Operation Guide Rev1 - Page 130
to the same screen as was displayed in step 2. 17 Once you are finished registering Network FAX information, press the Reset key. (Metric) 2 Touch the "NW-FAX set. list" key. (Inch) (Metric) 3 To print out a Network FAX Settings List, touch the "Yes" key. A Network FAX Settings List will be - Kyocera KM-3530 | Fax System (F) Operation Guide Rev1 - Page 131
Auxiliary Scanning Line Density Lists Activity Report, Confirmation List, User Setting List, One-Touch Key List, Telephone Directory List, Program Dial List, Group Dial List, Encryption Key List, Restricted Access Report, Department List Options Memory (8 MB), Printer/Scanner Kit * Specifications - Kyocera KM-3530 | Fax System (F) Operation Guide Rev1 - Page 132
alphabet may be available for use. Such characters are dealt with as "special characters" when registering information in this FAX. The following chart lists separately the special characters available for each language. Use this chart as reference when registering destination names, etc. For - Kyocera KM-3530 | Fax System (F) Operation Guide Rev1 - Page 133
(Inch version) If the drawers do not contain paper that is of a size and orientation exactly the same as that of the received documents, the FAX will automatically select the most appropriate paper for print out. The following chart indicates the order of priority for paper selection in such a case - Kyocera KM-3530 | Fax System (F) Operation Guide Rev1 - Page 134
Metric version) If the drawers do not contain paper that is of a size and orientation exactly the same as that of the received documents, the FAX will automatically select the most appropriate paper for print out. The following chart indicates the order of priority for paper selection in such a case - Kyocera KM-3530 | Fax System (F) Operation Guide Rev1 - Page 135
"Print Report") are touched, as well as when the Default key is pressed. Refer to this chart as a reference when operating the FAX. "Register" ["Registration"] Key Speed-Dial Self-Station Information Date and Time Print Out Boxes Password Check Communication FAX Forwarding Remote Switching Remote - Kyocera KM-3530 | Fax System (F) Operation Guide Rev1 - Page 136
Report Confirmation Report User Setting List F-Code Confidential Box List F-Code Relay Box List Encryption Box List One-Touch Key List Group Dial List Program Dial List Telephone Directory List Encryption Key List Network FAX Setting List (Only available when the Printer/Scanner Kit is installed - Kyocera KM-3530 | Fax System (F) Operation Guide Rev1 - Page 137
procedures again. Communication was interrupted due to trouble with the other party's FAX unit. Check with the other party. Unsuccessfully was scheduled, and a number was entered using an abbreviated number or one-touch key, etc., but communication with that party was impossible because that number - Kyocera KM-3530 | Fax System (F) Operation Guide Rev1 - Page 138
was attempted in order to receive documents from the other party's FAX, but was unsuccessful because Password Check Communication was turned ON in the other party's FAX and the necessary password did not match. 2 The transmitting party's FAX is one of our models and an F-Code Based Bulletin Board - Kyocera KM-3530 | Fax System (F) Operation Guide Rev1 - Page 139
in order to receive documents from that party's F-Code Box, but was unsuccessful because the F-Code password that you entered did not match the one registered in the transmitting party's FAX. An F-Code Based Bulletin Board Reception was attempted in order to receive documents from the other party - Kyocera KM-3530 | Fax System (F) Operation Guide Rev1 - Page 140
Communication was attempted but, but was unsuccessful because the other party's FAX does not match the communication protocol in use (the other party the data to be transmitted was not received because the memory in your FAX machine has become full. Check the contents of your machine's memory and, - Kyocera KM-3530 | Fax System (F) Operation Guide Rev1 - Page 141
in order for you to make necessary modifications to maintain uninterrupted service. 7. If trouble is experienced with this equipment, please contact the following company for repair and (or) warranty information: KYOCERA MITA AMERICA, INC. 225 Sand Road, P.O.Box 40008 Fairfield, New Jersey 07004 - Kyocera KM-3530 | Fax System (F) Operation Guide Rev1 - Page 142
. 4. Use only the power cord and batteries indicated in this manual. Do not dispose of batteries in a fire. They may explode. Check with local codes for possible special disposal instructions. SAVE THESE INSTRUCTIONS IMPORTANTES MESURES DE SECURITE Certaines mesures de sécurité doivent être prises - Kyocera KM-3530 | Fax System (F) Operation Guide Rev1 - Page 143
CANADIAN IC REQUIREMENTS "This product meets the applicable Industry Canada technical specifications" "The Ringer Equivalence Number is an indication of the maximum number of devices allowed to be connected to a telephone interface. The termination on an interface - Kyocera KM-3530 | Fax System (F) Operation Guide Rev1 - Page 144
the limits for a Class A digital device, pursuant to Part 15 of the FCC Rules. These limits are designed to instruction manual, may cause harmful interference to radio communications. Operation of this equipment in a residential area is likely to cause harmful interference in which case the user - Kyocera KM-3530 | Fax System (F) Operation Guide Rev1 - Page 145
This machine has passed all quality controls and final inspection. - Kyocera KM-3530 | Fax System (F) Operation Guide Rev1 - Page 146
2002. 8 3DB80020A
-
 1
1 -
 2
2 -
 3
3 -
 4
4 -
 5
5 -
 6
6 -
 7
7 -
8
-
9
-
10
-
11
-
12
-
13
-
14
-
15
-
16
-
17
-
18
-
19
-
20
-
21
-
22
-
23
-
24
-
25
-
26
-
27
-
28
-
29
-
30
-
31
-
32
-
33
-
34
-
35
-
36
-
37
-
38
-
39
-
40
-
41
-
42
-
43
-
44
-
45
-
46
-
47
-
48
-
49
-
50
-
51
-
52
-
53
-
54
-
55
-
56
-
57
-
58
-
59
-
60
-
61
-
62
-
63
-
64
-
65
-
66
-
67
-
68
-
69
-
70
-
71
-
72
-
73
-
74
-
75
-
76
-
77
-
78
-
79
-
80
-
81
-
82
-
83
-
84
-
85
-
86
-
87
-
88
-
89
-
90
-
91
-
92
-
93
-
94
-
95
-
96
-
97
-
98
-
99
-
100
-
101
-
102
-
103
-
104
-
105
-
106
-
107
-
108
-
109
-
110
-
111
-
112
-
113
-
114
-
115
-
116
-
117
-
118
-
119
-
120
-
121
-
122
-
123
-
124
-
125
-
126
-
127
-
128
-
129
-
130
-
131
-
132
-
133
-
134
-
135
-
136
-
137
-
138
-
139
-
140
-
141
-
142
-
143
-
144
-
145
-
146
 |
 |
ALWAYS read this Operation Guide thoroughly before use.
After reading, maintain it in good condition and keep it
together with the Operation Guide for your copier.
FAX System
(
F
)
Operation Guide