Kyocera KM-3530 Fax System (F) Operation Guide Rev1 - Page 97
Other Features of this Fax, Modifying and Deleting Encryption Keys
 |
View all Kyocera KM-3530 manuals
Add to My Manuals
Save this manual to your list of manuals |
Page 97 highlights
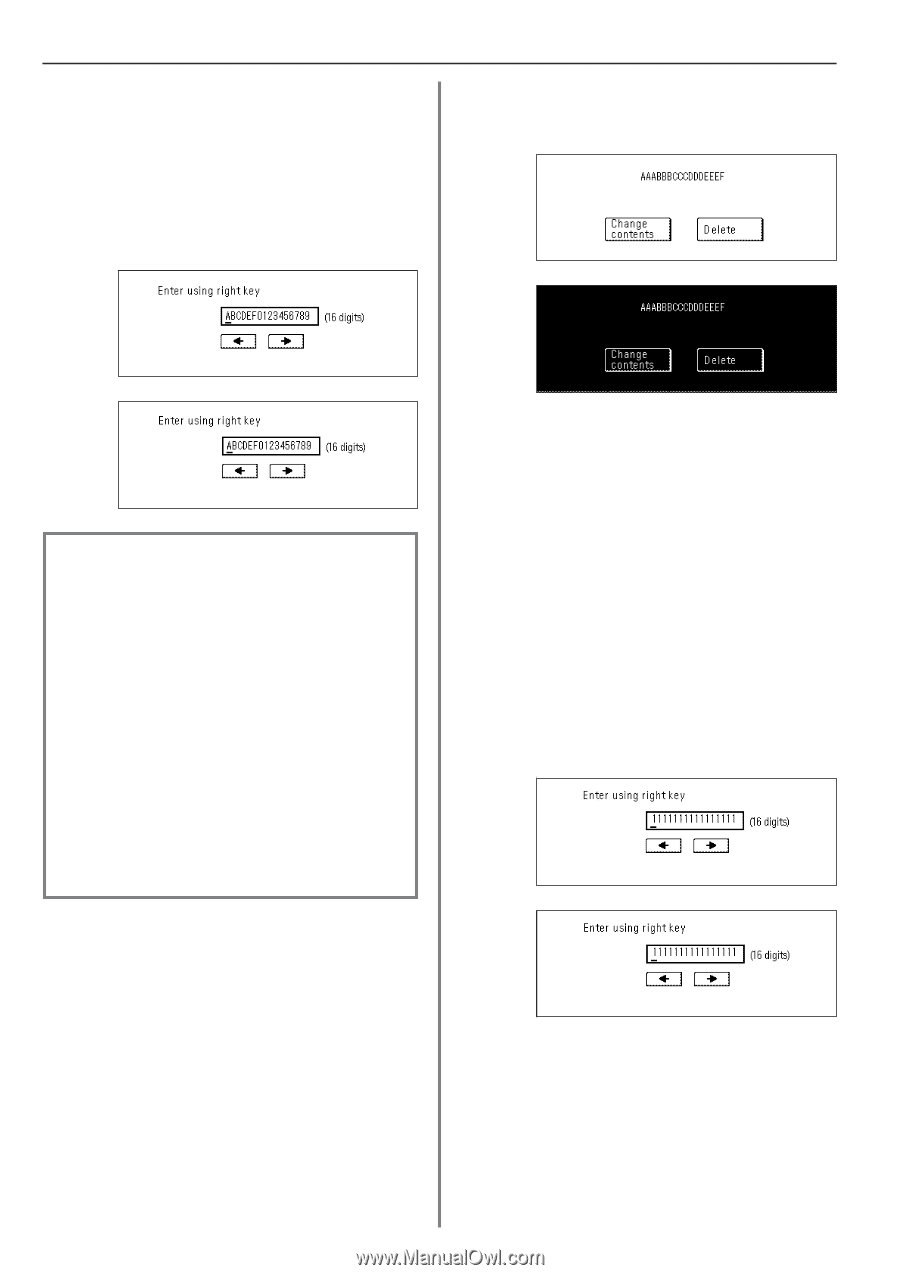
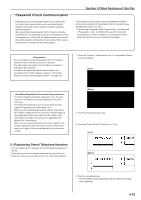
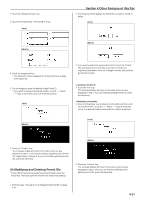
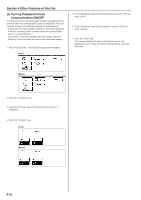
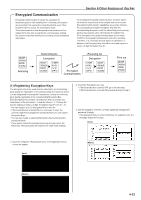
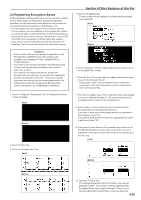
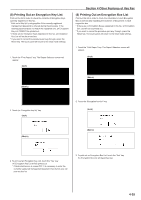
Section 4 Other Features of this Fax 4. Touch an unregistered key. * The information will be displayed for all keys that have already been registered. 5. Use the numerals (0 - 9) and the English alphabet (A - Z) that is shown on the touch panel to create the desired 16-character Encryption Key. * If you want to change the entered key, use the "r" and/or "R" keys to move the cursor to the desired location. (Inch) 2. Touch the key which displays the Encryption Key you want to modify or delete. (Inch) (Metric) (Metric) 3. If you want to delete the registered Encryption Key, touch the "Delete" key and then go to the next step. If you want to modify the registered information, touch the "Change contents" key and then go directly to step 5. Each Encryption Key is registered under an "Encryption Key ID" (a 2-digit number from "01" to "20"). When you want to designate an Encryption Key for a certain communication, it is this 2-digit number that you must enter. * In order to receive document successfully, while it is abso- lutely necessary that the Encryption Key used by the transmitting party matches the Encryption Key that is registered for the corresponding Encryption Box in the receiving party's fax, it is not necessary that the key IDs match. For example, if the transmitting party initiates an Encrypted Transmission using an Encryption Key of ABFE468C2569D341 that is registered under key ID "18", and the receiving party has registered the same Encryption Key, but it is registered under key ID "09", as long as the receiving party has registered key ID "09" for the Encryption Box that will receive the encrypted documents, the 2 Encryption Keys will match so reception and correct print out will be successful. 6. Touch the "OK" key. The message display will return to the same screen as was displayed in step 4. If you want to continue registering other Encryption Keys, repeat steps 4 through 6. If you are finished registering Encryption Keys, press the Reset key. > Deleting an Encryption Key 4. Touch the "Yes" key. The message display will return to the same screen as was displayed in step 2. If you are finished deleting Encryption Keys, press the Reset key. > Modifying information 5. Press the Stop/Clear key to delete the old key and then enter the new Encryption Key, or use the "r" and/or "R" keys to move the cursor to a desired location and reenter the Encryption Key as desired. (Inch) (Metric) (2) Modifying and Deleting Encryption Keys * If you want to cancel the procedure part way through, press the Reset key. The touch panel will return to the initial mode settings. 6. Touch the "OK" key. The message display will return to the same screen as was displayed in step 2. Once you are finished modifying and/or deleting Encryption Keys, press the Reset key. 1. Perform steps 1 through 3 of "(1) Registering Encryption Keys" on page 4-33. 4-34
-
 1
1 -
2
-
3
-
4
-
5
-
6
-
7
-
8
-
9
-
10
-
11
-
12
-
13
-
14
-
15
-
16
-
17
-
18
-
19
-
20
-
21
-
22
-
23
-
24
-
25
-
26
-
27
-
28
-
29
-
30
-
31
-
32
-
33
-
34
-
35
-
36
-
37
-
38
-
39
-
40
-
41
-
42
-
43
-
44
-
45
-
46
-
47
-
48
-
49
-
50
-
51
-
52
-
53
-
54
-
55
-
56
-
57
-
58
-
59
-
60
-
61
-
62
-
63
-
64
-
65
-
66
-
67
-
68
-
69
-
70
-
71
-
72
-
73
-
74
-
75
-
76
-
77
-
78
-
79
-
80
-
81
-
82
-
83
-
84
-
85
-
86
-
87
-
88
-
89
-
90
-
91
-
 92
92 -
 93
93 -
 94
94 -
 95
95 -
 96
96 -
 97
97 -
 98
98 -
 99
99 -
 100
100 -
 101
101 -
 102
102 -
103
-
104
-
105
-
106
-
107
-
108
-
109
-
110
-
111
-
112
-
113
-
114
-
115
-
116
-
117
-
118
-
119
-
120
-
121
-
122
-
123
-
124
-
125
-
126
-
127
-
128
-
129
-
130
-
131
-
132
-
133
-
134
-
135
-
136
-
137
-
138
-
139
-
140
-
141
-
142
-
143
-
144
-
145
-
146
 |
 |