Kyocera KM-3530 Fax System (F) Operation Guide Rev1 - Page 53
Fax Operation Various Functions, Modifying the Contents of the, Communication
 |
View all Kyocera KM-3530 manuals
Add to My Manuals
Save this manual to your list of manuals |
Page 53 highlights
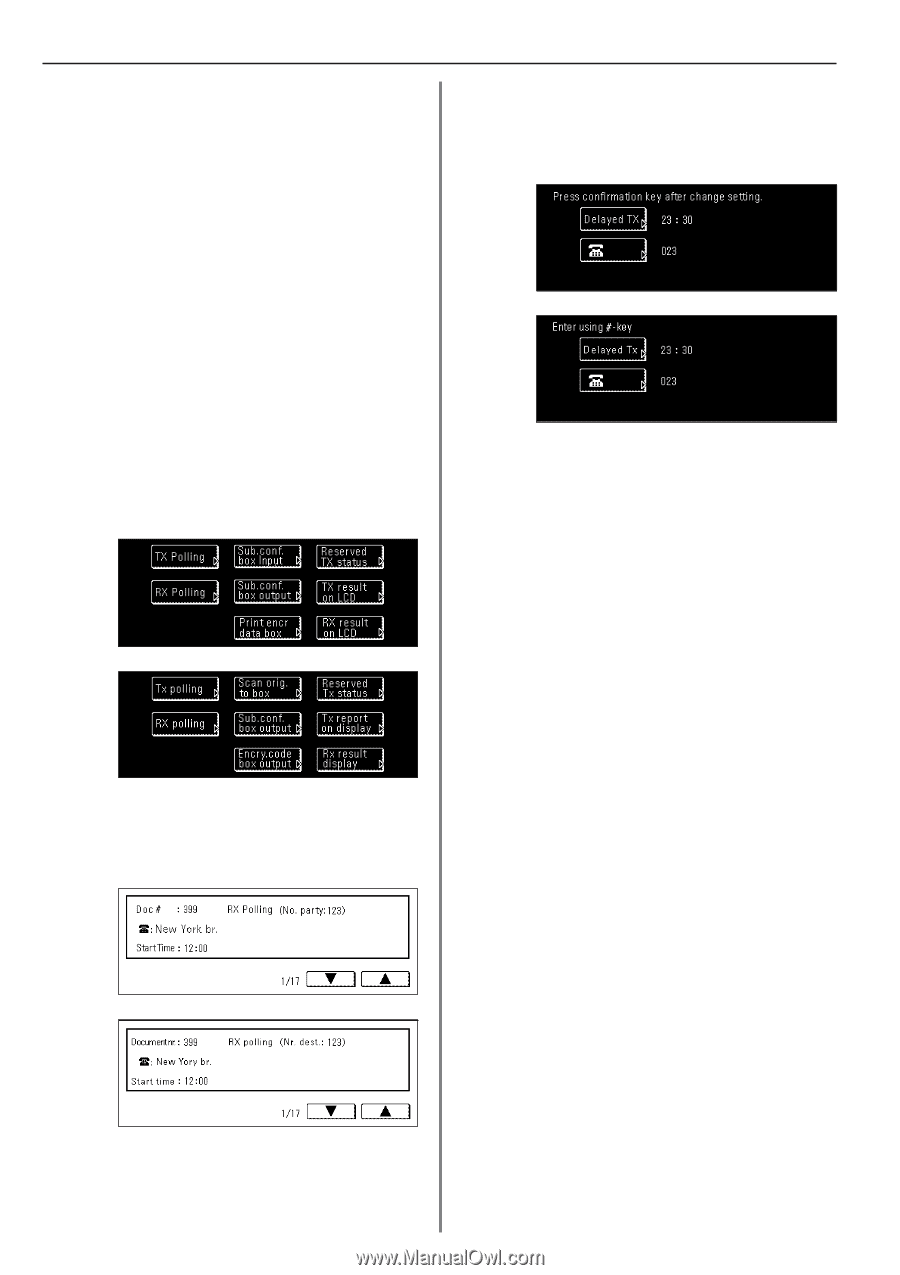
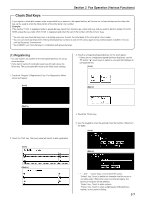
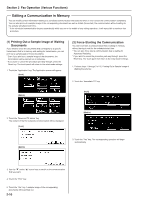
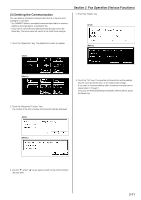
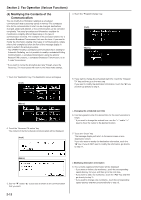
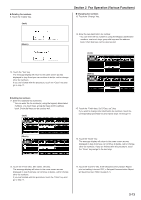
Section 2 Fax Operation (Various Functions) (4) Modifying the Contents of the Communication You can modify the information relating to a scheduled communication that is presently saved in memory. The scheduled time for the communication to start can be changed, destinations changed, added and deleted, or the communication can be canceled completely. The actual procedure and information available for modification is slightly different depending on the type of communication involved. The example in the procedure below is for a scheduled Broadcast Transmission that uses the timer. If you want to modify the information relating other types of communications, simply refer to this example but follow the flow of the message display in order to perform the actual procedure. * You CANNOT modify a scheduled communication that is waiting for Automatic Redialing, nor is it possible to modify a scheduled Polling Communication, a scheduled transmission using the optional Network FAX functions, a scheduled Broadcast Transmission, or an F-code Transmission. * If you want to cancel the procedure part way through, press the Reset key. The touch panel will return to the initial mode settings. 4. Touch the "Program/Change" key. (Inch) (Metric) 1. Touch the "Application" key. The Application screen will appear. (Inch) 5. If you want to change the scheduled start time, touch the "Delayed TX" key and then go to the next step. If you want to modify the destination information, touch the "v" key and then go directly to step 8. (Metric) 2. Touch the "Reserved TX status" key. The content of the first schedule communication will be displayed. (Inch) > Changing the scheduled start time 6. Use the keypad to enter the desired time for the communication to begin. * If you want to change the entered time, use the "r" and/or "R" keys to move the cursor to the desired location. 7. Touch the "Close" key. The message display will return to the same screen as was displayed in step 5. If you also want to modify the destination information, touch the "v" key. If you do NOT want to modify the information, go directly to step 17. (Metric) 3. Use the "M" and/or "L" cursor keys to switch to the communication that you want. 2-12 > Modifying destination information 8. The currently registered information will be displayed. • If you want to delete a fax number(s), touch the corresponding speed-dial key (or keys) and then go to the next step. • If you want to add a fax number(s), touch the "Add" key and then go directly to step 11. • If you want to change a fax number(s), touch the corresponding speed-dial key and then proceed directly to step 13.
-
 1
1 -
2
-
3
-
4
-
5
-
6
-
7
-
8
-
9
-
10
-
11
-
12
-
13
-
14
-
15
-
16
-
17
-
18
-
19
-
20
-
21
-
22
-
23
-
24
-
25
-
26
-
27
-
28
-
29
-
30
-
31
-
32
-
33
-
34
-
35
-
36
-
37
-
38
-
39
-
40
-
41
-
42
-
43
-
44
-
45
-
46
-
47
-
 48
48 -
 49
49 -
 50
50 -
 51
51 -
 52
52 -
 53
53 -
 54
54 -
 55
55 -
 56
56 -
 57
57 -
 58
58 -
59
-
60
-
61
-
62
-
63
-
64
-
65
-
66
-
67
-
68
-
69
-
70
-
71
-
72
-
73
-
74
-
75
-
76
-
77
-
78
-
79
-
80
-
81
-
82
-
83
-
84
-
85
-
86
-
87
-
88
-
89
-
90
-
91
-
92
-
93
-
94
-
95
-
96
-
97
-
98
-
99
-
100
-
101
-
102
-
103
-
104
-
105
-
106
-
107
-
108
-
109
-
110
-
111
-
112
-
113
-
114
-
115
-
116
-
117
-
118
-
119
-
120
-
121
-
122
-
123
-
124
-
125
-
126
-
127
-
128
-
129
-
130
-
131
-
132
-
133
-
134
-
135
-
136
-
137
-
138
-
139
-
140
-
141
-
142
-
143
-
144
-
145
-
146
 |
 |