Kyocera KM-3530 Fax System (F) Operation Guide Rev1 - Page 108
Other Features of this Fax, Printing Out a Department List, Clearing the count for all
 |
View all Kyocera KM-3530 manuals
Add to My Manuals
Save this manual to your list of manuals |
Page 108 highlights
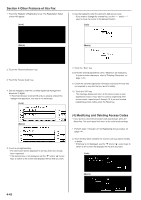
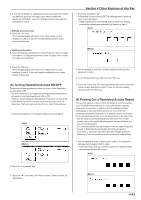
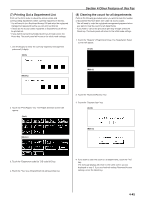
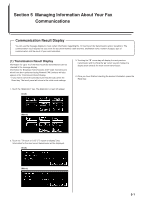
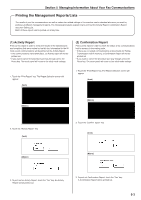
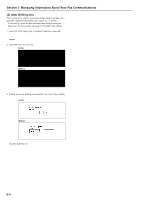
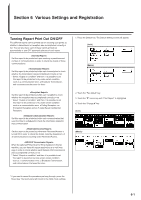
(7) Printing Out a Department List Print out this list in order to check the access codes and corresponding department names currently registered in this fax. * You will need to turn Restricted Access ON and enter the registered management password before you can print out this list. * If there are no access codes registered, a Department List will not be printed out. * If you want to cancel the procedure part way through, press the Reset key. The touch panel will return to the initial mode settings. 1. Use the keypad to enter the currently registered management password (4 digits). (Inch) Section 4 Other Features of this Fax (8) Clearing the count for all departments Perform the following procedure when you want to clear the number of documents that have been sent under all access codes. * You will need to enter the registered management password when you want to clear the count for all departments. * If you want to cancel the procedure part way through, press the Reset key. The touch panel will return to the initial mode settings. 1. Touch the "Register" ["Registration"] key. The Registration Select screen will appear. (Inch) (Metric) (Metric) 2. Touch the "Print Report" key. The Report Selection screen will appear. (Inch) (Metric) 2. Touch the "Restricted Access" key. 3. Touch the "Counter clear" key. (Inch) (Metric) 3. Touch the "Department code list" ["ID-code list"] key. 4. Touch the "Yes" key. A Department list will be printed out. 4. If you want to clear the count for all departments, touch the "Yes" key. The message display will return to the same screen as was displayed in step 3. If you are finished making Restricted Access settings, press the Reset key. 4-45
-
 1
1 -
2
-
3
-
4
-
5
-
6
-
7
-
8
-
9
-
10
-
11
-
12
-
13
-
14
-
15
-
16
-
17
-
18
-
19
-
20
-
21
-
22
-
23
-
24
-
25
-
26
-
27
-
28
-
29
-
30
-
31
-
32
-
33
-
34
-
35
-
36
-
37
-
38
-
39
-
40
-
41
-
42
-
43
-
44
-
45
-
46
-
47
-
48
-
49
-
50
-
51
-
52
-
53
-
54
-
55
-
56
-
57
-
58
-
59
-
60
-
61
-
62
-
63
-
64
-
65
-
66
-
67
-
68
-
69
-
70
-
71
-
72
-
73
-
74
-
75
-
76
-
77
-
78
-
79
-
80
-
81
-
82
-
83
-
84
-
85
-
86
-
87
-
88
-
89
-
90
-
91
-
92
-
93
-
94
-
95
-
96
-
97
-
98
-
99
-
100
-
101
-
102
-
 103
103 -
 104
104 -
 105
105 -
 106
106 -
 107
107 -
 108
108 -
 109
109 -
 110
110 -
 111
111 -
 112
112 -
 113
113 -
114
-
115
-
116
-
117
-
118
-
119
-
120
-
121
-
122
-
123
-
124
-
125
-
126
-
127
-
128
-
129
-
130
-
131
-
132
-
133
-
134
-
135
-
136
-
137
-
138
-
139
-
140
-
141
-
142
-
143
-
144
-
145
-
146
 |
 |
