Kyocera KM-3530 Fax System (F) Operation Guide Rev1 - Page 98
Other Features of this Fax, Registering Encryption Boxes
 |
View all Kyocera KM-3530 manuals
Add to My Manuals
Save this manual to your list of manuals |
Page 98 highlights
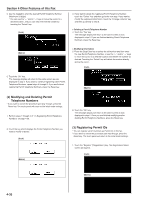
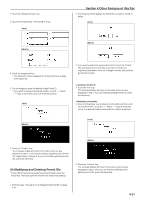
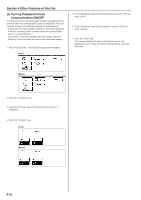
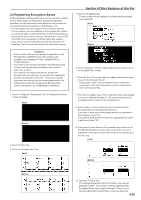
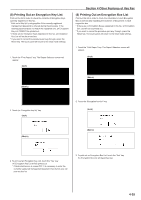
(3) Registering Encryption Boxes An Encryption Box must be registered in your fax machine in order to receive an Encryption Communication. During that registration procedure, you will also need to select whether or not you want the received documents to be printed out immediately or not. * You can register up to 15 Encryption Boxes in this fax machine. * If, for any reason, you lose reference to an Encryption Box number, you will not be able to modify information for the corresponding box nor will you be able to delete that box. Therefore, you exercise DUE CAUTION in the management of the Encryption Box numbers. * If you want to cancel the procedure part way through, press the Reset key. The touch panel will return to the initial mode settings. • The box number that you enter during the registration of any Encryption Box CANNOT be the same number as the subaddress of a registered F-Code Confidential Box or F-Code Relay Box. • If you want to have received documents automatically printed out from the Encryption Box immediately after reception, select "On" in step 8. If you want to have received documents stored in the Encryption Box and allow print out only when the appropriate procedure is performed, select "Off". In this case, since the only person who can print out the received documents is the individual who knows the corresponding Encryption Box number and that box's ID, confidentiality is maintained. 1. Touch the "Register" ["Registration"] key. The Registration Select screen will appear. (Inch) (Metric) 2. Touch the "Box" key. 3. Touch the "Encryption box" key. (Inch) Section 4 Other Features of this Fax 4. Touch an unregistered key. * The box number will be displayed for all keys that have already been registered. (Inch) (Metric) 5. Use the keypad to enter the 4-digit number that you want to use as the Encryption Box number. 6. Touch the "Box. ID" key and enter the 4-digit number that you want to use for the Encryption Box ID. * If you register "0000" as the Encryption Box ID, it will not be necessary to enter an ID-code when you print out documents from that Encryption Box. 7. Touch the "Encryption Code" ["Encr. code"] key and use the keypad to enter the 2-digit key ID-code (01 - 20) that corresponds to the Encryption Key to be used for this Encryption Box. 8. Select whether or not you want documents received into this Encryption Box to be automatically printed out. If you want to have received documents printed out immediately after reception, select "On". If you want to allow print out only when the appropriate procedure is performed, select "Off". 9. If the optional Printer/Scanner Kit is installed and you want to use the NW-FAX Reception function, make sure that the "On" key is highlighted. If the optional Printer/Scanner Kit is not installed, go to the next step. (Inch) (Metric) (Metric) 10. Touch the "Confirm" key. The message display will return to the same screen as was displayed in step 4. If you want to continue registering other Encryption Boxes, repeat steps 4 through 10. Once you are finished registering Encryption Boxes, press the Reset key. 4-35
-
 1
1 -
2
-
3
-
4
-
5
-
6
-
7
-
8
-
9
-
10
-
11
-
12
-
13
-
14
-
15
-
16
-
17
-
18
-
19
-
20
-
21
-
22
-
23
-
24
-
25
-
26
-
27
-
28
-
29
-
30
-
31
-
32
-
33
-
34
-
35
-
36
-
37
-
38
-
39
-
40
-
41
-
42
-
43
-
44
-
45
-
46
-
47
-
48
-
49
-
50
-
51
-
52
-
53
-
54
-
55
-
56
-
57
-
58
-
59
-
60
-
61
-
62
-
63
-
64
-
65
-
66
-
67
-
68
-
69
-
70
-
71
-
72
-
73
-
74
-
75
-
76
-
77
-
78
-
79
-
80
-
81
-
82
-
83
-
84
-
85
-
86
-
87
-
88
-
89
-
90
-
91
-
92
-
 93
93 -
 94
94 -
 95
95 -
 96
96 -
 97
97 -
 98
98 -
 99
99 -
 100
100 -
 101
101 -
 102
102 -
 103
103 -
104
-
105
-
106
-
107
-
108
-
109
-
110
-
111
-
112
-
113
-
114
-
115
-
116
-
117
-
118
-
119
-
120
-
121
-
122
-
123
-
124
-
125
-
126
-
127
-
128
-
129
-
130
-
131
-
132
-
133
-
134
-
135
-
136
-
137
-
138
-
139
-
140
-
141
-
142
-
143
-
144
-
145
-
146
 |
 |
