Kyocera KM-3530 Fax System (F) Operation Guide Rev1 - Page 79
RX Polling
 |
View all Kyocera KM-3530 manuals
Add to My Manuals
Save this manual to your list of manuals |
Page 79 highlights
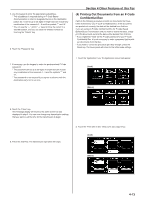
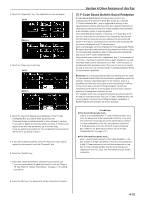
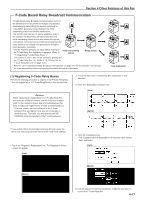
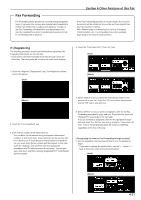
Section 4 Other Features of this Fax 1. Touch the "Application" key. The Application screen will appear. (Inch) (Metric) 2. Touch the "RX Polling" key. (Inch) (Metric) 6. Use the keypad to enter the appropriate subaddress. * This subaddress is required during an F-Code Based Communication in order to designate the box in the destination party's fax. It can be up to 20 digits in length and can include any combination of the numerals 0 - 9 and the symbols "*" and "#". * You can use the "r" and/or "R" keys to move the cursor to a desired location, and you can clear the entered number by touching the "Delete" key. 7. Touch the "Password" key. 8. If necessary, use the keypad to enter the predetermined F-Code password. * The password can be up to 20 digits in length and can include any combination of the numerals 0 - 9 and the symbols "*" and "#". * This password is not required if you agree in advance with the destination party not to use one. 9. Touch the "Close" key. The message display will return to the same screen as was displayed in step 3. You can now change any transmission settings that you want or set the time for the transmission to begin. You can additionally select another transmitting fax to receive documents from. 10. Press the Start key. The reception operation will begin. 3. Use the keypad to enter the fax number of the transmitting party. * You can also enter the fax number using one-touch keys that have been designated for F-Code Based Communication as well. If you do use such a one-touch key, press the Start key and the reception operation will begin automatically. 4. Touch the "Subadd." key. 5. Touch the "On" key. (Inch) (Metric) 4-16
-
 1
1 -
2
-
3
-
4
-
5
-
6
-
7
-
8
-
9
-
10
-
11
-
12
-
13
-
14
-
15
-
16
-
17
-
18
-
19
-
20
-
21
-
22
-
23
-
24
-
25
-
26
-
27
-
28
-
29
-
30
-
31
-
32
-
33
-
34
-
35
-
36
-
37
-
38
-
39
-
40
-
41
-
42
-
43
-
44
-
45
-
46
-
47
-
48
-
49
-
50
-
51
-
52
-
53
-
54
-
55
-
56
-
57
-
58
-
59
-
60
-
61
-
62
-
63
-
64
-
65
-
66
-
67
-
68
-
69
-
70
-
71
-
72
-
73
-
 74
74 -
 75
75 -
 76
76 -
 77
77 -
 78
78 -
 79
79 -
 80
80 -
 81
81 -
 82
82 -
 83
83 -
 84
84 -
85
-
86
-
87
-
88
-
89
-
90
-
91
-
92
-
93
-
94
-
95
-
96
-
97
-
98
-
99
-
100
-
101
-
102
-
103
-
104
-
105
-
106
-
107
-
108
-
109
-
110
-
111
-
112
-
113
-
114
-
115
-
116
-
117
-
118
-
119
-
120
-
121
-
122
-
123
-
124
-
125
-
126
-
127
-
128
-
129
-
130
-
131
-
132
-
133
-
134
-
135
-
136
-
137
-
138
-
139
-
140
-
141
-
142
-
143
-
144
-
145
-
146
 |
 |
