Kyocera TASKalfa 4500i Fax System (V) Operation Guide - Page 200
i-FAX Transmission, Switching to the Send Screen, Placing Originals, Specifying the Destination - scan to folder
 |
View all Kyocera TASKalfa 4500i manuals
Add to My Manuals
Save this manual to your list of manuals |
Page 200 highlights
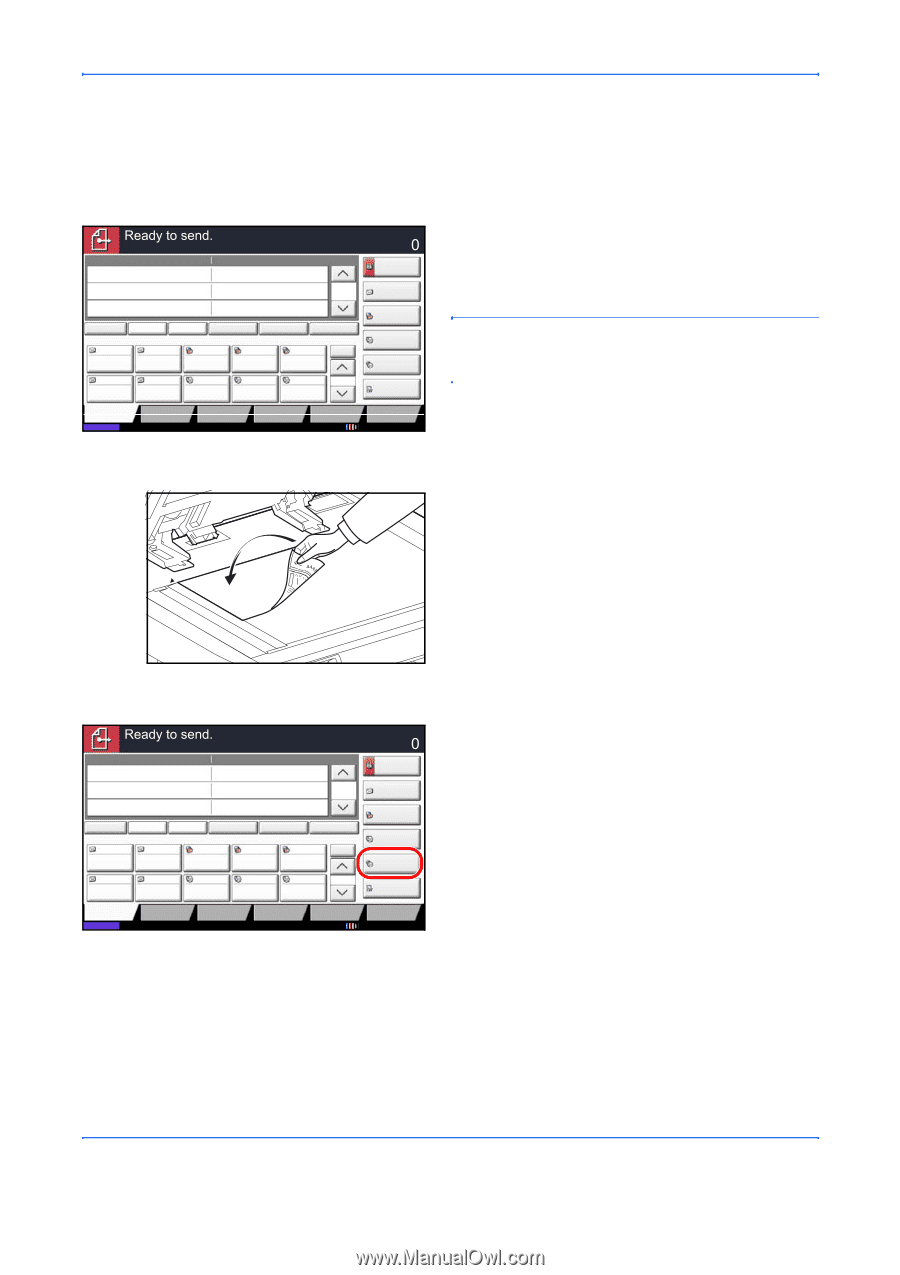
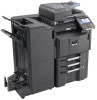
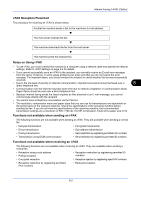
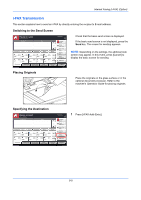
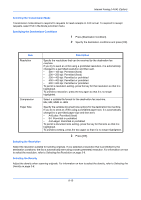
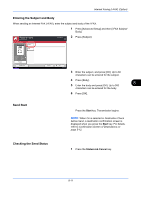
Internet Faxing (i-FAX) (Option) i-FAX Transmission This section explains how to send an i-FAX by directly entering the recipient's E-mail address. Switching to the Send Screen Enter Destination. Destination Detail 1/1 On Hook Direct Chain Detail/Edit Delete Recall 0001 0002 0003 0004 0005 No. AAA BBB CCC DDD EEE 0006 0007 0008 FFF GGG HHH III Destination Status Quick Setup Org./Sending Data Format 0009 0010 JJJ 1/100 Color/ Image Quality Advanced Setup Destination Address Book E-mail Addr Entry Folder Path Entry FAX No. Entry i-FAX Addr Entry WSD Scan Program 10/10/2010 Placing Originals Check that the basic send screen is displayed. If the basic send screen is not displayed, press the Send key. The screen for sending appears. NOTE: Depending on the settings, the address book screen may appear. In this event, press [Cancel] to display the basic screen for sending. Place the originals on the glass surface or in the optional document processor. Refer to the machine's Operation Guide for placing originals. Specifying the Destination Enter Destination. Destination Detail 1/1 On Hook Direct Chain Detail/Edit Delete Recall 0001 0002 0003 0004 0005 No. AAA BBB CCC DDD EEE 0006 0007 0008 FFF GGG HHH III 0009 0010 JJJ 1/100 Destination Status Quick Setup Org./Sending Data Format Color/ Image Quality Advanced Setup Destination Address Book E-mail Addr Entry Folder Path Entry FAX No. Entry i-FAX Addr Entry WSD Scan Program 10/10/2010 1 Press [i-FAX Addr Entry]. 8-8
-
 1
1 -
2
-
3
-
4
-
5
-
6
-
7
-
8
-
9
-
10
-
11
-
12
-
13
-
14
-
15
-
16
-
17
-
18
-
19
-
20
-
21
-
22
-
23
-
24
-
25
-
26
-
27
-
28
-
29
-
30
-
31
-
32
-
33
-
34
-
35
-
36
-
37
-
38
-
39
-
40
-
41
-
42
-
43
-
44
-
45
-
46
-
47
-
48
-
49
-
50
-
51
-
52
-
53
-
54
-
55
-
56
-
57
-
58
-
59
-
60
-
61
-
62
-
63
-
64
-
65
-
66
-
67
-
68
-
69
-
70
-
71
-
72
-
73
-
74
-
75
-
76
-
77
-
78
-
79
-
80
-
81
-
82
-
83
-
84
-
85
-
86
-
87
-
88
-
89
-
90
-
91
-
92
-
93
-
94
-
95
-
96
-
97
-
98
-
99
-
100
-
101
-
102
-
103
-
104
-
105
-
106
-
107
-
108
-
109
-
110
-
111
-
112
-
113
-
114
-
115
-
116
-
117
-
118
-
119
-
120
-
121
-
122
-
123
-
124
-
125
-
126
-
127
-
128
-
129
-
130
-
131
-
132
-
133
-
134
-
135
-
136
-
137
-
138
-
139
-
140
-
141
-
142
-
143
-
144
-
145
-
146
-
147
-
148
-
149
-
150
-
151
-
152
-
153
-
154
-
155
-
156
-
157
-
158
-
159
-
160
-
161
-
162
-
163
-
164
-
165
-
166
-
167
-
168
-
169
-
170
-
171
-
172
-
173
-
174
-
175
-
176
-
177
-
178
-
179
-
180
-
181
-
182
-
183
-
184
-
185
-
186
-
187
-
188
-
189
-
190
-
191
-
192
-
193
-
194
-
 195
195 -
 196
196 -
 197
197 -
 198
198 -
 199
199 -
 200
200 -
 201
201 -
 202
202 -
 203
203 -
 204
204 -
 205
205 -
206
-
207
-
208
-
209
-
210
-
211
-
212
-
213
-
214
-
215
-
216
-
217
-
218
-
219
-
220
-
221
-
222
-
223
-
224
-
225
-
226
-
227
-
228
-
229
-
230
-
231
-
232
-
233
-
234
-
235
-
236
-
237
-
238
-
239
-
240
-
241
-
242
-
243
-
244
-
245
-
246
-
247
-
248
-
249
-
250
-
251
-
252
 |
 |