Kyocera TASKalfa 4500i Fax System (V) Operation Guide - Page 48
Selecting the Density, Select of Original Image, Description, Press [Color/Image Quality]
 |
View all Kyocera TASKalfa 4500i manuals
Add to My Manuals
Save this manual to your list of manuals |
Page 48 highlights
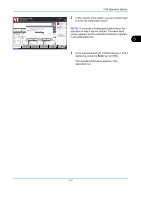
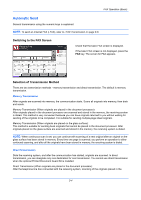
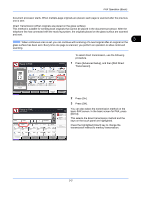
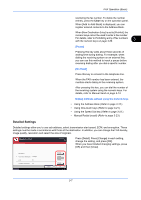
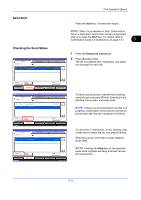
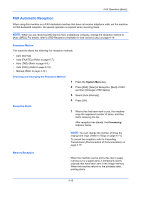
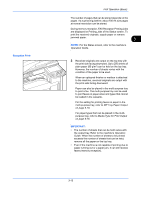
FAX Operation (Basic) Key Sub Address Transmission Start Speed ECM Encrypted Transmission Description To communicate using the sub address, press this key. For details, refer to Sub Address Communication on page 4-45. To change the transmission start speed, press this key. Select the speed from 33,600 bps, 14,400 bps, and 9,600 bps. ECM (error correction mode) prevents distortion of the fax image by automatically resending any parts of the data that were not correctly sent due to the effects of noise on the telephone line during transmission. To change the ECM communication setting, press this key. To send faxes using encryption, press this key. For details, refer to Encryption on page 6-29. Selecting the Density Adjust the density when scanning originals. Density Destination Lighter Normal Darker Original Zoom Send : A4 : 100% : A4 Preview Status Add Shortcut -3 -2 -1 0 +1 +2 +3 -2.5 -1.5 -0.5 +0.5 +1.5 +2.5 Cancel OK 10/10/2010 Select of Original Image Select the original image. 1 Press [Color/Image Quality], and then [Density]. You can see a preview of the image to be sent by pressing [Preview]. For details, refer to Previewing Images on page 3-24. 2 Select the density. The density can be selected in 13 levels from -3 (lighter) to +3 (darker). In Quick Setup, the density is in seven levels. To adjust the density in 13 levels, press [More]. 3 Press [OK]. 1 Press [Image Quality], and then [Original Image].You can see a preview of the image to be sent by pressing [Preview]. For details, refer to Previewing Images on page 3-24. 3-8
-
 1
1 -
2
-
3
-
4
-
5
-
6
-
7
-
8
-
9
-
10
-
11
-
12
-
13
-
14
-
15
-
16
-
17
-
18
-
19
-
20
-
21
-
22
-
23
-
24
-
25
-
26
-
27
-
28
-
29
-
30
-
31
-
32
-
33
-
34
-
35
-
36
-
37
-
38
-
39
-
40
-
41
-
42
-
 43
43 -
 44
44 -
 45
45 -
 46
46 -
 47
47 -
 48
48 -
 49
49 -
 50
50 -
 51
51 -
 52
52 -
 53
53 -
54
-
55
-
56
-
57
-
58
-
59
-
60
-
61
-
62
-
63
-
64
-
65
-
66
-
67
-
68
-
69
-
70
-
71
-
72
-
73
-
74
-
75
-
76
-
77
-
78
-
79
-
80
-
81
-
82
-
83
-
84
-
85
-
86
-
87
-
88
-
89
-
90
-
91
-
92
-
93
-
94
-
95
-
96
-
97
-
98
-
99
-
100
-
101
-
102
-
103
-
104
-
105
-
106
-
107
-
108
-
109
-
110
-
111
-
112
-
113
-
114
-
115
-
116
-
117
-
118
-
119
-
120
-
121
-
122
-
123
-
124
-
125
-
126
-
127
-
128
-
129
-
130
-
131
-
132
-
133
-
134
-
135
-
136
-
137
-
138
-
139
-
140
-
141
-
142
-
143
-
144
-
145
-
146
-
147
-
148
-
149
-
150
-
151
-
152
-
153
-
154
-
155
-
156
-
157
-
158
-
159
-
160
-
161
-
162
-
163
-
164
-
165
-
166
-
167
-
168
-
169
-
170
-
171
-
172
-
173
-
174
-
175
-
176
-
177
-
178
-
179
-
180
-
181
-
182
-
183
-
184
-
185
-
186
-
187
-
188
-
189
-
190
-
191
-
192
-
193
-
194
-
195
-
196
-
197
-
198
-
199
-
200
-
201
-
202
-
203
-
204
-
205
-
206
-
207
-
208
-
209
-
210
-
211
-
212
-
213
-
214
-
215
-
216
-
217
-
218
-
219
-
220
-
221
-
222
-
223
-
224
-
225
-
226
-
227
-
228
-
229
-
230
-
231
-
232
-
233
-
234
-
235
-
236
-
237
-
238
-
239
-
240
-
241
-
242
-
243
-
244
-
245
-
246
-
247
-
248
-
249
-
250
-
251
-
252
 |
 |