Lenovo ThinkPad L520 (English) User Guide - Page 89
Hard disk passwords, Enter New Password
 |
View all Lenovo ThinkPad L520 manuals
Add to My Manuals
Save this manual to your list of manuals |
Page 89 highlights
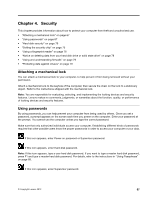
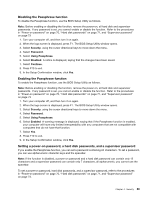
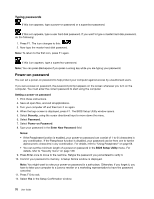
Changing or removing the power-on password To change or remove the power-on password, follow the steps 1 through 7 above in "Setting a power-on password" on page 70. Note: When you press F1 to enter the BIOS Setup Utility, the system will require the power-on password. Type your power-on password and press enter, then the BIOS Setup Utility window opens. To change the power-on password, do the following: 1. In the Enter Current Password field, type the current power-on password. 2. When the Enter New Password field opens, type a new password in the field and then retype it to verify. To remove the power-on password, do as follows: 1. In the Enter Current Password field, type the current power-on password. 2. When the Enter New Password field opens, leave it blank and press Enter twice. Hard disk passwords Two types of hard disk passwords help protect the information stored on the hard disk: • User hard disk password • Master hard disk password, which requires a user hard disk password If a user hard disk password has been set, but no master hard disk password has been, the user must enter the user hard disk password in order to gain access to files and applications on the hard disk. The master password can be set and used only by a system administrator. Like a master key, it enables the administrator to get access to any hard drive in a system. The administrator sets the master password; no one else knows it. Then the administrator sets a user password for each computer in the network, and tells each user the password for his or her computer. The user can then change the user password as desired, but the administrator can still get access by using the master password. Setting a hard disk password 1. Print these instructions. 2. Save all open files, and exit all applications. 3. Turn your computer off and then on again. 4. When the logo screen is displayed, press F1. The BIOS Setup Utility opens. 5. Select Security, using the cursor directional keys to move down the menu. 6. Select Password. 7. Select Hard Disk x Password, where x is the number of the hard disk drive for which you want to set a password. 8. A password window opens. You are prompted to select User or User + Master. Select User if you want to set only one hard disk password. If you are an administrator or supervisor, you can select User + Master to set two passwords. (The user can change the user password later.) 9. If you select User + Master, go to step 12. 10. If you select User only, a new-password window opens. Type your new password in the Enter New Password field. Notes: • If the Passphrase function is enabled, you can choose your hard disk password, which can consist of 1 to 64 characters in any combination. If the Passphrase function is disabled, you can choose a hard Chapter 4. Security 71
-
 1
1 -
2
-
3
-
4
-
5
-
6
-
7
-
8
-
9
-
10
-
11
-
12
-
13
-
14
-
15
-
16
-
17
-
18
-
19
-
20
-
21
-
22
-
23
-
24
-
25
-
26
-
27
-
28
-
29
-
30
-
31
-
32
-
33
-
34
-
35
-
36
-
37
-
38
-
39
-
40
-
41
-
42
-
43
-
44
-
45
-
46
-
47
-
48
-
49
-
50
-
51
-
52
-
53
-
54
-
55
-
56
-
57
-
58
-
59
-
60
-
61
-
62
-
63
-
64
-
65
-
66
-
67
-
68
-
69
-
70
-
71
-
72
-
73
-
74
-
75
-
76
-
77
-
78
-
79
-
80
-
81
-
82
-
83
-
 84
84 -
 85
85 -
 86
86 -
 87
87 -
 88
88 -
 89
89 -
 90
90 -
 91
91 -
 92
92 -
 93
93 -
 94
94 -
95
-
96
-
97
-
98
-
99
-
100
-
101
-
102
-
103
-
104
-
105
-
106
-
107
-
108
-
109
-
110
-
111
-
112
-
113
-
114
-
115
-
116
-
117
-
118
-
119
-
120
-
121
-
122
-
123
-
124
-
125
-
126
-
127
-
128
-
129
-
130
-
131
-
132
-
133
-
134
-
135
-
136
-
137
-
138
-
139
-
140
-
141
-
142
-
143
-
144
-
145
-
146
-
147
-
148
-
149
-
150
-
151
-
152
-
153
-
154
-
155
-
156
-
157
-
158
-
159
-
160
-
161
-
162
-
163
-
164
-
165
-
166
-
167
-
168
-
169
-
170
-
171
-
172
-
173
-
174
-
175
-
176
-
177
-
178
-
179
-
180
-
181
-
182
-
183
-
184
-
185
-
186
-
187
-
188
-
189
-
190
-
191
-
192
-
193
-
194
-
195
-
196
-
197
-
198
-
199
-
200
-
201
-
202
-
203
-
204
-
205
-
206
-
207
-
208
-
209
-
210
-
211
-
212
-
213
-
214
-
215
-
216
-
217
-
218
-
219
-
220
-
221
-
222
-
223
-
224
-
225
 |
 |