Lexmark C540 Service Manual - Page 172
xx, 4xx, Installation note, PRINTER SETUP, Select, ITU Barcode, Enter the Diagnostics Menu
 |
View all Lexmark C540 manuals
Add to My Manuals
Save this manual to your list of manuals |
Page 172 highlights
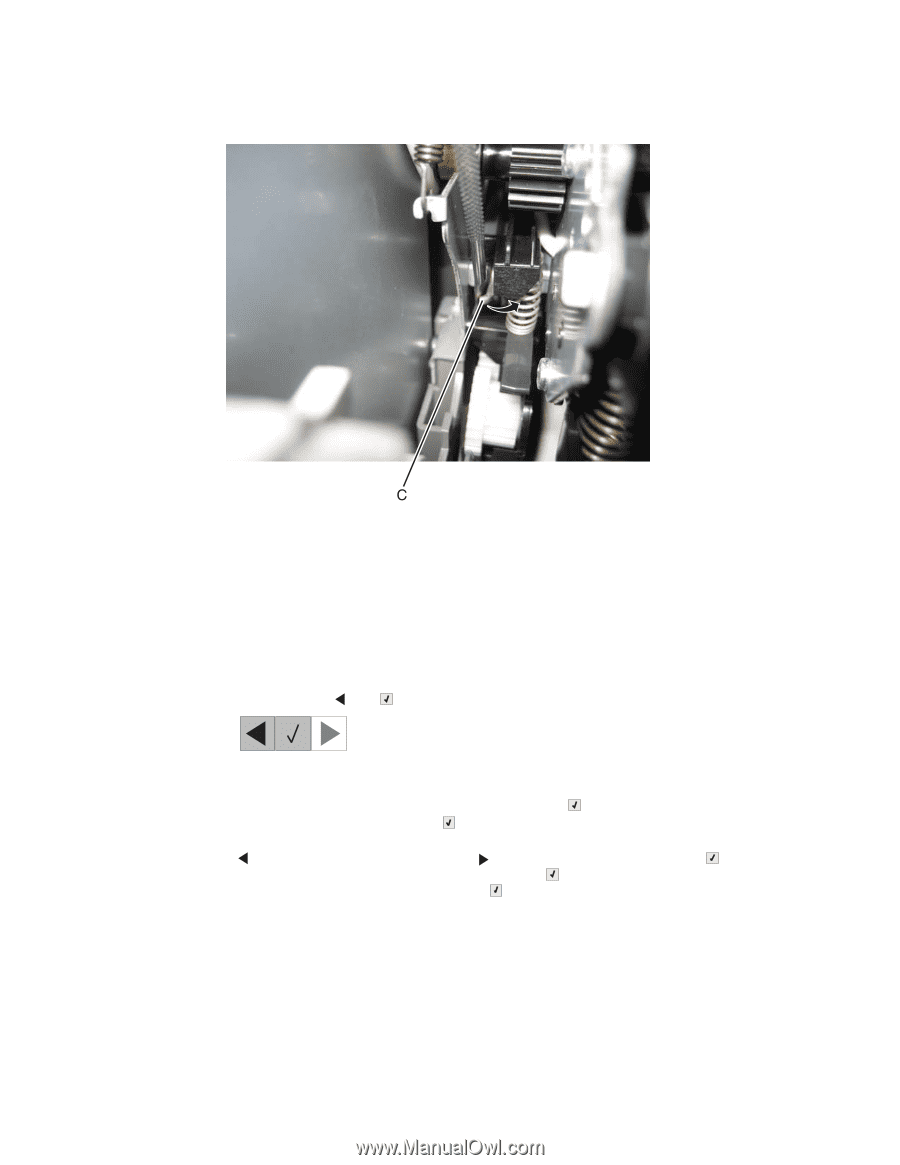
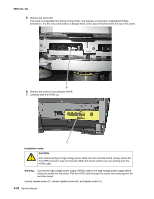
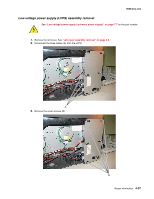
5025-2xx, 4xx 7. Rotate the release lever (C) in a counterclockwise direction with a springhook or needlenose pliers to decouple the ITU while pulling the ITU toward the front. 8. Hold the release lever for the first four inches (100 mm) as you pull out the ITU, but a quick, firm push should overcome the latch. Installation note: • Write down the 16-digit numeric value of the new FRU before you begin to install it. • You may have to rotate the release lever again to install the new ITU. • When you have replaced the ITU, be sure to enter the 16-digit numeric value from the barcode on the new ITU into the printer. 1. Enter the Diagnostics Menu: a. Turn the printer off. b. Press and hold and . c. Turn the printer on. d. Release the buttons when the installed memory and processor speed displays. 2. Select PRINTER SETUP from Diag Menu, and press Select ( ). 3. Select ITU Barcode, and press Select ( ). 4. To enter the 16-digit numeric value: Use to decrease the leftmost digit value or to increase the value. Press Select ( ) to advance to the next digit. If a digit is already correct, press Select ( ) to accept the number and to continue. When the last number is entered, press Select ( ), and Submitting changes... should appear. If the entered number is incorrect, Check Sum Does Not Match displays. Check and reenter the number. 4-34 Service Manual
-
 1
1 -
2
-
3
-
4
-
5
-
6
-
7
-
8
-
9
-
10
-
11
-
12
-
13
-
14
-
15
-
16
-
17
-
18
-
19
-
20
-
21
-
22
-
23
-
24
-
25
-
26
-
27
-
28
-
29
-
30
-
31
-
32
-
33
-
34
-
35
-
36
-
37
-
38
-
39
-
40
-
41
-
42
-
43
-
44
-
45
-
46
-
47
-
48
-
49
-
50
-
51
-
52
-
53
-
54
-
55
-
56
-
57
-
58
-
59
-
60
-
61
-
62
-
63
-
64
-
65
-
66
-
67
-
68
-
69
-
70
-
71
-
72
-
73
-
74
-
75
-
76
-
77
-
78
-
79
-
80
-
81
-
82
-
83
-
84
-
85
-
86
-
87
-
88
-
89
-
90
-
91
-
92
-
93
-
94
-
95
-
96
-
97
-
98
-
99
-
100
-
101
-
102
-
103
-
104
-
105
-
106
-
107
-
108
-
109
-
110
-
111
-
112
-
113
-
114
-
115
-
116
-
117
-
118
-
119
-
120
-
121
-
122
-
123
-
124
-
125
-
126
-
127
-
128
-
129
-
130
-
131
-
132
-
133
-
134
-
135
-
136
-
137
-
138
-
139
-
140
-
141
-
142
-
143
-
144
-
145
-
146
-
147
-
148
-
149
-
150
-
151
-
152
-
153
-
154
-
155
-
156
-
157
-
158
-
159
-
160
-
161
-
162
-
163
-
164
-
165
-
166
-
 167
167 -
 168
168 -
 169
169 -
 170
170 -
 171
171 -
 172
172 -
 173
173 -
 174
174 -
 175
175 -
 176
176 -
 177
177 -
178
-
179
-
180
-
181
-
182
-
183
-
184
-
185
-
186
-
187
-
188
-
189
-
190
-
191
-
192
-
193
-
194
-
195
-
196
-
197
-
198
-
199
-
200
-
201
-
202
-
203
-
204
-
205
-
206
-
207
-
208
-
209
-
210
-
211
-
212
-
213
-
214
-
215
-
216
-
217
-
218
-
219
-
220
-
221
-
222
-
223
-
224
-
225
-
226
-
227
-
228
-
229
-
230
-
231
-
232
-
233
-
234
-
235
-
236
 |
 |