Lexmark C540 Service Manual - Page 35
Diagnostic information, Start - error codes
 |
View all Lexmark C540 manuals
Add to My Manuals
Save this manual to your list of manuals |
Page 35 highlights
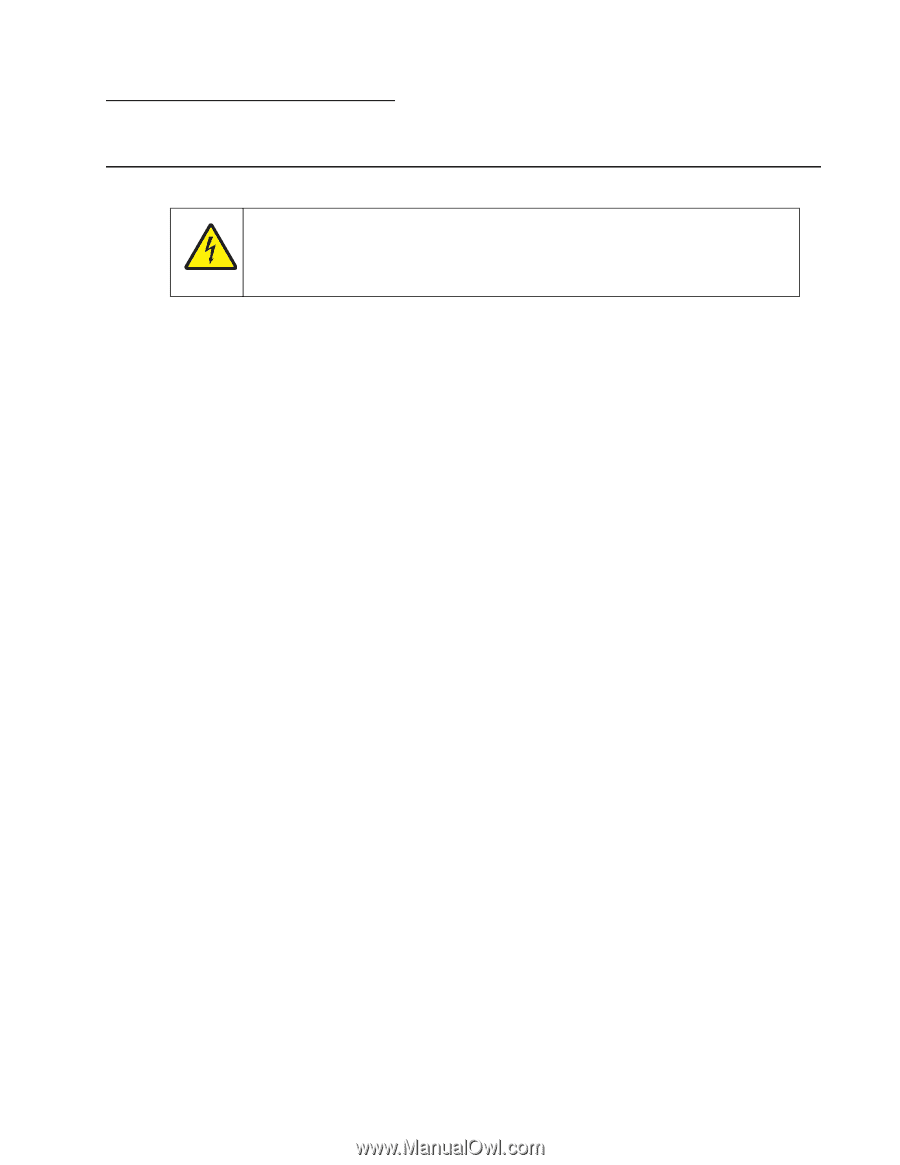
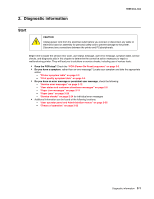
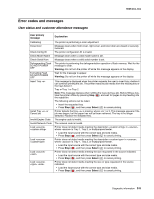
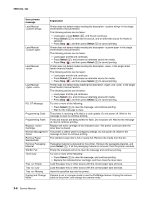
2. Diagnostic information 5025-2xx, 4xx Start CAUTION Unplug power cord from the electrical outlet before you connect or disconnect any cable or electronic board or assembly for personal safety and to prevent damage to the printer. Disconnect any connections between the printer and PCs/peripherals. Begin here to locate the service error code, user status message, user error message, symptom table, service checks, and diagnostic aids in this chapter to determine the corrective action necessary to repair a malfunctioning printer. They will lead you to solutions or service checks, including use of various tests. • Does the POR stop? Check the "POR (Power-On Reset) sequence" on page 2-2. • Do you have a symptom, rather than an error message? Locate your symptom and take the appropriate action: - "Printer symptom table" on page 2-3 - "Print quality symptom table" on page 2-4 • Do you have an error message or persistent user message, check the following: - "Service error messages" on page 2-12 - "User status and customer attendance messages" on page 2-5 - "Paper Jam messages" on page 2-11 - "Paper jams" on page 3-28 - "Service checks" on page 2-24 for individual error messages • Additional information can be found at the following locations: - "User operator panel and Administration menus" on page 2-55 - "Theory of operation" on page 3-33 Diagnostic information 2-1
-
 1
1 -
2
-
3
-
4
-
5
-
6
-
7
-
8
-
9
-
10
-
11
-
12
-
13
-
14
-
15
-
16
-
17
-
18
-
19
-
20
-
21
-
22
-
23
-
24
-
25
-
26
-
27
-
28
-
29
-
 30
30 -
 31
31 -
 32
32 -
 33
33 -
 34
34 -
 35
35 -
 36
36 -
 37
37 -
 38
38 -
 39
39 -
 40
40 -
41
-
42
-
43
-
44
-
45
-
46
-
47
-
48
-
49
-
50
-
51
-
52
-
53
-
54
-
55
-
56
-
57
-
58
-
59
-
60
-
61
-
62
-
63
-
64
-
65
-
66
-
67
-
68
-
69
-
70
-
71
-
72
-
73
-
74
-
75
-
76
-
77
-
78
-
79
-
80
-
81
-
82
-
83
-
84
-
85
-
86
-
87
-
88
-
89
-
90
-
91
-
92
-
93
-
94
-
95
-
96
-
97
-
98
-
99
-
100
-
101
-
102
-
103
-
104
-
105
-
106
-
107
-
108
-
109
-
110
-
111
-
112
-
113
-
114
-
115
-
116
-
117
-
118
-
119
-
120
-
121
-
122
-
123
-
124
-
125
-
126
-
127
-
128
-
129
-
130
-
131
-
132
-
133
-
134
-
135
-
136
-
137
-
138
-
139
-
140
-
141
-
142
-
143
-
144
-
145
-
146
-
147
-
148
-
149
-
150
-
151
-
152
-
153
-
154
-
155
-
156
-
157
-
158
-
159
-
160
-
161
-
162
-
163
-
164
-
165
-
166
-
167
-
168
-
169
-
170
-
171
-
172
-
173
-
174
-
175
-
176
-
177
-
178
-
179
-
180
-
181
-
182
-
183
-
184
-
185
-
186
-
187
-
188
-
189
-
190
-
191
-
192
-
193
-
194
-
195
-
196
-
197
-
198
-
199
-
200
-
201
-
202
-
203
-
204
-
205
-
206
-
207
-
208
-
209
-
210
-
211
-
212
-
213
-
214
-
215
-
216
-
217
-
218
-
219
-
220
-
221
-
222
-
223
-
224
-
225
-
226
-
227
-
228
-
229
-
230
-
231
-
232
-
233
-
234
-
235
-
236
 |
 |