Lexmark X5495 User's Guide
Lexmark X5495 - Clr Inkjet P/s/c/f Adf USB 4800X1200 3.5PPM Manual
 |
UPC - 734646058568
View all Lexmark X5495 manuals
Add to My Manuals
Save this manual to your list of manuals |
Lexmark X5495 manual content summary:
- Lexmark X5495 | User's Guide - Page 1
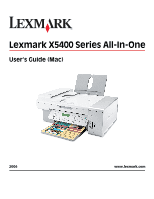
Lexmark X5400 Series All-In-One User's Guide (Mac) 2006 www.lexmark.com - Lexmark X5495 | User's Guide - Page 2
- Lexmark X5495 | User's Guide - Page 3
Performing printing and related tasks...10 Managing print jobs...17 Learning about the All-In-One software print options 18 Copying 22 Getting ...85 Understanding the printer 94 Understanding the printer parts...94 Understanding the software...106 Networking the printer 119 Networking overview - Lexmark X5495 | User's Guide - Page 4
print cartridge...128 Using genuine Lexmark print cartridges...128 Ordering supplies...129 Finding information about the printer...130 Contacting Customer Support...133 Troubleshooting 135 Setup troubleshooting...135 Print troubleshooting...141 Copy troubleshooting...151 Scan troubleshooting...153 - Lexmark X5495 | User's Guide - Page 5
in the user documentation, to a professional service person. This product is designed, tested, and approved to meet strict global safety standards with the use of specific Lexmark components. The safety features of some parts may not always be obvious. Lexmark is not responsible for the use of - Lexmark X5495 | User's Guide - Page 6
inkjet printers. instructions that came with it. • You do not force paper into the printer. 2 Before loading paper the first time, slide the paper guides out toward the edges of the paper support ink smudging. 3 Load the paper vertically in the center of the paper support, and adjust the paper guides - Lexmark X5495 | User's Guide - Page 7
banner paper into the printer first. 5 Make sure: • The paper is loaded in the center of the paper support. • The paper guides rest against the edges The stack height does not exceed 10 mm. • The paper is loaded in the center of the paper support. • The paper guides rest against the edges of the - Lexmark X5495 | User's Guide - Page 8
bars. 1 Load envelopes in the center of the paper support with the stamp location in the upper left corner. 2 Make sure: • The print side of the envelopes faces you. • The envelopes are designed for use with inkjet printers. • The paper guides rest against the edges of the envelopes. 1 2 Notes: • Do - Lexmark X5495 | User's Guide - Page 9
results loading them one at a time. 1 Load iron-on transfers with the print side of the transfer facing you. 2 Make sure: • You follow the loading instructions that came with the iron-on transfers. • The transfers are loaded in the center of the paper support. • The paper guides rest against the - Lexmark X5495 | User's Guide - Page 10
printers. Inexpensive and fade-resistant, it offers excellent image quality for everyday photo-printing projects. • Lexmark Premium Photo Paper-A heavier photo paper specifically designed to bond chemically with Lexmark inks . 3 From the Printer pop-up menu, side, see the instructions that came with - Lexmark X5495 | User's Guide - Page 11
applications do not support margin setting. 1 Load photo or glossy paper, with the glossy or printable side facing you. (If you are not sure which side is the printable side, see the instructions Print. b From the Printer pop-up menu, choose X5400 Series. c For Mac OS X version 10.4 or later, click - Lexmark X5495 | User's Guide - Page 12
, choose a card size. d Choose an orientation. e Click OK. 3 Customize the settings as needed in the Print dialog. a From the software application, click File Œ Print. b From the Printer pop-up menu, choose X5400 Series. c Click Print. Notes: • To avoid paper jams, do not force the cards into the - Lexmark X5495 | User's Guide - Page 13
d Choose a paper size. e Choose an orientation. f Click OK. 3 Customize the settings as needed in the Print dialog. a From the software application, click File ΠPrint. b From the Printer pop-up menu, choose X5400 Series. c From the third pop-up menu from the top, choose Quality & Media. d From the - Lexmark X5495 | User's Guide - Page 14
paper on the top cover. 4 Load only the first page of banner paper into the paper support with the leading edge of the banner going into the printer. 5 Adjust the left and right paper guides. 6 Customize the settings in the Page Setup dialog. a With your document open, choose File ΠPage Setup - Lexmark X5495 | User's Guide - Page 15
settings as needed in the Print dialog. a From the software application, click File Œ Print. b From the Printer pop-up menu, choose X5400 Series. c From the topics: • "Loading transparencies" on page 9 Printing multiple pages on one sheet 1 Load paper. 2 Customize the settings as needed in the - Lexmark X5495 | User's Guide - Page 16
cartridge installed. 1 Load paper. 2 Customize the settings in the Page Setup dialog as needed. 3 With a document open, click File ΠPrint. 4 From the Printer on page 108 Printing the last page first (reverse page order) For Mac OS X version 10.4.2 or later: 1 With a document open, click File ΠPrint - Lexmark X5495 | User's Guide - Page 17
For Mac OS X version 10.3.9: 1 With a document open, click File ΠPrint. 2 From the cartridge carrier returns to its home position. 2 Press to turn off the printer. To cancel a print job using the computer: 1 While the document is printing, click the printer icon on the dock. 2 From the queue window - Lexmark X5495 | User's Guide - Page 18
Applications ΠUtilities ΠPrint Center/Printer Setup Utility. 2 From the list of printers, double-click your printer. 3 From the printer page 17 Learning about the All-In-One software print options Choosing a paper size 1 With /photo, and transparency paper. To manually choose the paper type: 1 With - Lexmark X5495 | User's Guide - Page 19
-up menu in the center, choose Quality & Media. 4 From the Print Quality menu, select the appropriate print quality for the document: • Automatic-The printer sets the print quality for the paper type loaded (default setting). • Quick Print-Best for text-only documents with reduced print quality but - Lexmark X5495 | User's Guide - Page 20
not sure which side is the printable side, see the instructions that came with the paper.) 2 Load an original document facedown software" on page 92 Resetting All-In-One software settings to defaults 1 From the Finder desktop, double-click the Lexmark X5400 Series folder. 2 Double-click the Lexmark - Lexmark X5495 | User's Guide - Page 21
Related topics: • "Using the All-In-One Center" on page 112 • "Customizing scan settings from the Scan dialog" on page 44 Printing 21 - Lexmark X5495 | User's Guide - Page 22
instructions that came with it. • You do not force paper into the printer. 2 Before loading paper the first time, slide the paper guides out toward the edges of the paper support to avoid ink smudging. 3 Load the paper vertically in the center of the paper support, and adjust the paper guides to rest - Lexmark X5495 | User's Guide - Page 23
then print photos, text documents, magazine articles, newspapers, and other publications. You can scan a document for faxing. 1 Make sure the computer and the printer are on. 2 Open the top cover. 3 Place the original document or item facedown on the scanner glass in the upper left corner. Copying - Lexmark X5495 | User's Guide - Page 24
scanned image. Related topics: • "Understanding the parts of the printer" on page 95 Loading original documents into the Automatic Document the Automatic Document Feeder (ADF) paper stop. 2 Adjust the paper guide on the Automatic Document Feeder (ADF) tray to the width of the original document. 3 - Lexmark X5495 | User's Guide - Page 25
is not supported when using the Automatic Document Feeder (ADF). You can preview one page at a time when using the scanner. Automatic Document Feeder (ADF) paper capacity Load up to Make sure 15 sheets of: • Letter-size paper • A4 paper • Legal-size paper • You adjust the paper guide - Lexmark X5495 | User's Guide - Page 26
• Preprinted forms • Letterhead paper Make sure • You adjust the paper guide on the Automatic Document Feeder (ADF) tray to the width of the original media printed with metallic ink particles. • You avoid embossed designs. Related topics: • "Understanding the parts of the printer" on page 95 - Lexmark X5495 | User's Guide - Page 27
which side is the printable side, see the instructions that came with the paper.) 2 Place a . 9 Press or repeatedly until Paper Size appears. 10 Press . 11 Press or repeatedly until the size you on page 97 Collating copies using the computer The printer can sort multiple copy jobs. If you print two - Lexmark X5495 | User's Guide - Page 28
, see the instructions that came with the paper.) 2 Load an original document facedown on the scanner glass. 3 From the control panel, press Copy Mode. 4 Press . 5 Press or repeatedly until Repeat Image appears. 6 Press . 7 Press or repeatedly until the number of images you want to print on one page - Lexmark X5495 | User's Guide - Page 29
Managing copy jobs Canceling a copy job 1 Press . Scanning stops and the scanner bar returns to its home position. 2 Press to turn off the printer. Related topics: • "Using the control panel" on page 97 Copying 29 - Lexmark X5495 | User's Guide - Page 30
then print photos, text documents, magazine articles, newspapers, and other publications. You can scan a document for faxing. 1 Make sure the computer and the printer are on. 2 Open the top cover. 3 Place the original document or item facedown on the scanner glass in the upper left corner. Scanning - Lexmark X5495 | User's Guide - Page 31
scanned image. Related topics: • "Understanding the parts of the printer" on page 95 Loading original documents into the Automatic Document Feeder the Automatic Document Feeder (ADF) paper stop. 2 Adjust the paper guide on the Automatic Document Feeder (ADF) tray to the width of the original document. 3 Fan - Lexmark X5495 | User's Guide - Page 32
is not supported when using the Automatic Document Feeder (ADF). You can preview one page at a time when using the scanner. Automatic Document Feeder (ADF) paper capacity Load up to Make sure 15 sheets of: • Letter-size paper • A4 paper • Legal-size paper • You adjust the paper guide - Lexmark X5495 | User's Guide - Page 33
sure • You adjust the paper guide on the Automatic Document Feeder (ADF ink particles. • You avoid embossed designs. Related topics: • "Understanding the parts of the printer the printer is connected to a computer, and both the printer the printer is connected to a computer, and both the printer and - Lexmark X5495 | User's Guide - Page 34
menu, choose a destination folder or application for your scanned photo. 8 Select 10 Crop photos, if needed. For more information, see "Cropping photos using the software the printer is connected to a computer, and both the printer and the Lexmark X5400 Series folder. 4 Double-click the Lexmark X5400 - Lexmark X5495 | User's Guide - Page 35
is connected to a computer, and both the printer and the computer are on. 2 Load an original document or image facedown on the scanner glass. 3 From the Finder desktop, double-click the Lexmark X5400 Series folder. 4 Double-click the Lexmark X5400 Series Center icon. 5 Click Preview/Edit. 6 Click - Lexmark X5495 | User's Guide - Page 36
designated cropped area is saved or sent to an application. Related topics: • "Loading original documents on Lexmark X5400 Series Center icon. 4 Select Prompt for multiple pages. This option automatically scans all documents loaded into the ADF and creates a numbered file name according to the one - Lexmark X5495 | User's Guide - Page 37
. • When a scan job is saved as a PDF, the Save dialog will only prompt once. All scanned pages are saved to only one file since PDF supports multiple-page scanning. Related topics: • "Loading original documents into the Automatic Document Feeder" on page 24 Scanning clear images from magazines or - Lexmark X5495 | User's Guide - Page 38
OCR) software feature to scan a document and produce text you can edit with a word-processing application. Note: This function will work only if you have installed From the Finder desktop, double-click the Lexmark X5400 Series folder. 3 Double-click the Lexmark X5400 Series Center icon. 4 From the " - Lexmark X5495 | User's Guide - Page 39
the Lexmark X5400 Series folder. 3 Double-click the Lexmark X5400 sure the printer is connected to a computer, and both the printer and the application. 8 From the software application, click File ΠSave As. 9 Enter the file name, format, and location where you want the scanned image to be saved. 10 - Lexmark X5495 | User's Guide - Page 40
install the printer software for the first time. You can also change it as needed. 1 From the Finder desktop, double-click the Lexmark X5400 Series folder. 2 Double-click the Lexmark 7 From the Network All-in-One Selection dialog, select the printer you want to scan to your computer. Scanning 40 - Lexmark X5495 | User's Guide - Page 41
the scanner bar returns to its home position. 2 Press to turn off the printer. To cancel a scan using the software: 1 From the Finder desktop, double-click the Lexmark X5400 Series folder. 2 Double-click the Lexmark X5400 Series Center icon. 3 From the Progress dialog, click Cancel. Related topics - Lexmark X5495 | User's Guide - Page 42
42 Adjusting color settings when scanning You can manually adjust the color settings for optimum color output. 1 From the Finder desktop, double-click the Lexmark X5400 Series folder. 2 Double-click the Lexmark X5400 Series Center icon. 3 From the All-In-One Center, click Preview/Edit to open the - Lexmark X5495 | User's Guide - Page 43
, double-click the Lexmark X5400 Series folder. 2 Double-click the Lexmark X5400 Series Center icon application-Opens the scanned image in the specified application. Related topics: • "Saving a scanned image" on page 39 • "Using the All-In-One Center" on page 112 Cropping photos using the software - Lexmark X5495 | User's Guide - Page 44
Scan dialog. 1 From the Finder desktop, double-click the Lexmark X5400 Series folder. 2 Double-click the Lexmark X5400 Series Center icon. 3 Click Preview/Edit to open Note: Select Custom Settings to customize the scan setting manually instead of using a preset scan setting. Remove smudges and - Lexmark X5495 | User's Guide - Page 45
of ink on the list The list of applications in the Customize list is generated when you install the All-In-One software. You can expand this list to a maximum of 50 applications. You can add, remove, or modify an application in the Customize list. 1 From the Finder desktop, double-click the Lexmark - Lexmark X5495 | User's Guide - Page 46
Browse to navigate through the list of applications available on the computer. Click the application that you want to add to the Available Applications list. 3 Click OK. 4 From the File Type pop-up menu, choose the type of file you want to send to your chosen application. 5 Edit the display name if - Lexmark X5495 | User's Guide - Page 47
Resetting All-In-One software settings to defaults 1 From the Finder desktop, double-click the Lexmark X5400 Series folder. 2 Double-click the Lexmark X5400 Series Center icon. 3 Click Defaults. Related topics: • "Using the All-In-One Center" on page 112 • "Customizing scan settings from the Scan - Lexmark X5495 | User's Guide - Page 48
during a lightning storm. Choosing a fax connection You can connect the printer with equipment such as a telephone, an answering machine, or a computer modem. If problems occur, see "Setup troubleshooting" on page 135. Note: The printer is an analog device that works best when directly connected to - Lexmark X5495 | User's Guide - Page 49
equipment, use the telephone line adapter included in the box with the printer. 1 Connect one end of the telephone cord into the Line port of the printer. 2 Connect the adapter to the telephone line that came with the printer. Note: The UK adapter is shown. Your adapter may look different, but - Lexmark X5495 | User's Guide - Page 50
not function properly. 2 Connect your telecommunications equipment directly to the EXT port on the back of the printer. Warning-Potential Damage: Do not touch cables or the printer in the area shown while actively sending or receiving a fax. Country/region • Saudi Arabia • United Arab Emirates - Lexmark X5495 | User's Guide - Page 51
not function properly. 2 Connect your telecommunications equipment directly to the EXT port on the back of the printer. Warning-Potential Damage: Do not touch cables or the printer in the area shown while actively sending or receiving a fax. Country/region • Germany • Austria • Switzerland Faxing 51 - Lexmark X5495 | User's Guide - Page 52
is a plug installed in the EXT port of the printer. This plug is necessary for the proper functioning of the printer. Note: Do not telephone cord and a telephone wall jack. 2 Connect one end of the telephone cord into the LINE port of the printer. 3 Connect the other end of the telephone cord into - Lexmark X5495 | User's Guide - Page 53
topic, "Using an RJ11 adapter." 1 Make sure you have the following: • A telephone • Two telephone cords • A telephone wall jack 2 Connect one telephone cord to the LINE port of the printer, and then plug it into an active telephone wall jack. 3 Remove the protective plug from the EXT port of the - Lexmark X5495 | User's Guide - Page 54
, see the related topic, "Using an RJ11 adapter." 1 Make sure you have the following: • A telephone • An answering machine • Three telephone cords • A telephone wall jack 2 Connect one telephone cord into the LINE port of the printer, and then plug it into an active telephone wall jack. Faxing 54 - Lexmark X5495 | User's Guide - Page 55
the answering machine to the EXT port of the printer. Related topics: • "Getting the printer ready to fax" on page 48 Connecting to a computer with a modem Connect the printer to a computer with a modem to send faxes from the software application. Note: Setup steps may vary depending on your country - Lexmark X5495 | User's Guide - Page 56
the LINE port of the printer, and then plug it into an active telephone wall jack. 3 Remove the protective plug from the EXT port of the printer. 4 Connect a second telephone cord from the computer modem to the EXT port of the printer. Related topics: • "Getting the printer ready to fax" on page - Lexmark X5495 | User's Guide - Page 57
then print photos, text documents, magazine articles, newspapers, and other publications. You can scan a document for faxing. 1 Make sure the computer and the printer are on. 2 Open the top cover. 3 Place the original document or item facedown on the scanner glass in the upper left corner. Faxing 57 - Lexmark X5495 | User's Guide - Page 58
scanned image. Related topics: • "Understanding the parts of the printer" on page 95 Loading original documents into the Automatic Document the Automatic Document Feeder (ADF) paper stop. 2 Adjust the paper guide on the Automatic Document Feeder (ADF) tray to the width of the original document. 3 - Lexmark X5495 | User's Guide - Page 59
is not supported when using the Automatic Document Feeder (ADF). You can preview one page at a time when using the scanner. Automatic Document Feeder (ADF) paper capacity Load up to Make sure 15 sheets of: • Letter-size paper • A4 paper • Legal-size paper • You adjust the paper guide - Lexmark X5495 | User's Guide - Page 60
• Preprinted forms • Letterhead paper Make sure • You adjust the paper guide on the Automatic Document Feeder (ADF) tray to the width of the original media printed with metallic ink particles. • You avoid embossed designs. Related topics: • "Understanding the parts of the printer" on page 95 • - Lexmark X5495 | User's Guide - Page 61
include a calling card number as part of the fax number. • Enter a maximum of 64 digits in a fax number. • Press Pause / Redial to insert a three-second pause entry (1- 89) or Group Dial entry (90-99). Notes: • For instructions on how to add Speed Dial or Group Dial numbers using the computer, see - Lexmark X5495 | User's Guide - Page 62
number or press Phone Book to select a number from the Speed Dial or Group Dial list. For more information, see "Entering a fax number" on page 61. Note: To Press . 8 Enter the time you want to send the fax. 9 Press . 10 If the printer is not set to the 24 hour mode, press or repeatedly to select AM - Lexmark X5495 | User's Guide - Page 63
the fax transmission is unsuccessful to any of the numbers on the broadcast list, the unsuccessful numbers will be dialed again. Related topics: • "Using Hook Dial) The manual dialing feature lets you dial a telephone number while listening to the call through a speaker on the printer. It is useful - Lexmark X5495 | User's Guide - Page 64
printer automatically receives faxes, see "Setting the number of rings before receiving a fax automatically" on page 68. Related topics: • "Using the control panel" on page 97 Receiving a fax manually this service, it works with the printer. When regions. The printer supports two distinct Caller 64 - Lexmark X5495 | User's Guide - Page 65
: • Off-(Default). • Forward-The printer sends the fax to the designated fax number. • Print & Forward-The printer prints the fax and then sends it to appears. 8 Press . 9 Press or repeatedly until the setting you want appears. 10 Press . 11 Enter the number to which you want to forward the fax. 12 - Lexmark X5495 | User's Guide - Page 66
appears. 8 Press . 9 Press or repeatedly until the setting you want appears. 10 Press to print the report. Related topics: • "Using the control panel" on click the Lexmark X5400 Series folder. 2 Double-click the Fax Setup Utility icon. 3 Select the Speed Dials tab. 4 Set your Speed Dial list. To - Lexmark X5495 | User's Guide - Page 67
or repeatedly until the setting you want appears. 6 Press , and follow the instructions on the display. Use this View Add Remove Modify Print To View Phone Book Speed Dial and Group Dial entries in the Phone Book. Note: For instructions on how to add Speed Dial or Group Dial entries to the Phone - Lexmark X5495 | User's Guide - Page 68
to a single telephone line. If you subscribe to this service, you can program your printer to have a distinctive ring pattern and phone number for 8 Press . 9 Press or repeatedly until the ring pattern you want appears. 10 Press to save the setting. Related topics: • "Using the control panel" on - Lexmark X5495 | User's Guide - Page 69
10 Press to save the setting. 11 Make sure the Fax Auto Answer light is on. When the number of rings you set is detected, the printer PBX If the printer is being used fax number, the printer waits to recognize the PBX" feature enables the printer to dial the fax Behind PBX appears. 10 Press to save - Lexmark X5495 | User's Guide - Page 70
printer's Speed Dial list. Note: Only the fax numbers specified in the Address Book contact is reflected on the Speed Dial list. If there is more than one fax number for a contact, the application a maximum of 20 characters. 10 Press to save the setting. enter a maximum of 64 numbers. 14 Press to - Lexmark X5495 | User's Guide - Page 71
Fax Printing appears. 6 Press . 7 Press or repeatedly until Fax Footer appears. 8 Press . 9 Press or repeatedly until On appears. 10 Press . 11 During the initial setup of your printer, you were prompted to enter the date and time. If you have not entered this information: a Press twice. b Press or - Lexmark X5495 | User's Guide - Page 72
4 Press . 5 Press or repeatedly until Device Setup appears. 6 Press . 7 Press or until Host Fax Settings appears. 8 Press . 9 Press or until Block appears. 10 Press to save this setting. Related topics: • "Blocking junk faxes" on page 72 • "Using the control panel" on page 97 Blocking junk faxes If - Lexmark X5495 | User's Guide - Page 73
, double-click the Lexmark X5400 Series folder. 2 Double-click the Lexmark X5400 Series Fax Setup Utility icon. 3 From the Fax Setup Utility dialog, choose the printer from the Device pop-up menu. Note: If you are using a network printer to send a fax, the MAC address of your printer is shown on the - Lexmark X5495 | User's Guide - Page 74
fax machine. • Enter your name and fax number. Notes: - You can include a calling card number as part of the fax number. - Enter a maximum of 64 digits in a fax number. • Select incoming call options. • Select Auto Answer options. • Select whether you want to forward a fax, or print it and then - Lexmark X5495 | User's Guide - Page 75
. • Select when to print fax activity and confirmation reports. Speed Dials Create, add to, edit, or delete entries from the Speed Dial list, including Group Dial entries. 4 Click Save Settings after you finish customizing the settings. To change settings back to the factory default settings - Lexmark X5495 | User's Guide - Page 76
the memory card is being read or is transmitting data. Warning-Potential Damage: Do not touch cables, any network adapter, the memory card, or the printer in the area shown while actively printing, reading, or writing from the memory card. A loss of data can occur. Also, do not remove the memory - Lexmark X5495 | User's Guide - Page 77
message Memory Card Detected appears on the control panel display. If the printer does not read the memory card, remove and reinsert it. Notes: • The printer recognizes one memory card at a time. If you insert more than one memory card, a message appears on the display prompting you to remove all - Lexmark X5495 | User's Guide - Page 78
printer recognizes one active media device at a time. If you insert more than one media device, a message appears on the display prompting you to designate the device you want the printer or repeatedly until Computer appears. 5 Follow the instructions on the computer screen. Related topics: • " - Lexmark X5495 | User's Guide - Page 79
appears. Notes: • If photos on the memory card were taken on more than one date, selections will include Last Date and Date Range. • To choose a date (If you are not sure which side is the printable side, see the instructions that came with the paper.) For more information, see "Loading paper" on - Lexmark X5495 | User's Guide - Page 80
. For more information on making camera selections, see the documentation that came with your camera. 1 Connect a PictBridge-enabled digital camera to the printer. a Insert one end of the USB cable into the camera. Note: Use only the USB cable that came with the digital camera. b Insert the other - Lexmark X5495 | User's Guide - Page 81
detects the type of paper that has been loaded into the printer and adjusts the settings for you. 1 Setting will return to on the card were taken on more than one date 8 Press . 9 Press again. One or more proof sheets print. 10 Follow the instructions on the proof sheet to select which photos - Lexmark X5495 | User's Guide - Page 82
. (If you are not sure which side is the printable side, see the instructions that came with the paper.) For more information, see "Loading paper" on page the print job are displayed sequentially on the second line of the display. 10 Press Start Color or Start Black again. Related topics: • "Using - Lexmark X5495 | User's Guide - Page 83
enter the number of the photo you want to print, and then press . 10 Press Start Color or Start Black. 11 Press Start Color or Start Black again. . (If you are not sure which side is the printable side, see the instructions that came with the paper.) For more information, see "Loading paper" on page - Lexmark X5495 | User's Guide - Page 84
printer settings. 1 Load photo paper with the glossy or printable side facing you. (If you are not sure which side is the printable side, see the instructions -enabled digital camera to the printer, and use the buttons on the camera to select and print photos. 1 Insert one end of the USB cable into - Lexmark X5495 | User's Guide - Page 85
The printer recognizes one active media device at a time. If you insert more than one Error messages on the printer display" on page 170. • Values selected within the menu items are the settings used for Pictbridge printing if no explicit selection is made from the camera. 3 Follow the instructions - Lexmark X5495 | User's Guide - Page 86
open, choose File ΠPrint. b From the Printer pop-up menu, choose X5400 Series. c For Mac OS X version 10.4 or later, click Advanced. Otherwise, proceed to as needed in the Print dialog. a From the software application, click File ΠPrint. b From the Printer pop-up menu, choose X5400 Series. c Click - Lexmark X5495 | User's Guide - Page 87
images in black and white This setting is available only if there is a black print cartridge installed. 1 Load paper. 2 Customize the settings in the Page Setup dialog as needed. 3 With a document open, click File ΠPrint. 4 From the Printer pop-up menu, choose X5400 Series. Working with photos 87 - Lexmark X5495 | User's Guide - Page 88
printer and the computer are on. 2 Load an original image facedown on the scanner glass. 3 From the Finder desktop, double-click the Lexmark X5400 Series folder. 4 Double-click the Lexmark or application for your 10 Crop photos, if needed. For more information, see "Cropping photos using the software - Lexmark X5495 | User's Guide - Page 89
specified and numbered accordingly. • When a scan job is saved as a PDF, the Save dialog will only prompt once. All scanned pages are saved to only one file since PDF supports multiple-page scanning. Working with photos 89 - Lexmark X5495 | User's Guide - Page 90
as needed. 7 Click Scan. The scanned image opens in the specified application. 8 From the software application, click File Œ Save As. 9 Enter the file name, format, and location where you want the scanned image to be saved. 10 Click Save. Related topics: • "Loading original documents on the scanner - Lexmark X5495 | User's Guide - Page 91
, double-click the Lexmark X5400 Series folder. 2 Double-click the Lexmark X5400 Series Center icon. 3 From the All-In-One Center, click Preview/ Adjusting color settings when scanning" on page 42 Cropping photos using the software You can use the Auto-crop feature to highlight certain focal points - Lexmark X5495 | User's Guide - Page 92
One Center" on page 112 Enhancing photo print quality using the software 1 From the Finder desktop, double-click the Lexmark X5400 Series folder. 2 Double-click the Lexmark not sure which side is the printable side, see the instructions that came with the paper.) 2 Load an original document facedown - Lexmark X5495 | User's Guide - Page 93
page 24 Sharpening an image 1 From the Finder desktop, double-click the Lexmark X5400 Series folder. 2 Double-click the Lexmark X5400 Series Center icon. 3 Click Preview/Edit to open the Scan dialog. " on page 44 • "Enhancing photo print quality using the software" on page 92 Working with photos 93 - Lexmark X5495 | User's Guide - Page 94
Name Description 1 Black print cartridge 2 Color print cartridge Cartridges to be installed into the printer Note: Cartridge combinations vary depending on printer 5 Quick Setup sheet Initial setup directions 6 Installation software CD • Installation software for the printer • User's Guide: - Lexmark X5495 | User's Guide - Page 95
Feeder (ADF) exit tray Hold paper as it exits from the ADF. 8 Paper guide Keep paper straight when feeding. 9 Paper support Load paper. 10 Automatic Document Feeder (ADF) paper stop • Stop paper as it exits the ADF. • Support A4- and legal-size paper as it exits. 11 Scanner glass Copy, scan - Lexmark X5495 | User's Guide - Page 96
Access the print cartridges. 2 Print cartridge carrier Install, replace, or remove a print cartridge. 3 USB port Connect the printer to a computer line), ISDN (integrated services digital network), or cable modem to the printer. LINE 6 Power supply with port Connect the printer to a power source - Lexmark X5495 | User's Guide - Page 97
Using the control panel buttons and menus Using the control panel The display shows: • Printer status • Messages • Menus Press To 1 • Turn the printer on and off. • Stop the print, copy, scan, or fax process. 2 Copy Mode Access the copy default screen and make copies. Note: The mode is - Lexmark X5495 | User's Guide - Page 98
to the fax default screen. • Exit a menu or submenu, and return to the default copy, scan, fax, or photo card screen. • Clear current settings or error messages, and return to default settings. Understanding the printer 98 - Lexmark X5495 | User's Guide - Page 99
• Enter fax numbers. • Navigate an automated answering system. • Select letters when creating a Speed Dial list. • Type numbers to enter or edit the date and time shown on the display. 2 Auto Answer Set the printer to answer all incoming calls when the button light is on. Note: For information on - Lexmark X5495 | User's Guide - Page 100
Specify the type of the original document. Tools • Maintenance - View ink levels. - Clean cartridges. - Align cartridges. - Print a test page. • Device Setup-Customize printer setup settings. • Defaults-Customize printer settings. * Temporary setting. For information on saving temporary and other - Lexmark X5495 | User's Guide - Page 101
- View ink levels. - Clean cartridges. - Align cartridges. - Print a test page. • Device Setup-Customize printer setup settings. • Defaults-Customize printer settings. to the previous menus and make other setting selections. 10 Press Start Color or Start Black. Understanding the printer 101 - Lexmark X5495 | User's Guide - Page 102
Block faxes from the numbers you specify. Tools • Maintenance - View ink levels. - Clean cartridges. - Align cartridges. - Print a test page. • Device Setup-Customize printer setup settings. • Defaults-Customize printer settings. * Temporary setting. For information on saving temporary and other - Lexmark X5495 | User's Guide - Page 103
Type1, 2 Specify the type of paper loaded. Tools • Maintenance - View ink levels. - Clean cartridges. - Align cartridges. - Print a test page. • Device Setup-Customize printer setup settings. • Defaults-Reset printer settings to factory defaults. 1 Setting will return to factory default setting - Lexmark X5495 | User's Guide - Page 104
* appears next to the selected setting. Note: The printer reverts to the default setting of a temporary setting after two minutes of inactivity or if the printer is turned off. Temporary settings Copy Mode - Copies - Resize - - Lexmark X5495 | User's Guide - Page 105
appears. i Press . 3 To change one or more temporary settings into new default settings Installing another language control panel These instructions apply only if you received one or more additional language control panels with the printer. 1 Lift and remove the control panel (if one is installed - Lexmark X5495 | User's Guide - Page 106
at www.lexmark.com. 2 From the home page, navigate through the menu selection, and then click Drivers & Downloads. 3 Choose the printer and the printer driver for your operating system. 4 Follow the instructions on the computer screen to download the driver and install the printer software. Related - Lexmark X5495 | User's Guide - Page 107
on the desktop or was accidentally deleted: a Go to the Mac OS X drive where the printer software was installed. b Choose Library ΠPrinters ΠLexmark ΠLexmark X5400 Series folder. 2 Double-click the Uninstaller icon for your printer. 3 Complete the user authentication notice, and then click OK - Lexmark X5495 | User's Guide - Page 108
topics: • "Using the Print dialog" on page 108 Using the Print dialog You can open the Print dialog from almost any application: 1 With a document open, choose File Œ Print. The Print dialog appears. • For Mac OS X version 10.3: • For Mac OS X version 10.4 or later: Understanding the printer 108 - Lexmark X5495 | User's Guide - Page 109
available only in Mac OS X version 10.3. Note: This is activated only when the "Save as File" • PDF • Postscript option is selected. Scheduler Print Document Schedule a print job. You can choose to print a file immediately, put it on hold, or specify a time for the printer - Lexmark X5495 | User's Guide - Page 110
Note: This option is available only in Mac OS X version 10.4 or later. Cover Page Type Quality these print options: • All pages • Odd numbered pages • Even numbered pages Choose one of these options: • Use documents paper size • Scale to fit paper size Note blurring. Understanding the printer 110 - Lexmark X5495 | User's Guide - Page 111
Troubleshooting Order Supplies Contact Lexmark Software Version Rotate Quartz Filter Summary These buttons are at the bottom of the Print dialog: To Go to the Utility. Open the Help Center. Visit our Web site to order printer supplies. Visit our Web site. View the software version on installed - Lexmark X5495 | User's Guide - Page 112
Support. • Obtain software version information. To access Printer Services: 1 With a document open, click File Œ Print. 2 From the third pop-up menu from the top, choose Printer Services. Related topics: • "Using the Print dialog" on page 108 • "Using the Utility" on page 114 Using the All-In-One - Lexmark X5495 | User's Guide - Page 113
/Web page • To be faxed • To be edited (OCR) Send scanned image to Choose where to send scanned images, such as to File, to the Clipboard, or to an application. To add, remove, or modify an application in the list, see "Editing the Customize list" on page 45. For more information, see "Choosing - Lexmark X5495 | User's Guide - Page 114
The Utility is the central source for printer maintenance and helpful Web links. From here you can: • Install the print cartridges. • Print a test page. • Print an alignment page. • Clean the print cartridge nozzles. • Order ink or supplies. • Register your printer. Understanding the printer 114 - Lexmark X5495 | User's Guide - Page 115
X5400 Series Utility icon. • From an application: For Mac OS X version 10.3 or later: 1 With a document open, click File Œ Print. 2 From the third pop-up menu from the top, choose Printer Services. 3 Click Lexmark X5400 Series Utility. For Mac OS X version 10.4 or later: 1 With a document open - Lexmark X5495 | User's Guide - Page 116
default, Show preview when Scan button pressed on the printer is selected. 6 Click OK to close the Preferences dialog with your scan settings applied and go back to the scan job, or you can click the Customize list icon to edit the Available Applications list. Click to go to the Help Center for more - Lexmark X5495 | User's Guide - Page 117
want to use. d Click Select. Use Shared A list of all shared printers appears in the Printer Name window. a From the list of printers, choose the printer that you want to use. b Click Select. 2 Click Continue. Related topics: • "Installing the printer software" on page 106 Understanding the - Lexmark X5495 | User's Guide - Page 118
Using the Printer Setup Complete dialog The Printer Setup Complete dialog provides helpful options after successful installation. From here you can: • Check for special offers. • Print a test page. Related topics: • "Installing the printer software" on page 106 Understanding the printer 118 - Lexmark X5495 | User's Guide - Page 119
subnet. 1 Open the application that you want to use. The Network Selection sheet can be accessed through two different paths: If you are using Do this Lexmark Setup Assistant (during setup) a Install the printer software. For more information, see "Installing the printer software" on page 106 - Lexmark X5495 | User's Guide - Page 120
appear as a highlighted printer in the installation. If multiple printers appear in the list, make sure you select the printer with the correct IP address/MAC address. Sharing the printer on a network To let other Macintosh computers on your network that use Mac OS X version 10.3 or later use any - Lexmark X5495 | User's Guide - Page 121
5 Click Show All, and then click Sharing. 6 From the Services tab, select Windows Sharing. Note: Windows users should see the Windows documentation for information on adding a network printer connected to a Macintosh computer. Tips for using network adapters • Make sure the adapter connections are - Lexmark X5495 | User's Guide - Page 122
Maintaining the printer Print cartridges Installing print cartridges 1 Open the printer. 2 Remove the used print cartridge or cartridges. For more information, see "Removing a used print cartridge" on page 123. 3 If you are installing new print cartridges, remove the tape from the back and bottom of - Lexmark X5495 | User's Guide - Page 123
, print, copy, or fax job. Related topics: • "Removing a used print cartridge" on page 123 • "Aligning print cartridges" on page 124 Removing a used print cartridge 1 Make sure the printer is on. 2 Lift the scanner unit. The print cartridge carrier moves and stops at the loading position, unless the - Lexmark X5495 | User's Guide - Page 124
carrier lever to raise the cartridge carrier lid. 4 Remove the used print cartridge. Note: If you are removing both cartridges, repeat step 3 and step 4 for the second cartridge. Related topics: • "Installing print cartridges" on page 122 Aligning print cartridges 1 Load plain or heavyweight matte - Lexmark X5495 | User's Guide - Page 125
repeatedly until Clean Cartridges appears. 9 Press . A page prints, forcing ink through the print cartridge nozzles to clean them. 10 Print the document on page 127 Wiping the print cartridge nozzles and contacts 1 Remove the print cartridges. 2 Dampen a clean, lint-free cloth with water. 3 Gently - Lexmark X5495 | User's Guide - Page 126
. Related topics: • "Cleaning the print cartridge nozzles" on page 124 • "Preserving the print cartridges" on page 126 Preserving the print cartridges • Keep a new cartridge in its packaging until you are ready to install it. • Do not remove a cartridge from the printer except to replace, clean, or - Lexmark X5495 | User's Guide - Page 127
not use Lexmark Premium Photo Paper. Your print cartridges are not compatible with this type of paper. • Use a paper that is a heavier weight or bright white. CHECK PRINT CARTRIDGES If the document still does not have the print quality you want, follow these steps: 1 Align the print cartridges. For - Lexmark X5495 | User's Guide - Page 128
to the printer. For best results, use Lexmark supplies. Using genuine Lexmark print cartridges Lexmark printers, print cartridges, and photo paper are designed to perform together for superior print quality. If you receive an Out of Original Lexmark Ink message, the original Lexmark ink in the - Lexmark X5495 | User's Guide - Page 129
. • If you are using the printer without a computer, press Cancel. Lexmark's warranty does not cover damage caused by non-Lexmark ink or print cartridges. Ordering supplies Ordering print cartridges Lexmark X5400 Series models Item Part number Average cartridge standard page yield is up to1 - Lexmark X5495 | User's Guide - Page 130
box or on the Lexmark Web site at www.lexmark.com. User's Guide Description Where to find The User's Guide gives you instructions for setting up the printer and some basic instructions for using the printer. Note: If your printer supports Macintosh operating systems, see the Mac Help: 1 From the - Lexmark X5495 | User's Guide - Page 131
a computer, the Help gives you When you install the printer software, your printer's instructions for using the printer and other information Help will be installed. such as: • Using the software 1 From the Finder desktop, double-click the Lexmark X5400 Series folder. • Loading paper 2 Double - Lexmark X5495 | User's Guide - Page 132
that shipped with your printer. E-mail support For e-mail support, visit our Web site: www.lexmark.com. 1 Click CUSTOMER SUPPORT. 2 Click Technical Support. 3 Select your printer family. 4 Select your printer model. 5 From the Support Tools section, click e- Mail Support. 6 Complete the form, and - Lexmark X5495 | User's Guide - Page 133
free of defects in printer, or set forth at printer. materials and workmanship for a www.lexmark.com. period of 12 months after the 1 Click CUSTOMER SUPPORT. original date of purchase. 2 Click Warranty Information. 3 From the Statement of Limited Warranty section, click Inkjet & All-In-One - Lexmark X5495 | User's Guide - Page 134
Is contact information available online? Yes. You can access the Lexmark home page on the World Wide Web at www.lexmark.com. Maintaining the printer 134 - Lexmark X5495 | User's Guide - Page 135
. Note: If you cannot understand the language on the display, see "Resetting the printer to factory default settings" on page 175. Power button is not lit These are possible solutions. Try one or more of the following: PRESS POWER BUTTON Make sure the printer is on by pressing . Troubleshooting 135 - Lexmark X5495 | User's Guide - Page 136
the light is not on, press . Software does not install These are possible causes and solutions. Try one or more of the following: CHECK YOUR OPERATING SYSTEM The following operating systems are supported: • Windows 2000 • Windows XP • Windows Vista • Mac OS X CHECK YOUR SYSTEM REQUIREMENTS Check - Lexmark X5495 | User's Guide - Page 137
software" on page 175. 2 If the software still does not install correctly, visit our Web site at www.lexmark.com to check for the latest software. a In all countries or regions except the United States, select your country or region. b Click the links for drivers or downloads. c Select your printer - Lexmark X5495 | User's Guide - Page 138
tape have been removed. 3 Reinsert the cartridges. 1 2 MAKE SURE THE PRINTER IS SET AS THE DEFAULT PRINTER AND IS NOT ON HOLD OR PAUSED To set printer as default 1 From the Finder desktop, choose Applications ΠUtilities ΠPrint Center or Printer Setup Utility, depending on the operating system - Lexmark X5495 | User's Guide - Page 139
software" on page 175. 2 If the software still does not install correctly, visit our Web site at www.lexmark.com to check for the latest software. a In all countries or regions except the United States, select your country or region. b Click the links for drivers or downloads. c Select your printer - Lexmark X5495 | User's Guide - Page 140
or photo cartridge, make sure it is properly installed in the left carrier. For more information, see the related topic below. MAKE SURE THE LEXMARK PRINTER DRIVER IS SET AS THE DEFAULT PRINTER AND IS NOT ON HOLD OR PAUSED To set the printer as default 1 From the Finder desktop, choose Applications - Lexmark X5495 | User's Guide - Page 141
a document to print. ADJUST THE COLOR AND PRINT SPEED You may need to adjust the color and print speed. CHECK THE LEVEL OF INK IN THE PRINT CARTRIDGES 1 From the Finder desktop, double-click the Lexmark X5400 Series folder. 2 Double-click the Lexmark X5400 Series Utility icon. Troubleshooting 141 - Lexmark X5495 | User's Guide - Page 142
on a cartridge, the ink level is low. Install a new cartridge. Improving print quality These are possible solutions. Try one or more of the following: CHECK PAPER • Use the appropriate paper for the document. If you are printing photos or other high-quality images, for best results use Lexmark Photo - Lexmark X5495 | User's Guide - Page 143
Dark print • Faded print • Incorrect colors • Light and dark bands in print These are possible solutions. Try one or more of the following: • Skewed lines • Smudges • Streaks • White lines in print CHECK INK Check the ink levels, and install new print cartridges if necessary. Troubleshooting 143 - Lexmark X5495 | User's Guide - Page 144
PRINTED To avoid ink smudging when you Lexmark photo papers. CHECK PAPER CONDITION Use only new, unwrinkled paper. REMOVING AND REINSTALLING THE SOFTWARE Software may not be installed correctly. Poor quality at the edges of the page These are possible causes and solutions. Try one Troubleshooting 144 - Lexmark X5495 | User's Guide - Page 145
OK. MAKE SURE PAPER SIZE MATCHES THE PRINTER SETTING 1 From the software application, click File ΠPage Setup. 2 From the "Format for" pop-up menu, choose X5400 Series. 3 From the Paper Size pop-up menu, check the paper size. CLEAN PRINT CARTRIDGE NOZZLES For more information, see "Cleaning the - Lexmark X5495 | User's Guide - Page 146
paper. 2 From the Finder desktop, double-click the Lexmark X5400 Series folder. 3 Double-click the Lexmark X5400 Series Utility icon. 4 From the Maintenance tab, click Print Alignment Page. 5 Follow the instructions on the computer screen. CLEAN THE PRINT CARTRIDGES You may need to clean the print - Lexmark X5495 | User's Guide - Page 147
the print nozzles located on the bottom of the cartridges. MAKE SURE THE CARTRIDGES ARE PROPERLY INSTALLED With the front of the printer facing you, check for proper print cartridge installation. If you are using a color cartridge, make sure it is properly installed in the right carrier. If you are - Lexmark X5495 | User's Guide - Page 148
see the documentation that came with the application. PERFORM MAINTENANCE ON THE PRINT CATRIDGES You may need to clean the print cartridge nozzles. Print is too dark or smudged These are possible solutions. Try one or more of the following: MAKE SURE THE INK DRY BEFORE HANDLING THE PAPER Remove the - Lexmark X5495 | User's Guide - Page 149
. ALIGN THE PRINT CARTRIDGES 1 Load plain paper. 2 From the Finder desktop, double-click the Lexmark X5400 Series folder. 3 Double-click the Lexmark X5400 Series Utility icon. 4 From the Maintenance tab, click Print Alignment Page. 5 Follow the instructions on the computer screen. Troubleshooting - Lexmark X5495 | User's Guide - Page 150
. Try one or more of the following: CHECK THE STATUS OF THE HOST COMPUTER AND PRINTER Make sure: • The host computer is on and is directly connected to the printer. • The host computer can print to the printer. • The printer is shown as Shared in the Printer Browser list. CHECK THE PRINTER STATUS To - Lexmark X5495 | User's Guide - Page 151
MEMORY CARDS Remove any memory cards from the printer. CHECK MESSAGES If an error message appears on the display, see "Error messages on the printer display" on page 170. Copy troubleshooting Copier does not respond These are possible solutions. Try one or more of the following: CHECK MESSAGES - Lexmark X5495 | User's Guide - Page 152
is displayed, see "Error messages on the printer display" on page 170. CHECK INK Check the ink levels, and install a new print cartridge if necessary. CLEAN THE SCANNER GLASS If the scanner glass is dirty, gently wipe it with a clean, lint-free cloth dampened with water. REVIEW STEPS TO IMPROVE - Lexmark X5495 | User's Guide - Page 153
the size of the original document that you are copying. Scan troubleshooting Scanner does not respond These are possible solutions. Try one or more of the following: CHECK MESSAGES If an error message is displayed, see "Error messages on the printer display" on page 170. CHECK POWER If the light is - Lexmark X5495 | User's Guide - Page 154
solutions. Try one or more of the following: CHECK MESSAGES If an error message is displayed, see "Error messages on the printer display" on page 170. CLEAN THE SCANNER GLASS If the scanner glass is dirty, gently wipe it with a clean, lint-free cloth dampened with water. Troubleshooting 154 - Lexmark X5495 | User's Guide - Page 155
-click the Lexmark X5400 Series folder. 2 Double-click the Lexmark X5400 Series application SELECT A DIFFERENT APPLICATION 1 From the error dialog, click Cancel. 2 From the All-In-One Center, choose a different application from the "Send scanned image to" menu. 3 Scan the document. Troubleshooting - Lexmark X5495 | User's Guide - Page 156
see "Removing and reinstalling the software" on page 175. Fax troubleshooting Cannot send or receive a fax These are possible solutions. Try one or more of the following: CHECK MESSAGES If an error message is displayed, follow the instructions on the display. MAKE SURE THE PRINTER IS ON If the light - Lexmark X5495 | User's Guide - Page 157
if applicable: printer to that wall jack. REVIEW DIGITAL PHONE SERVICE CHECKLIST support analog use. For more information, contact your DSL provider. • If you are using a PBX telephone service, make sure you are connecting to an analog connection on the PBX. If none exists, consider installing the printer - Lexmark X5495 | User's Guide - Page 158
SERVICE? Voice mail offered through your local telephone company may disrupt fax transmissions. To enable both voice mail and the printer where you are operating the printer appears. 10 Press to save the setting. IS YOUR PRINTER MEMORY FULL? Change the setting appears. 10 Press . Troubleshooting 158 - Lexmark X5495 | User's Guide - Page 159
printer will answer after the preset number of telephone rings. • If you are using a distinctive ring, see "Setting the distinctive ring" on page 68. CHECK INK Check the ink levels, and install a new cartridge setting. 10 To one or more of the following: CHECK MODE SELECTION To make sure the printer - Lexmark X5495 | User's Guide - Page 160
the computer" on page 66. • You can also dial the telephone number manually. BE SURE THAT PRINTER IS DETECTING A DIAL TONE • See "Sending a fax while listening to a Dial Method appears. 9 Press . 10 Press or repeatedly until Dial Behind PBX appears. 11 Press to save this setting. Troubleshooting 160 - Lexmark X5495 | User's Guide - Page 161
been a problem with the quality of the telephone line connection. • Increase the fax scan resolution. CHECK INK Check the ink levels, and install a new print cartridge if necessary. Caller ID information is not displayed CALLER ID PATTERN MAY NOT BE SET CORRECTLY The printer supports two distinct - Lexmark X5495 | User's Guide - Page 162
it does not support: • Your Error These are possible causes and solutions. Try one or more of the following: CHECK PHONE LINE Resend the fax. There may have been a problem or repeatedly until a lower speed appears. 10 Press . Notes: • The lower the 12 If the problem persists, repeat the previous - Lexmark X5495 | User's Guide - Page 163
time" on page 62. Phone Line Error These are possible causes and solutions. Try one or more of the following: REVIEW DIGITAL PHONE SERVICE CHECKLIST The fax modem is an analog device. Certain devices can be connected to the printer so that digital telephone services can be used. • If you are - Lexmark X5495 | User's Guide - Page 164
none exists, consider installing an analog telephone line for the fax machine. For more information on faxing when using a PBX telephone service, see "Setting up are secure, if applicable: • Power supply • Telephone • Handset • Answering machine Jams and misfeeds troubleshooting How to clear and - Lexmark X5495 | User's Guide - Page 165
Paper jam in the Automatic Document Feeder (ADF) 1 Flip open the ADF by grasping the notch in the left side of the ADF and pulling up. 2 Firmly grasp the paper, and gently pull it out. Troubleshooting 165 - Lexmark X5495 | User's Guide - Page 166
MANUALLY 1 Press to turn off the printer. 2 Firmly grasp the paper, and gently pull it out. 3 Press to turn the printer back on. Paper jam in the paper support 1 Press to turn off the printer. 2 Firmly grasp the paper, and gently pull it out. 3 Press to turn the printer back on. Troubleshooting - Lexmark X5495 | User's Guide - Page 167
Specific loading instructions for supported paper and Printer does not feed paper, envelopes, or specialty media These are possible solutions. Try one or more of the following: CHECK FOR PAPER JAMS Check for and clear any paper jams. For more information, see "Jams and misfeeds troubleshooting - Lexmark X5495 | User's Guide - Page 168
. To resume print jobs: 1 From the Finder desktop, choose Applications ΠUtilities ΠPrint Center or Printer Setup Utility, depending on the operating system version you are using. 2 From the list of printers, double-click your printer. The printer pop-up menu appears. 3 If you want to resume all - Lexmark X5495 | User's Guide - Page 169
? For more information, see "Loading paper" on page 6. Note: Do not force paper into the printer. Memory card reader and PictBridge troubleshooting Memory card cannot be inserted These are possible solutions. Try one or more of the following: CHECK MEMORY CARD TYPE Make sure that the type of memory - Lexmark X5495 | User's Guide - Page 170
only plain, unmarked paper for aligning the cartridge. The printer will read any markings on used paper, which could cause the alignment error message to appear. Cartridge Error (1102, 1203, 1204, or 120F) 1 Remove the print cartridges, and close the cartridge carrier lids. 2 Disconnect the power - Lexmark X5495 | User's Guide - Page 171
not reappear, reinsert the color print cartridge. 7 If the error reappears, replace the color print cartridge with a new one. Black Ink Low / Color Ink Low / Photo Ink Low 1 Check the indicated ink level or levels, and install a new print cartridge or cartridges if necessary. To order supplies, see - Lexmark X5495 | User's Guide - Page 172
If the error: • Does not reappear, the problem has been corrected. • Reappears, replace the print cartridge with a new one. Left Cartridge Missing / Right Cartridge Missing One or both print cartridges are missing or not installed properly. For more information, see "Installing print cartridges" on - Lexmark X5495 | User's Guide - Page 173
send or receive. 5 Resend the fax. SET THE PRINTER TO SCAN AFTER DIALING 1 From the control panel, . 9 Press or repeatedly until After Dial appears. 10 Press . No images have been selected You have not card or flash drive from the printer, or turned off the printer, before scanning the photo proof - Lexmark X5495 | User's Guide - Page 174
. 1 Make sure you completely fill in only one circle for each option. 2 Press to continue. Photo size error. Photo must fit on page. There are one or more photos larger than the paper size you selected on the printer menu. 1 Press to clear the error message. 2 Press or repeatedly until Paper Size - Lexmark X5495 | User's Guide - Page 175
a communications error message appears when you try to use the printer, you may need to remove and reinstall the printer software. 1 Close all open software applications. 2 From the Finder desktop, double-click the Lexmark X5400 Series folder. 3 Double-click the Uninstaller icon. Troubleshooting 175 - Lexmark X5495 | User's Guide - Page 176
the computer screen to remove the printer software. 5 Restart the computer before reinstalling the printer software. 6 Insert the CD, and then follow the instructions on the computer screen to reinstall the software. Related topics: • "Installing the printer software" on page 106 Troubleshooting 176 - Lexmark X5495 | User's Guide - Page 177
could include technical inaccuracies or typographical errors. Changes are periodically made to the services, except those expressly designated by the manufacturer, are the user's responsibility. © 2008 Lexmark International, Inc. All rights reserved. UNITED STATES GOVERNMENT RIGHTS This software - Lexmark X5495 | User's Guide - Page 178
Lexmark and Lexmark with diamond design are trademarks of Lexmark International, Inc., registered in the United States and/or other countries. PerfectFinish is a trademark of Lexmark that could damage your product hardware or software. CAUTION-POTENTIAL INJURY: A CAUTION identifies something - Lexmark X5495 | User's Guide - Page 179
installation. This equipment generates, uses, and can radiate radio frequency energy and, if not installed and used in accordance with the instructions information statement should be directed to: Director of Lexmark Technology & Services Lexmark International, Inc. 740 West New Circle Road Lexington - Lexmark X5495 | User's Guide - Page 180
of the directives has been signed by the Director of Manufacturing and Technical Support, Lexmark International, Inc., S.A., Boigny, France. This product satisfies the Class B about recycling options, visit the Lexmark Web site at www.lexmark.com for your local sales office phone number. Notices 180 - Lexmark X5495 | User's Guide - Page 181
Product disposal Do not dispose of the printer or supplies in the same manner as normal household waste. -2006. X: Indicates that the content of the toxic and hazardous substance in at least one homogenous material of the part exceeds the concentration limit requirement as described in SJ/T11363-2006 - Lexmark X5495 | User's Guide - Page 182
service. If you experience trouble with this equipment, for repair or warranty information, contact Lexmark International, Inc. at www.lexmark.com or your Lexmark has been identified as a major nationwide problem. It is recommended that the customer install an appropriate AC surge arrestor in the AC - Lexmark X5495 | User's Guide - Page 183
This product meets the applicable Industry Canada technical specifications. nationwide problem. It is recommended that the customer install an appropriate AC surge arrestor in the AC outlet to which this device is connected. An appropriate AC surge arrestor is defined as one - Lexmark X5495 | User's Guide - Page 184
User Instructions. The services. This equipment shall not be set up to make automatic calls to the Telecom's 111 Emergency Service 10 call attempts to the same number within any 30 minute period for any single manual the end of one call attempt and référence Lexmark : 14B5123) devant être installé sur - Lexmark X5495 | User's Guide - Page 185
Questo prodotto richiede un filtro toni Billing svizzero, (codice Lexmark 14B5109), da installare su tutte le linee che ricevono impulsi the power switch n/a is turned off. The power consumption levels listed in the previous table represent time-averaged measurements. Instantaneous power draws may - Lexmark X5495 | User's Guide - Page 186
or its suppliers, governs your use of any Software Program installed on or provided by Lexmark for use in connection with your Lexmark product. The term "Software Program" includes machine-readable instructions, audio/visual content (such as images and recordings), and associated media, printed - Lexmark X5495 | User's Guide - Page 187
TO THE MAXIMUM EXTENT PERMITTED BY APPLICABLE LAW, LEXMARK AND ITS SUPPLIERS PROVIDE THE SOFTWARE PROGRAM "AS IS" AND HEREBY one (1) copy of the Software Program. The term "Use" means storing, loading, installing, executing, or displaying the Software Program. If Lexmark has licensed the Software - Lexmark X5495 | User's Guide - Page 188
reverse compile or otherwise translate the Software Program, except as and to the extent expressly permitted to do so by applicable law for the purposes of inter-operability, error correction, and security testing. If you have such statutory rights, you will notify Lexmark in writing of any intended - Lexmark X5495 | User's Guide - Page 189
if applicable, Lexmark relating to your Use of the Software Program). To the extent any Lexmark policies or programs for support services Lexmark warrants that this product: -Is manufactured from new parts, or new and serviceable used parts, which perform like new parts -Is, during normal use, free - Lexmark X5495 | User's Guide - Page 190
period. For products no longer covered by a Lexmark warranty, technical support may not be available or only be available for a fee. Extent of limited warranty We do not warrant uninterrupted or error-free operation of any product. Warranty service does not include repair of failures caused by - Lexmark X5495 | User's Guide - Page 191
or a Remarketer for this product under this limited warranty, you may recover actual damages up to the limit set forth in the following paragraph. Lexmark's liability for actual damages from any cause whatsoever will be limited to the amount you paid for the product that caused the damages. This
-
 1
1 -
 2
2 -
 3
3 -
 4
4 -
 5
5 -
 6
6 -
 7
7 -
8
-
9
-
10
-
11
-
12
-
13
-
14
-
15
-
16
-
17
-
18
-
19
-
20
-
21
-
22
-
23
-
24
-
25
-
26
-
27
-
28
-
29
-
30
-
31
-
32
-
33
-
34
-
35
-
36
-
37
-
38
-
39
-
40
-
41
-
42
-
43
-
44
-
45
-
46
-
47
-
48
-
49
-
50
-
51
-
52
-
53
-
54
-
55
-
56
-
57
-
58
-
59
-
60
-
61
-
62
-
63
-
64
-
65
-
66
-
67
-
68
-
69
-
70
-
71
-
72
-
73
-
74
-
75
-
76
-
77
-
78
-
79
-
80
-
81
-
82
-
83
-
84
-
85
-
86
-
87
-
88
-
89
-
90
-
91
-
92
-
93
-
94
-
95
-
96
-
97
-
98
-
99
-
100
-
101
-
102
-
103
-
104
-
105
-
106
-
107
-
108
-
109
-
110
-
111
-
112
-
113
-
114
-
115
-
116
-
117
-
118
-
119
-
120
-
121
-
122
-
123
-
124
-
125
-
126
-
127
-
128
-
129
-
130
-
131
-
132
-
133
-
134
-
135
-
136
-
137
-
138
-
139
-
140
-
141
-
142
-
143
-
144
-
145
-
146
-
147
-
148
-
149
-
150
-
151
-
152
-
153
-
154
-
155
-
156
-
157
-
158
-
159
-
160
-
161
-
162
-
163
-
164
-
165
-
166
-
167
-
168
-
169
-
170
-
171
-
172
-
173
-
174
-
175
-
176
-
177
-
178
-
179
-
180
-
181
-
182
-
183
-
184
-
185
-
186
-
187
-
188
-
189
-
190
-
191
 |
 |

Lexmark X5400 Series All-In-One
User's Guide (Mac)
2006
www.lexmark.com