Lexmark X5495 User's Guide - Page 114
Using the Fax Setup Utility, Using the Utility, Prompt for multiple s, Lexmark X5400 Series
 |
UPC - 734646058568
View all Lexmark X5495 manuals
Add to My Manuals
Save this manual to your list of manuals |
Page 114 highlights
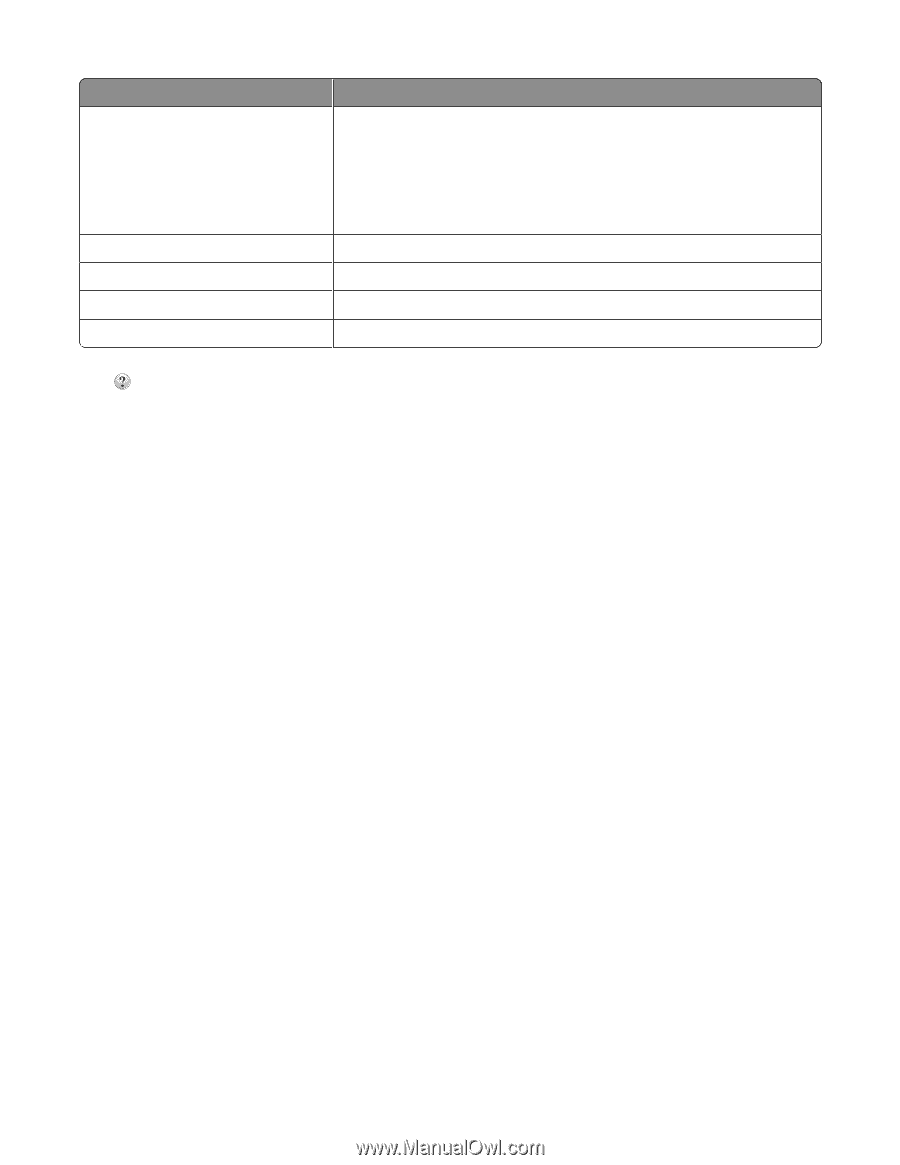
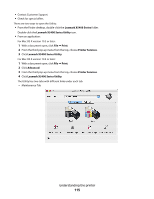
From here Prompt for multiple pages Prompt to name each page Defaults Preview/Edit Scan You can Scan multiple pages using the current scan settings. You are prompted to place the next item on the scanner glass after a page is scanned. If you still have more pages to scan, click Scan. When the multiple-page scan is complete, click Done. Do not select Prompt for multiple pages if you are scanning only a single item. Enter a filename for every page or item scanned. Revert to factory default settings. Open the Scan dialog to view the image, and adjust the scan settings. Start scanning. Click to go to the Help Center for more information. Related topics: • "Scanning" on page 30 • "Working with photos using the computer" on page 85 Using the Fax Setup Utility Use this utility to adjust how faxes are sent and received. When you save the settings, they apply to every fax you send or receive. You can also use this utility to create and edit the Speed Dial list. 1 From the Finder desktop, double-click the Lexmark X5400 Series folder. 2 Double-click the Fax Setup Utility icon. 3 From the Device menu, select your printer. Customize your settings as needed. Note: For a list of available options, see "Customizing settings using the Fax Setup Utility" on page 73. 4 Click Save Settings after you finish customizing the settings. 5 Close the Fax Setup Utility. Related topics: • "Customizing settings using the Fax Setup Utility" on page 73 Using the Utility The Utility is the central source for printer maintenance and helpful Web links. From here you can: • Install the print cartridges. • Print a test page. • Print an alignment page. • Clean the print cartridge nozzles. • Order ink or supplies. • Register your printer. Understanding the printer 114
-
 1
1 -
2
-
3
-
4
-
5
-
6
-
7
-
8
-
9
-
10
-
11
-
12
-
13
-
14
-
15
-
16
-
17
-
18
-
19
-
20
-
21
-
22
-
23
-
24
-
25
-
26
-
27
-
28
-
29
-
30
-
31
-
32
-
33
-
34
-
35
-
36
-
37
-
38
-
39
-
40
-
41
-
42
-
43
-
44
-
45
-
46
-
47
-
48
-
49
-
50
-
51
-
52
-
53
-
54
-
55
-
56
-
57
-
58
-
59
-
60
-
61
-
62
-
63
-
64
-
65
-
66
-
67
-
68
-
69
-
70
-
71
-
72
-
73
-
74
-
75
-
76
-
77
-
78
-
79
-
80
-
81
-
82
-
83
-
84
-
85
-
86
-
87
-
88
-
89
-
90
-
91
-
92
-
93
-
94
-
95
-
96
-
97
-
98
-
99
-
100
-
101
-
102
-
103
-
104
-
105
-
106
-
107
-
108
-
 109
109 -
 110
110 -
 111
111 -
 112
112 -
 113
113 -
 114
114 -
 115
115 -
 116
116 -
 117
117 -
 118
118 -
 119
119 -
120
-
121
-
122
-
123
-
124
-
125
-
126
-
127
-
128
-
129
-
130
-
131
-
132
-
133
-
134
-
135
-
136
-
137
-
138
-
139
-
140
-
141
-
142
-
143
-
144
-
145
-
146
-
147
-
148
-
149
-
150
-
151
-
152
-
153
-
154
-
155
-
156
-
157
-
158
-
159
-
160
-
161
-
162
-
163
-
164
-
165
-
166
-
167
-
168
-
169
-
170
-
171
-
172
-
173
-
174
-
175
-
176
-
177
-
178
-
179
-
180
-
181
-
182
-
183
-
184
-
185
-
186
-
187
-
188
-
189
-
190
-
191
 |
 |