Lexmark X5495 User's Guide - Page 158
Tools, Device Setup, Country Code, Fax Setup, Dialing and Sending, After Dial, ISABLE, AITING
 |
UPC - 734646058568
View all Lexmark X5495 manuals
Add to My Manuals
Save this manual to your list of manuals |
Page 158 highlights
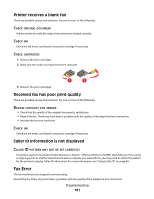
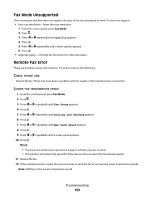
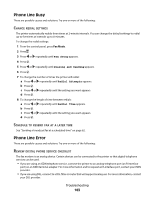
DISABLE CALL WAITING TEMPORARILY Call Waiting can disrupt fax transmissions. Disable this feature before sending or receiving a fax. Call your telephone company to obtain the keypad sequence for temporarily disabling Call Waiting. DO YOU HAVE VOICE MAIL SERVICE? Voice mail offered through your local telephone company may disrupt fax transmissions. To enable both voice mail and the printer to answer calls: • See "Setting the distinctive ring" on page 68. Setting selections include single ring, double ring, triple ring, and any ring. • Consider adding a second telephone line for the printer. CHECK COUNTRY CODE Make sure the country code has been set for the country or region where you are operating the printer: 1 From the control panel, press Fax Mode. 2 Press . 3 Press or repeatedly until Tools appears. 4 Press . 5 Press or repeatedly until Device Setup appears. 6 Press . 7 Press or repeatedly until Country Code appears. 8 Press . 9 Press or repeatedly until the country or region where you are operating the printer appears. 10 Press to save the setting. IS YOUR PRINTER MEMORY FULL? Change the setting to Scan after Dial. 1 From the control panel, press Fax Mode. 2 Press . 3 Press or repeatedly until Fax Setup appears. 4 Press . 5 Press or repeatedly until Dialing and Sending appears. 6 Press . 7 Press or repeatedly until Scan appears. 8 Press . 9 Press or repeatedly until After Dial appears. 10 Press . Troubleshooting 158
-
 1
1 -
2
-
3
-
4
-
5
-
6
-
7
-
8
-
9
-
10
-
11
-
12
-
13
-
14
-
15
-
16
-
17
-
18
-
19
-
20
-
21
-
22
-
23
-
24
-
25
-
26
-
27
-
28
-
29
-
30
-
31
-
32
-
33
-
34
-
35
-
36
-
37
-
38
-
39
-
40
-
41
-
42
-
43
-
44
-
45
-
46
-
47
-
48
-
49
-
50
-
51
-
52
-
53
-
54
-
55
-
56
-
57
-
58
-
59
-
60
-
61
-
62
-
63
-
64
-
65
-
66
-
67
-
68
-
69
-
70
-
71
-
72
-
73
-
74
-
75
-
76
-
77
-
78
-
79
-
80
-
81
-
82
-
83
-
84
-
85
-
86
-
87
-
88
-
89
-
90
-
91
-
92
-
93
-
94
-
95
-
96
-
97
-
98
-
99
-
100
-
101
-
102
-
103
-
104
-
105
-
106
-
107
-
108
-
109
-
110
-
111
-
112
-
113
-
114
-
115
-
116
-
117
-
118
-
119
-
120
-
121
-
122
-
123
-
124
-
125
-
126
-
127
-
128
-
129
-
130
-
131
-
132
-
133
-
134
-
135
-
136
-
137
-
138
-
139
-
140
-
141
-
142
-
143
-
144
-
145
-
146
-
147
-
148
-
149
-
150
-
151
-
152
-
 153
153 -
 154
154 -
 155
155 -
 156
156 -
 157
157 -
 158
158 -
 159
159 -
 160
160 -
 161
161 -
 162
162 -
 163
163 -
164
-
165
-
166
-
167
-
168
-
169
-
170
-
171
-
172
-
173
-
174
-
175
-
176
-
177
-
178
-
179
-
180
-
181
-
182
-
183
-
184
-
185
-
186
-
187
-
188
-
189
-
190
-
191
 |
 |