Lexmark X5495 User's Guide - Page 73
Customizing settings using the Fax Setup Utility, Lexmark X5400 Series
 |
UPC - 734646058568
View all Lexmark X5495 manuals
Add to My Manuals
Save this manual to your list of manuals |
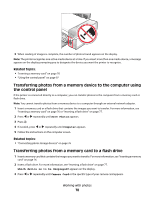
Page 73 highlights
c Enter a phone number. Note: You can enter a maximum of 64 numbers. d Press . e If you want to enter a corresponding name, enter it using the keypad buttons. f Press . g If you want to enter additional numbers: 1 Press . 2 Repeat step c through step f. Note: You can enter up to 50 phone numbers. h If you do not want to enter additional numbers: 1 Press or repeatedly until No appears. 2 Press . 12 If you want to block all faxes that do not provide a Caller ID number: a Press or repeatedly until Block No-ID appears. b Press . c Press or repeatedly until On appears. d Press to save the setting. 13 If you want to print a list of blocked faxes: a Press or repeatedly until Print appears. b Press to print the list. Related topics: • "Blocking unwanted changes to fax settings" on page 72 • "Using the control panel" on page 97 Customizing settings using the Fax Setup Utility You can adjust the fax settings in the Fax Setup Utility. These settings apply to the faxes you send or receive. 1 From the Finder desktop, double-click the Lexmark X5400 Series folder. 2 Double-click the Lexmark X5400 Series Fax Setup Utility icon. 3 From the Fax Setup Utility dialog, choose the printer from the Device pop-up menu. Note: If you are using a network printer to send a fax, the MAC address of your printer is shown on the Device pop-up menu. Otherwise, only the printer name is shown. Faxing 73
-
 1
1 -
2
-
3
-
4
-
5
-
6
-
7
-
8
-
9
-
10
-
11
-
12
-
13
-
14
-
15
-
16
-
17
-
18
-
19
-
20
-
21
-
22
-
23
-
24
-
25
-
26
-
27
-
28
-
29
-
30
-
31
-
32
-
33
-
34
-
35
-
36
-
37
-
38
-
39
-
40
-
41
-
42
-
43
-
44
-
45
-
46
-
47
-
48
-
49
-
50
-
51
-
52
-
53
-
54
-
55
-
56
-
57
-
58
-
59
-
60
-
61
-
62
-
63
-
64
-
65
-
66
-
67
-
 68
68 -
 69
69 -
 70
70 -
 71
71 -
 72
72 -
 73
73 -
 74
74 -
 75
75 -
 76
76 -
 77
77 -
 78
78 -
79
-
80
-
81
-
82
-
83
-
84
-
85
-
86
-
87
-
88
-
89
-
90
-
91
-
92
-
93
-
94
-
95
-
96
-
97
-
98
-
99
-
100
-
101
-
102
-
103
-
104
-
105
-
106
-
107
-
108
-
109
-
110
-
111
-
112
-
113
-
114
-
115
-
116
-
117
-
118
-
119
-
120
-
121
-
122
-
123
-
124
-
125
-
126
-
127
-
128
-
129
-
130
-
131
-
132
-
133
-
134
-
135
-
136
-
137
-
138
-
139
-
140
-
141
-
142
-
143
-
144
-
145
-
146
-
147
-
148
-
149
-
150
-
151
-
152
-
153
-
154
-
155
-
156
-
157
-
158
-
159
-
160
-
161
-
162
-
163
-
164
-
165
-
166
-
167
-
168
-
169
-
170
-
171
-
172
-
173
-
174
-
175
-
176
-
177
-
178
-
179
-
180
-
181
-
182
-
183
-
184
-
185
-
186
-
187
-
188
-
189
-
190
-
191
 |
 |