Lexmark X5495 User's Guide - Page 147
A blank or incorrect prints, Glossy photo paper or transparencies stick together, EMOVE, STICKER
 |
UPC - 734646058568
View all Lexmark X5495 manuals
Add to My Manuals
Save this manual to your list of manuals |
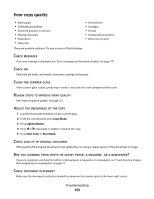
Page 147 highlights
4 Press . 5 Press or repeatedly until Photo Size appears. 6 Press . 7 Press or repeatedly until 4 x 6 in. or 10 x 15 cm appears. 8 Press . 9 Press or repeatedly until Paper Size appears. 10 Press . 11 Press or repeatedly until 10 x 15 cm appears. 12 Press . 13 Press Start Color or Start Black. A blank or incorrect page prints REMOVE THE STICKER AND TAPE FROM THE PRINT CARTRIDGES Lift the scanner unit, and remove the print cartridges from the print cartridge carrier. Make sure the sticker and tape are removed from the print nozzles located on the bottom of the cartridges. MAKE SURE THE CARTRIDGES ARE PROPERLY INSTALLED With the front of the printer facing you, check for proper print cartridge installation. If you are using a color cartridge, make sure it is properly installed in the right carrier. If you are using a black or photo cartridge, make sure it is properly installed in the left carrier. CHECK THE USB CONNECTION 1 Check that the USB cable is connected to the computer. The USB port on the back of the computer is marked by the USB symbol. Plug the long, flat end of the USB cable into this port. 2 Make sure that the smaller, more square end of the USB cable is plugged into the back of the printer. 3 Check that the USB cable is not damaged and that the light is on. CLOSE OTHER OPEN FILES BEFORE PRINTING Before sending a file to print, close all other open files in the program you are using. The printer prints a blank page when too many files are open in the same program. Glossy photo paper or transparencies stick together DO PHOTOS OR TRANSPARENCIES DRY AND STICK TOGETHER ON THE PAPER EXIT TRAY? Remove the photos or transparencies from the paper exit tray as they exit the printer. Allow them to dry before stacking. It takes longer for the ink to dry on the surface of photo paper or transparencies than it does on most printouts. Troubleshooting 147
-
 1
1 -
2
-
3
-
4
-
5
-
6
-
7
-
8
-
9
-
10
-
11
-
12
-
13
-
14
-
15
-
16
-
17
-
18
-
19
-
20
-
21
-
22
-
23
-
24
-
25
-
26
-
27
-
28
-
29
-
30
-
31
-
32
-
33
-
34
-
35
-
36
-
37
-
38
-
39
-
40
-
41
-
42
-
43
-
44
-
45
-
46
-
47
-
48
-
49
-
50
-
51
-
52
-
53
-
54
-
55
-
56
-
57
-
58
-
59
-
60
-
61
-
62
-
63
-
64
-
65
-
66
-
67
-
68
-
69
-
70
-
71
-
72
-
73
-
74
-
75
-
76
-
77
-
78
-
79
-
80
-
81
-
82
-
83
-
84
-
85
-
86
-
87
-
88
-
89
-
90
-
91
-
92
-
93
-
94
-
95
-
96
-
97
-
98
-
99
-
100
-
101
-
102
-
103
-
104
-
105
-
106
-
107
-
108
-
109
-
110
-
111
-
112
-
113
-
114
-
115
-
116
-
117
-
118
-
119
-
120
-
121
-
122
-
123
-
124
-
125
-
126
-
127
-
128
-
129
-
130
-
131
-
132
-
133
-
134
-
135
-
136
-
137
-
138
-
139
-
140
-
141
-
 142
142 -
 143
143 -
 144
144 -
 145
145 -
 146
146 -
 147
147 -
 148
148 -
 149
149 -
 150
150 -
 151
151 -
 152
152 -
153
-
154
-
155
-
156
-
157
-
158
-
159
-
160
-
161
-
162
-
163
-
164
-
165
-
166
-
167
-
168
-
169
-
170
-
171
-
172
-
173
-
174
-
175
-
176
-
177
-
178
-
179
-
180
-
181
-
182
-
183
-
184
-
185
-
186
-
187
-
188
-
189
-
190
-
191
 |
 |