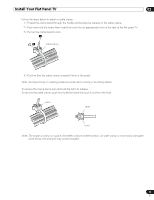
Pioneer PRO 111FD Owner's Manual - Page 38
Set the Clock, Create the List of Channels - settings
 |
UPC - 012562887111
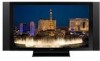
View all Pioneer PRO 111FD manuals
Add to My Manuals
Save this manual to your list of manuals |
Page 38 highlights
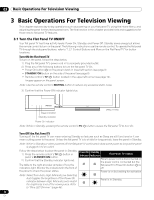
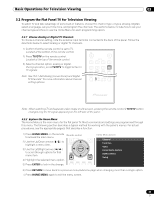
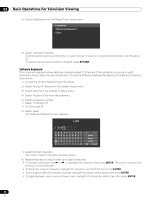
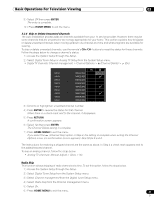
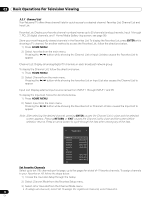
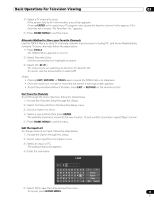
03 Basic Operations For Television Viewing 3.2.4 Set the Clock Set the flat panel TV's clock to take advantage of many built-in features such as Time Zone and D.S.T. (Daylight Saving Time) activation for digital TV broadcast. Note: If the panel's power cord is unplugged or there is a power outage, the time must be reset. Follow the steps below to set the clock. 1 ) Access the System Setup through the Setup. 2 ) Select Digital Tuner Setup from the System Setup menu. 3 ) Select Clock from the Digital Tuner Setup menu. 4 ) Select Time Zone from the options. 5 ) Select the time zone for your area. Time Zone D.S.T. : Atlantic : On 6 ) Select the menu option D.S.T. to activate/deactivate Daylight Saving Time. 7 ) Select the proper option for your location. 8 ) Press HOME MENU to close the menu and exit. 3.2.5 Create the List of Channels This section describes how to search for and set up TV channels. There are two ways to add channels to your flat panel TV, Auto Installation for automatic channel selection or manual channel assignments. The Auto Installation adds all available channels from your selected TV provider. Once all channels are added to the list, simply delete any unwanted channels. This section provides steps to add/remove channels. Auto Installation Auto Installation searches for and adds TV channels to your list of viewable channels. Using the remote control, follow the steps below to automatically select all available channels. 1 ) Access the System Setup through the Setup. 2 ) Select Auto Installation from the System Setup menu. 3 ) Select Air/Cable, Language, or Time Zone from the Auto Installation menu. 4 ) Select an option. • Signal type: Air or Cable • Language: English, Français or Español • Time Zone: Atlantic, Eastern, Central, Mountain, Pacific, Alaska, or Hawaii 38 En
-
 1
1 -
2
-
3
-
4
-
5
-
6
-
7
-
8
-
9
-
10
-
11
-
12
-
13
-
14
-
15
-
16
-
17
-
18
-
19
-
20
-
21
-
22
-
23
-
24
-
25
-
26
-
27
-
28
-
29
-
30
-
31
-
32
-
 33
33 -
 34
34 -
 35
35 -
 36
36 -
 37
37 -
 38
38 -
 39
39 -
 40
40 -
 41
41 -
 42
42 -
 43
43 -
44
-
45
-
46
-
47
-
48
-
49
-
50
-
51
-
52
-
53
-
54
-
55
-
56
-
57
-
58
-
59
-
60
-
61
-
62
-
63
-
64
-
65
-
66
-
67
-
68
-
69
-
70
-
71
-
72
-
73
-
74
-
75
-
76
-
77
-
78
-
79
-
80
-
81
-
82
-
83
-
84
-
85
-
86
-
87
-
88
-
89
-
90
-
91
-
92
-
93
-
94
-
95
-
96
-
97
-
98
-
99
-
100
-
101
-
102
-
103
-
104
-
105
-
106
-
107
-
108
-
109
-
110
-
111
-
112
-
113
-
114
-
115
-
116
-
117
-
118
-
119
-
120
-
121
-
122
-
123
-
124
-
125
-
126
-
127
-
128
-
129
-
130
-
131
-
132
-
133
-
134
-
135
-
136
-
137
-
138
-
139
-
140
-
141
-
142
-
143
-
144
-
145
-
146
-
147
-
148
-
149
-
150
-
151
-
152
-
153
-
154
-
155
-
156
-
157
-
158
-
159
-
160
-
161
-
162
-
163
-
164
-
165
-
166
-
167
 |
 |