Pioneer PRO 111FD Owner's Manual - Page 61
Option, Left Arrow, Right Arrow
 |
UPC - 012562887111
View all Pioneer PRO 111FD manuals
Add to My Manuals
Save this manual to your list of manuals |
Page 61 highlights
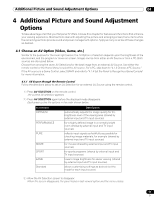
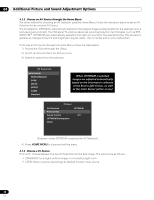
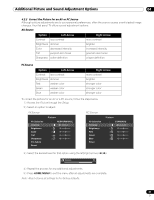
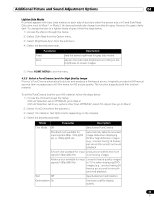
Additional Picture and Sound Adjustment Options 04 4.2.2 Correct the Picture for an AV or PC Source Although picture adjustments are to your personal preferences, often the source causes unanticipated image changes. Your flat panel TV offers several adjustment options. AV Source Option Left Arrow Contrast less contrast Brightness dimmer Color decreased intensity Tint purplish skin tones Sharpness softer definition Right Arrow more contrast brighter increased intensity greenish skin tones crisper definition PC Source Option Left Arrow Contrast less contrast Brightness dimmer Red weaker color Green weaker color Blue weaker color Right Arrow more contrast brighter stronger color stronger color stronger color To correct the picture for an AV or a PC source, follow the steps below. 1 ) Access the Picture through the Setup. 2 ) Select an option to adjust. AV Source PC Source AV Selection Contrast Brightness Color Tint Sharpness Pro Adjust Reset Picture : PERFORMANCE : 40 : 0 : 0 : 0 : 0 AV Selection Contrast Brightness Red Green Blue Reset Picture : STANDARD : 40 : 0 : 0 : 0 : 0 3 ) Select the desired level for that option using the left/right arrows (/). Contrast 32 4 ) Repeat the process for any additional adjustments. 5 ) Press HOME MENU to exit the menu after all adjustments are complete. Note: Reset returns all settings to the factory defaults. 61 En
-
 1
1 -
2
-
3
-
4
-
5
-
6
-
7
-
8
-
9
-
10
-
11
-
12
-
13
-
14
-
15
-
16
-
17
-
18
-
19
-
20
-
21
-
22
-
23
-
24
-
25
-
26
-
27
-
28
-
29
-
30
-
31
-
32
-
33
-
34
-
35
-
36
-
37
-
38
-
39
-
40
-
41
-
42
-
43
-
44
-
45
-
46
-
47
-
48
-
49
-
50
-
51
-
52
-
53
-
54
-
55
-
 56
56 -
 57
57 -
 58
58 -
 59
59 -
 60
60 -
 61
61 -
 62
62 -
 63
63 -
 64
64 -
 65
65 -
 66
66 -
67
-
68
-
69
-
70
-
71
-
72
-
73
-
74
-
75
-
76
-
77
-
78
-
79
-
80
-
81
-
82
-
83
-
84
-
85
-
86
-
87
-
88
-
89
-
90
-
91
-
92
-
93
-
94
-
95
-
96
-
97
-
98
-
99
-
100
-
101
-
102
-
103
-
104
-
105
-
106
-
107
-
108
-
109
-
110
-
111
-
112
-
113
-
114
-
115
-
116
-
117
-
118
-
119
-
120
-
121
-
122
-
123
-
124
-
125
-
126
-
127
-
128
-
129
-
130
-
131
-
132
-
133
-
134
-
135
-
136
-
137
-
138
-
139
-
140
-
141
-
142
-
143
-
144
-
145
-
146
-
147
-
148
-
149
-
150
-
151
-
152
-
153
-
154
-
155
-
156
-
157
-
158
-
159
-
160
-
161
-
162
-
163
-
164
-
165
-
166
-
167
 |
 |
