Pioneer PRO 111FD Owner's Manual - Page 85
Specify a Digital HDMI Signal Type, Specify an Audio HDMI Signal Type
 |
UPC - 012562887111
View all Pioneer PRO 111FD manuals
Add to My Manuals
Save this manual to your list of manuals |
Page 85 highlights
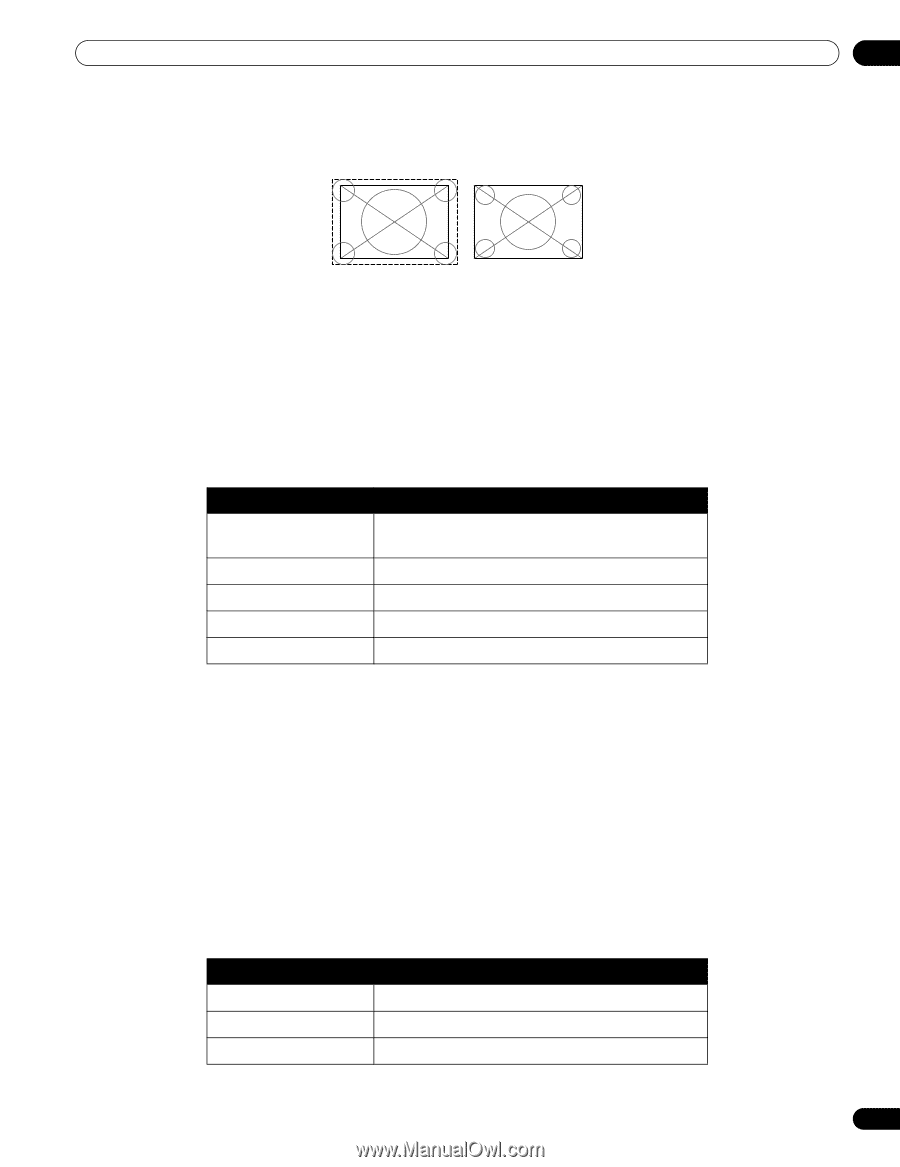
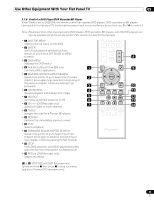
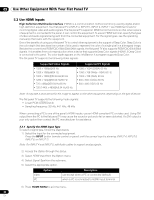
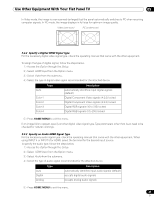
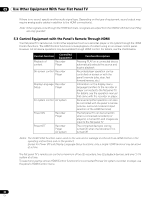
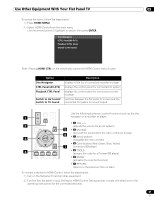
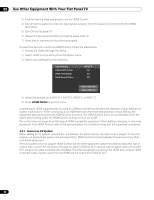
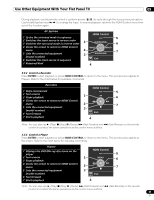
Use Other Equipment With Your Flat Panel TV 05 In Video mode, the image is over-scanned (enlarged) but the panel automatically switches to PC when receiving computer signals. In PC mode, the image displays in full size for optimum image quality. Video (over-scan) PC (under-scan) 5.2.2 Specify a Digital HDMI Signal Type For the necessary digital video signal type, check the operating manual that came with the other equipment. To assign the type of digital signal, follow the steps below. 1 ) Access the Option through the Setup. 2 ) Select HDMI Input from the Option menu. 3 ) Select Video from the submenu. 4 ) Select the type of digital video signal recommended for the attached device. Auto Type Color-1 Color-2 Color-3 Color-4 Description automatically identifies input digital signals (default) Digital Component Video signals (4:2:2) locked Digital Component Video signals (4:4:4) locked Digital RGB signals (16 to 235) locked Digital RGB signals (0 to 255) locked 5 ) Press HOME MENU to exit the menu. If an image fails to appear, specify another digital video signal type. Type parameters other than Auto need to be checked for natural colorings. 5.2.3 Specify an Audio HDMI Signal Type For the necessary audio signal type, check the operating manual that came with the other equipment. When using INPUT 4 or INPUT 5 for HDMI, select the terminal for the desired input source. To specify the audio type, follow the steps below. 1 ) Access the Option through the Setup. 2 ) Select HDMI Input from the Option menu. 3 ) Select Audio from the submenu. 4 ) Select the type of audio signal recommended for the attached device. Auto Digital Analog Type Description automatically identifies input audio signals (default) accepts digital audio signals accepts analog audio signals 5 ) Press HOME MENU to exit the menu. 85 En
-
 1
1 -
2
-
3
-
4
-
5
-
6
-
7
-
8
-
9
-
10
-
11
-
12
-
13
-
14
-
15
-
16
-
17
-
18
-
19
-
20
-
21
-
22
-
23
-
24
-
25
-
26
-
27
-
28
-
29
-
30
-
31
-
32
-
33
-
34
-
35
-
36
-
37
-
38
-
39
-
40
-
41
-
42
-
43
-
44
-
45
-
46
-
47
-
48
-
49
-
50
-
51
-
52
-
53
-
54
-
55
-
56
-
57
-
58
-
59
-
60
-
61
-
62
-
63
-
64
-
65
-
66
-
67
-
68
-
69
-
70
-
71
-
72
-
73
-
74
-
75
-
76
-
77
-
78
-
79
-
 80
80 -
 81
81 -
 82
82 -
 83
83 -
 84
84 -
 85
85 -
 86
86 -
 87
87 -
 88
88 -
 89
89 -
 90
90 -
91
-
92
-
93
-
94
-
95
-
96
-
97
-
98
-
99
-
100
-
101
-
102
-
103
-
104
-
105
-
106
-
107
-
108
-
109
-
110
-
111
-
112
-
113
-
114
-
115
-
116
-
117
-
118
-
119
-
120
-
121
-
122
-
123
-
124
-
125
-
126
-
127
-
128
-
129
-
130
-
131
-
132
-
133
-
134
-
135
-
136
-
137
-
138
-
139
-
140
-
141
-
142
-
143
-
144
-
145
-
146
-
147
-
148
-
149
-
150
-
151
-
152
-
153
-
154
-
155
-
156
-
157
-
158
-
159
-
160
-
161
-
162
-
163
-
164
-
165
-
166
-
167
 |
 |