Pioneer PRO 111FD Owner's Manual - Page 46
General Picture Video Adjustment for an AV Source - electronics
 |
UPC - 012562887111
View all Pioneer PRO 111FD manuals
Add to My Manuals
Save this manual to your list of manuals |
Page 46 highlights
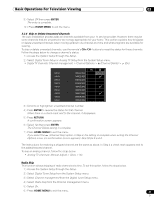
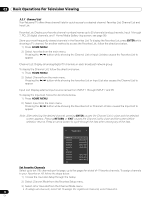
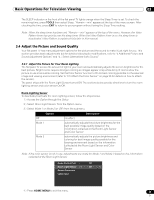
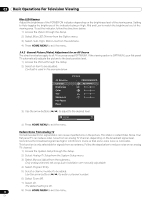
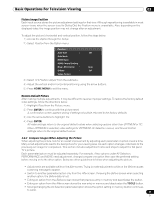
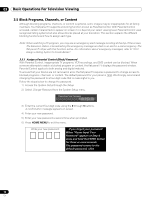
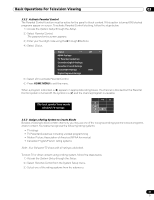
03 Basic Operations For Television Viewing Blue LED Dimmer Adjust the brightness of the POWER ON indicator depending on the brightness level of the viewing area. Setting to Auto toggles the brightness of the indicator between High, Mid and Low to match the brightness level of the viewing area. To set the indicator, follow the directions below. 1 ) Access the Option through the Setup. 2 ) Select Blue LED Dimmer from the Option menu. 3 ) Select Auto, High, Mid or Low from the submenu. 4 ) Press HOME MENU to exit the menu. 3.4.2 General Picture (Video) Adjustment for an AV Source The directions below apply to all AV sources except OPTIMUM. If the viewing option is OPTIMUM, your flat panel TV automatically adjusts the picture to the best possible level. 1 ) Access the Picture through the Setup. 2 ) Select an item to be adjusted. Contrast is used in the example below. AV Selection Contrast Brightness Color Tint Sharpness Pro Adjust Reset Picture : PERFORMANCE : 40 : 0 : 0 : 0 : 0 3 ) Use the arrow buttons (/) to adjust to the desired level. Contrast 32 4 ) Press HOME MENU to exit the menu. Reduce Noise from Analog TV Sometimes electronic signal static can cause imperfections in the picture. This static is called Video Noise. Your flat panel TV can reduce video noise from an analog TV channel, depending on the broadcast signal level. Sometimes the broadcast signal has higher interference levels so that some video noise is noticeable. This function is only selectable for signals from an antenna. Follow the steps below to reduce noise on an analog TV channel. 1 ) Access the System Setup through the Setup. 2 ) Select Analog TV Setup from the System Setup menu. 3 ) Select Manual Adjust from the submenu. Only analog channels set using Auto Installation are manually adjustable. 4 ) Select Program Entry. 5 ) Select a channel number to be added. Use the arrow buttons (/) to enter a channel number. 6 ) Select Tuner NR. 7 ) Select On. The default setting is On. 8 ) Press HOME MENU to exit the menu. 46 En
-
 1
1 -
2
-
3
-
4
-
5
-
6
-
7
-
8
-
9
-
10
-
11
-
12
-
13
-
14
-
15
-
16
-
17
-
18
-
19
-
20
-
21
-
22
-
23
-
24
-
25
-
26
-
27
-
28
-
29
-
30
-
31
-
32
-
33
-
34
-
35
-
36
-
37
-
38
-
39
-
40
-
 41
41 -
 42
42 -
 43
43 -
 44
44 -
 45
45 -
 46
46 -
 47
47 -
 48
48 -
 49
49 -
 50
50 -
 51
51 -
52
-
53
-
54
-
55
-
56
-
57
-
58
-
59
-
60
-
61
-
62
-
63
-
64
-
65
-
66
-
67
-
68
-
69
-
70
-
71
-
72
-
73
-
74
-
75
-
76
-
77
-
78
-
79
-
80
-
81
-
82
-
83
-
84
-
85
-
86
-
87
-
88
-
89
-
90
-
91
-
92
-
93
-
94
-
95
-
96
-
97
-
98
-
99
-
100
-
101
-
102
-
103
-
104
-
105
-
106
-
107
-
108
-
109
-
110
-
111
-
112
-
113
-
114
-
115
-
116
-
117
-
118
-
119
-
120
-
121
-
122
-
123
-
124
-
125
-
126
-
127
-
128
-
129
-
130
-
131
-
132
-
133
-
134
-
135
-
136
-
137
-
138
-
139
-
140
-
141
-
142
-
143
-
144
-
145
-
146
-
147
-
148
-
149
-
150
-
151
-
152
-
153
-
154
-
155
-
156
-
157
-
158
-
159
-
160
-
161
-
162
-
163
-
164
-
165
-
166
-
167
 |
 |
