Ricoh AC205 User's Guide - Page 177
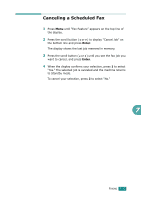
If you want to cancel the delayed transmission, see, Canceling a Scheduled Fax
 |
View all Ricoh AC205 manuals
Add to My Manuals
Save this manual to your list of manuals |
Page 177 highlights
NOTE: The Another No. prompt does not appear if you have added numbers for another broadcast or delay fax job. You must wait until the job is completed. 7 To enter more fax numbers, press 1 to select "Yes" and repeat steps 5 and 6. You can add up to 10 destinations. Note that you cannot use group dial numbers for another fax number. 8 When you finish entering fax numbers, press 2 to select "No" at the Another No. prompt. The display asks you to enter a name. 9 To assign a name to the transmission, enter the name you want. For details about entering characters, see page 2.18. If you do not want to assign a name, skip this step. 10 Press Enter. The display shows the current time and asks you to enter the starting time when the fax is to be sent. 11 Enter the time using the number keypad. To select "AM" or "PM" for 12-hour format, press the or button or any number button. If you set a time earlier than the current time, the document will be sent at that time on the following day. 12 Press Enter when the starting time displays correctly. 13 The document is scanned into memory before transmission. The display shows memory capacity and the number of pages being stored in memory. For a document placed on the document glass, the display asks if you want to load another page. Select "1.Yes" to add. Otherwise, select "2.No." 14 The machine returns to Standby mode. The display reminds you that you are in Standby mode and that a delayed fax is set. NOTE: If you want to cancel the delayed transmission, see "Canceling a Scheduled Fax" on page 7.33. 7.30 FAXING
-
 1
1 -
2
-
3
-
4
-
5
-
6
-
7
-
8
-
9
-
10
-
11
-
12
-
13
-
14
-
15
-
16
-
17
-
18
-
19
-
20
-
21
-
22
-
23
-
24
-
25
-
26
-
27
-
28
-
29
-
30
-
31
-
32
-
33
-
34
-
35
-
36
-
37
-
38
-
39
-
40
-
41
-
42
-
43
-
44
-
45
-
46
-
47
-
48
-
49
-
50
-
51
-
52
-
53
-
54
-
55
-
56
-
57
-
58
-
59
-
60
-
61
-
62
-
63
-
64
-
65
-
66
-
67
-
68
-
69
-
70
-
71
-
72
-
73
-
74
-
75
-
76
-
77
-
78
-
79
-
80
-
81
-
82
-
83
-
84
-
85
-
86
-
87
-
88
-
89
-
90
-
91
-
92
-
93
-
94
-
95
-
96
-
97
-
98
-
99
-
100
-
101
-
102
-
103
-
104
-
105
-
106
-
107
-
108
-
109
-
110
-
111
-
112
-
113
-
114
-
115
-
116
-
117
-
118
-
119
-
120
-
121
-
122
-
123
-
124
-
125
-
126
-
127
-
128
-
129
-
130
-
131
-
132
-
133
-
134
-
135
-
136
-
137
-
138
-
139
-
140
-
141
-
142
-
143
-
144
-
145
-
146
-
147
-
148
-
149
-
150
-
151
-
152
-
153
-
154
-
155
-
156
-
157
-
158
-
159
-
160
-
161
-
162
-
163
-
164
-
165
-
166
-
167
-
168
-
169
-
170
-
171
-
 172
172 -
 173
173 -
 174
174 -
 175
175 -
 176
176 -
 177
177 -
 178
178 -
 179
179 -
 180
180 -
 181
181 -
 182
182 -
183
-
184
-
185
-
186
-
187
-
188
-
189
-
190
-
191
-
192
-
193
-
194
-
195
-
196
-
197
-
198
-
199
-
200
-
201
-
202
-
203
-
204
-
205
-
206
-
207
-
208
-
209
-
210
-
211
-
212
-
213
-
214
-
215
-
216
-
217
-
218
-
219
-
220
-
221
-
222
-
223
-
224
-
225
-
226
-
227
-
228
-
229
-
230
-
231
-
232
-
233
-
234
-
235
-
236
-
237
-
238
-
239
-
240
-
241
-
242
-
243
-
244
-
245
-
246
-
247
-
248
-
249
-
250
-
251
-
252
-
253
-
254
-
255
-
256
-
257
-
258
-
259
-
260
-
261
-
262
-
263
-
264
-
265
-
266
-
267
-
268
-
269
-
270
-
271
-
272
-
273
-
274
-
275
-
276
-
277
-
278
 |
 |