Ricoh AC205 User's Guide - Page 275
optional Tray2 B.5, Network Scan Driver 6.12
 |
View all Ricoh AC205 manuals
Add to My Manuals
Save this manual to your list of manuals |
Page 275 highlights
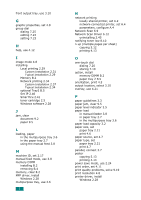
front output tray, use 3.10 G graphic properties, set 4.8 group dial dialing 7.25 editing 7.24 setting 7.23 H help, use 4.12 I image mode 4.8 installing Local printing 2.29 Custom Installation 2.31 Typical Installation 2.29 Memory B.2 Network printing 2.34 Custom Installation 2.37 Typical Installation 2.34 optional Tray2 B.5 Set IP 2.46 SmarThru 2.41 toner cartridge 2.5 Windows software 2.28 J jam, clear document 9.2 paper 9.5 L loading, paper in the multipurpose tray 3.6 in the paper tray 2.7 using the manual feed 3.8 M machine ID, set 2.17 manual feed mode, use 3.8 memory DIMM installing B.2 removing B.4 memory, clear 8.2 MFP driver, install Windows 2.28 multipurpose tray, use 3.6 2 N network printing locally shared printer, set A.2 network-connected printer, set A.4 parameters, configure A.4 Network Scan 6.9 Network Scan Driver 6.12 uninstalling 2.45 notifying toner low 8.10 n-up (multiple pages per sheet) copying 5.12 printing 4.13 O one-touch dial dialing 7.20 storing 7.19 option, install memory DIMM B.2 paper tray 2 B.5 orientation, print 4.5 output location, select 3.10 overlay, use 4.21 P paper guidelines 3.3 paper jam, clear 9.5 paper level indicator 3.5 paper load in manual feeder 3.8 in paper tray 2.7 in the multipurpose tray 3.6 paper load capacity 3.2 paper size, set paper tray 2.21 print 4.6 paper source, set 4.7 paper type, set paper tray 2.21 print 4.7 parallel, connect 3.7 poster copying 5.13 printing 4.14 power save mode, use 2.24 print order, set 4.11 print quality problems, solve 9.19 print resolution 4.8 printer driver, install Windows 2.28
-
 1
1 -
2
-
3
-
4
-
5
-
6
-
7
-
8
-
9
-
10
-
11
-
12
-
13
-
14
-
15
-
16
-
17
-
18
-
19
-
20
-
21
-
22
-
23
-
24
-
25
-
26
-
27
-
28
-
29
-
30
-
31
-
32
-
33
-
34
-
35
-
36
-
37
-
38
-
39
-
40
-
41
-
42
-
43
-
44
-
45
-
46
-
47
-
48
-
49
-
50
-
51
-
52
-
53
-
54
-
55
-
56
-
57
-
58
-
59
-
60
-
61
-
62
-
63
-
64
-
65
-
66
-
67
-
68
-
69
-
70
-
71
-
72
-
73
-
74
-
75
-
76
-
77
-
78
-
79
-
80
-
81
-
82
-
83
-
84
-
85
-
86
-
87
-
88
-
89
-
90
-
91
-
92
-
93
-
94
-
95
-
96
-
97
-
98
-
99
-
100
-
101
-
102
-
103
-
104
-
105
-
106
-
107
-
108
-
109
-
110
-
111
-
112
-
113
-
114
-
115
-
116
-
117
-
118
-
119
-
120
-
121
-
122
-
123
-
124
-
125
-
126
-
127
-
128
-
129
-
130
-
131
-
132
-
133
-
134
-
135
-
136
-
137
-
138
-
139
-
140
-
141
-
142
-
143
-
144
-
145
-
146
-
147
-
148
-
149
-
150
-
151
-
152
-
153
-
154
-
155
-
156
-
157
-
158
-
159
-
160
-
161
-
162
-
163
-
164
-
165
-
166
-
167
-
168
-
169
-
170
-
171
-
172
-
173
-
174
-
175
-
176
-
177
-
178
-
179
-
180
-
181
-
182
-
183
-
184
-
185
-
186
-
187
-
188
-
189
-
190
-
191
-
192
-
193
-
194
-
195
-
196
-
197
-
198
-
199
-
200
-
201
-
202
-
203
-
204
-
205
-
206
-
207
-
208
-
209
-
210
-
211
-
212
-
213
-
214
-
215
-
216
-
217
-
218
-
219
-
220
-
221
-
222
-
223
-
224
-
225
-
226
-
227
-
228
-
229
-
230
-
231
-
232
-
233
-
234
-
235
-
236
-
237
-
238
-
239
-
240
-
241
-
242
-
243
-
244
-
245
-
246
-
247
-
248
-
249
-
250
-
251
-
252
-
253
-
254
-
255
-
256
-
257
-
258
-
259
-
260
-
261
-
262
-
263
-
264
-
265
-
266
-
267
-
268
-
269
-
 270
270 -
 271
271 -
 272
272 -
 273
273 -
 274
274 -
 275
275 -
 276
276 -
 277
277 -
 278
278
 |
 |
