Dell 3130cn User's Guide (PDF) - Page 152
Printer Settings Utility, Status Window - troubleshooting
 |
UPC - 335531305295
View all Dell 3130cn manuals
Add to My Manuals
Save this manual to your list of manuals |
Page 152 highlights
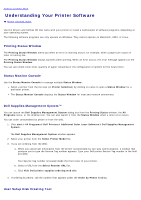
The User Setup Disk Creating Tool program located in the MakeDisk folder of the Utilities folder on the Drivers and Utilities CD and the printer drivers located on the Drivers and Utilities CD are used to create driver installation packages that contain custom driver settings. A driver installation package can contain a group of saved printer driver settings and other data for things such as: Print orientation and Multiple Up (document settings) Watermarks Font references If you want to install the printer driver with the same settings to multiple computers running the same operating system, create a setup disk in a floppy disk or in a server on the network. Using the setup disk that you have created will reduce the amount of work required when installing the printer driver. Install in advance the Dell™ 3130cn Color Laser Printer printer driver in the computer on which the setup disk is to be created. The setup disk can only be used on the operating system on which the disk was created or computers running the same operating system. Create a separate setup disk for different types of operating systems. Software Update The firmware and/or driver updates can be downloaded from the Dell Support website located at support.dell.com. Printer Settings Utility Using the Quick Launch Utility window, you can open Status Window, Tool Box, Updater, and Troubleshooting. When you install the Dell software, the Quick Launch Utility is automatically installed. For information about installing the software, see "Setting Up for Shared Printing". To open the Quick Launch Utility window: 1. Click start® All Programs® Dell Printers® Additional Color Laser Software® Quick Launch Utility. The Quick Launch Utility dialog box opens. 2. The Quick Launch Utility window provides four buttons; Status Window, Tool Box, Updater, and Troubleshooting. To exit, click the X button at the top-right of the window. For details, click the Help button of each application. Status Window
-
 1
1 -
2
-
3
-
4
-
5
-
6
-
7
-
8
-
9
-
10
-
11
-
12
-
13
-
14
-
15
-
16
-
17
-
18
-
19
-
20
-
21
-
22
-
23
-
24
-
25
-
26
-
27
-
28
-
29
-
30
-
31
-
32
-
33
-
34
-
35
-
36
-
37
-
38
-
39
-
40
-
41
-
42
-
43
-
44
-
45
-
46
-
47
-
48
-
49
-
50
-
51
-
52
-
53
-
54
-
55
-
56
-
57
-
58
-
59
-
60
-
61
-
62
-
63
-
64
-
65
-
66
-
67
-
68
-
69
-
70
-
71
-
72
-
73
-
74
-
75
-
76
-
77
-
78
-
79
-
80
-
81
-
82
-
83
-
84
-
85
-
86
-
87
-
88
-
89
-
90
-
91
-
92
-
93
-
94
-
95
-
96
-
97
-
98
-
99
-
100
-
101
-
102
-
103
-
104
-
105
-
106
-
107
-
108
-
109
-
110
-
111
-
112
-
113
-
114
-
115
-
116
-
117
-
118
-
119
-
120
-
121
-
122
-
123
-
124
-
125
-
126
-
127
-
128
-
129
-
130
-
131
-
132
-
133
-
134
-
135
-
136
-
137
-
138
-
139
-
140
-
141
-
142
-
143
-
144
-
145
-
146
-
 147
147 -
 148
148 -
 149
149 -
 150
150 -
 151
151 -
 152
152 -
 153
153 -
 154
154 -
 155
155 -
 156
156 -
 157
157 -
158
-
159
-
160
-
161
-
162
-
163
-
164
-
165
-
166
-
167
-
168
-
169
-
170
-
171
-
172
-
173
-
174
-
175
-
176
-
177
-
178
-
179
-
180
-
181
-
182
-
183
-
184
-
185
-
186
-
187
-
188
-
189
-
190
-
191
-
192
-
193
-
194
-
195
-
196
-
197
-
198
-
199
-
200
-
201
-
202
-
203
-
204
-
205
-
206
-
207
-
208
-
209
-
210
-
211
-
212
-
213
-
214
-
215
-
216
-
217
-
218
-
219
-
220
-
221
-
222
-
223
-
224
-
225
-
226
-
227
-
228
-
229
-
230
-
231
-
232
-
233
-
234
-
235
-
236
-
237
-
238
-
239
-
240
-
241
-
242
-
243
-
244
-
245
-
246
-
247
-
248
-
249
-
250
-
251
-
252
-
253
-
254
-
255
-
256
-
257
-
258
-
259
-
260
-
261
-
262
-
263
-
264
-
265
-
266
-
267
-
268
-
269
-
270
-
271
-
272
-
273
-
274
-
275
-
276
-
277
-
278
-
279
-
280
-
281
-
282
-
283
-
284
-
285
-
286
-
287
-
288
-
289
-
290
-
291
-
292
-
293
-
294
-
295
-
296
-
297
-
298
-
299
-
300
-
301
-
302
-
303
-
304
-
305
-
306
-
307
-
308
 |
 |
