Dell 3130cn User's Guide (PDF) - Page 84
Apply New Setting, Reset Wireless
 |
UPC - 335531305295
View all Dell 3130cn manuals
Add to My Manuals
Save this manual to your list of manuals |
Page 84 highlights
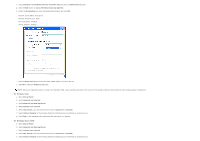
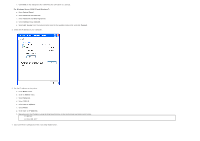
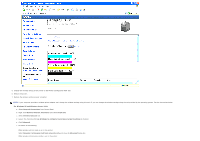
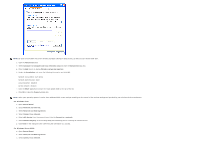
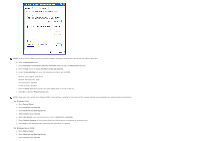
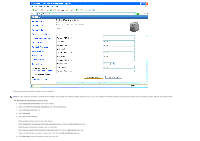
d. Select dell_device from the network items listed in Connect to a network. e. Select Connect Anyway in the warning dialog box indicating you are entering an unsecured area. f. Click Close in the dialog box after confirming the connection is a success. For Windows Server 2008 R2 and Windows 7: a. Open Control Panel. b. Select Network and Internet. c. Select Network and Sharing Center. d. Select Connect to a network. e. Select dell_device from the network items listed in the available network list, and click Connect. 2. Set up the printer wireless adapter IP address. a. Reset the settings for the wireless adapter to the default. i. Press Menu on printer control panel. ii. Scroll down and select Admin Menu. iii. Scroll down and select Network. iv. Scroll down and select Reset Wireless. v. Restart the printer. b. Retrieve the wireless adapter IP address on the printer. i. Press Menu on the printer control panel. ii. Scroll down and select Admin Menu. iii. Scroll down and select Network. iv. Scroll down and select TCP/IP. v. Scroll down and select IPv4. vi. Scroll down and select IP Address. (Default IP address range: 169.254.xxx.yyy) IP Address 169.254.000.041 * 3. Access Dell Printer Configuration Web Tool on your computer browser. a. Assign the PC IP address by DHCP mode (Change the TCP/IP properties to obtain the IP address automatically). b. Ensure your computer has the same IP address range as the printer wireless adapter. e.g. 169.254.xxx.zzz c. Access the Dell Printer Configuration Web Tool using the WEB browser, and then type printer wireless adapter settings in the address field of the browser. e.g. http://169.254.xxx.yyy/ (Your wireless adapter IP address) d. Change wireless settings (SSID/ communication mode) from Dell Printer Configuration Web Tool. i. Click Print Server Settings on the left navigational bar. ii. Click the Print Server Settings tab. iii. Click the TCP/IP sub-tab. iv. Select DHCP. v. Click the Apply New Setting button without restarting the printer (Ignore the screen instructions to restart the printer).
-
 1
1 -
2
-
3
-
4
-
5
-
6
-
7
-
8
-
9
-
10
-
11
-
12
-
13
-
14
-
15
-
16
-
17
-
18
-
19
-
20
-
21
-
22
-
23
-
24
-
25
-
26
-
27
-
28
-
29
-
30
-
31
-
32
-
33
-
34
-
35
-
36
-
37
-
38
-
39
-
40
-
41
-
42
-
43
-
44
-
45
-
46
-
47
-
48
-
49
-
50
-
51
-
52
-
53
-
54
-
55
-
56
-
57
-
58
-
59
-
60
-
61
-
62
-
63
-
64
-
65
-
66
-
67
-
68
-
69
-
70
-
71
-
72
-
73
-
74
-
75
-
76
-
77
-
78
-
 79
79 -
 80
80 -
 81
81 -
 82
82 -
 83
83 -
 84
84 -
 85
85 -
 86
86 -
 87
87 -
 88
88 -
 89
89 -
90
-
91
-
92
-
93
-
94
-
95
-
96
-
97
-
98
-
99
-
100
-
101
-
102
-
103
-
104
-
105
-
106
-
107
-
108
-
109
-
110
-
111
-
112
-
113
-
114
-
115
-
116
-
117
-
118
-
119
-
120
-
121
-
122
-
123
-
124
-
125
-
126
-
127
-
128
-
129
-
130
-
131
-
132
-
133
-
134
-
135
-
136
-
137
-
138
-
139
-
140
-
141
-
142
-
143
-
144
-
145
-
146
-
147
-
148
-
149
-
150
-
151
-
152
-
153
-
154
-
155
-
156
-
157
-
158
-
159
-
160
-
161
-
162
-
163
-
164
-
165
-
166
-
167
-
168
-
169
-
170
-
171
-
172
-
173
-
174
-
175
-
176
-
177
-
178
-
179
-
180
-
181
-
182
-
183
-
184
-
185
-
186
-
187
-
188
-
189
-
190
-
191
-
192
-
193
-
194
-
195
-
196
-
197
-
198
-
199
-
200
-
201
-
202
-
203
-
204
-
205
-
206
-
207
-
208
-
209
-
210
-
211
-
212
-
213
-
214
-
215
-
216
-
217
-
218
-
219
-
220
-
221
-
222
-
223
-
224
-
225
-
226
-
227
-
228
-
229
-
230
-
231
-
232
-
233
-
234
-
235
-
236
-
237
-
238
-
239
-
240
-
241
-
242
-
243
-
244
-
245
-
246
-
247
-
248
-
249
-
250
-
251
-
252
-
253
-
254
-
255
-
256
-
257
-
258
-
259
-
260
-
261
-
262
-
263
-
264
-
265
-
266
-
267
-
268
-
269
-
270
-
271
-
272
-
273
-
274
-
275
-
276
-
277
-
278
-
279
-
280
-
281
-
282
-
283
-
284
-
285
-
286
-
287
-
288
-
289
-
290
-
291
-
292
-
293
-
294
-
295
-
296
-
297
-
298
-
299
-
300
-
301
-
302
-
303
-
304
-
305
-
306
-
307
-
308
 |
 |
