Epson PowerLite 735c User Manual - Page 18
Starting EasyMP, to EasyMP.
 |
View all Epson PowerLite 735c manuals
Add to My Manuals
Save this manual to your list of manuals |
Page 18 highlights
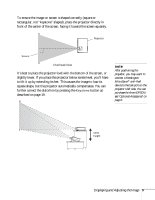
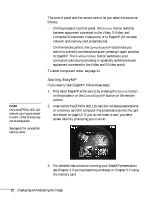
note Only the EPSON 802.11b network card is guaranteed to work. Other brands may not be compatible. See page 62 for compatible memory cards. The control panel and the remote control let you select the source as follows: ■ On the projector's control panel, the Source button switches between equipment connected to the Video, S-Video, and Computer/Component Video ports, or to EasyMP (for wireless network and memory card presentations). ■ On the remote control, the Comp/EasyMP button lets you switch to a directly connected computer; pressing it again switches to EasyMP. The S-Video/Video button switches to your connected video source (pressing it repeatedly switches between equipment connected to the Video and S-Video ports). To select component video, see page 13. Starting EasyMP If you want to start EasyMP, follow these steps: 1. First select EasyMP as the source by pressing the Source button on the projector or the Comp/EasyMP button on the remote control. 2. Insert either the EPSON 802.11b card (for wireless presentations) or a memory card (for computer-free presentations) into the card slot shown on page 13. If you do not insert a card, you see a screen like this, prompting you to do so: 3. For detailed instructions on running your EasyMP presentation, see Chapter 3 if you're presenting wirelessly or Chapter 5 if using the memory card. 12 Displaying and Adjusting the Image
-
 1
1 -
2
-
3
-
4
-
5
-
6
-
7
-
8
-
9
-
10
-
11
-
12
-
 13
13 -
 14
14 -
 15
15 -
 16
16 -
 17
17 -
 18
18 -
 19
19 -
 20
20 -
 21
21 -
 22
22 -
 23
23 -
24
-
25
-
26
-
27
-
28
-
29
-
30
-
31
-
32
-
33
-
34
-
35
-
36
-
37
-
38
-
39
-
40
-
41
-
42
-
43
-
44
-
45
-
46
-
47
-
48
-
49
-
50
-
51
-
52
-
53
-
54
-
55
-
56
-
57
-
58
-
59
-
60
-
61
-
62
-
63
-
64
-
65
-
66
-
67
-
68
-
69
-
70
-
71
-
72
-
73
-
74
-
75
-
76
-
77
-
78
-
79
-
80
-
81
-
82
-
83
-
84
-
85
-
86
-
87
-
88
-
89
-
90
-
91
-
92
-
93
-
94
-
95
-
96
-
97
-
98
-
99
-
100
-
101
-
102
-
103
-
104
-
105
-
106
-
107
-
108
-
109
-
110
-
111
-
112
-
113
-
114
-
115
-
116
-
117
-
118
-
119
-
120
-
121
-
122
-
123
-
124
-
125
-
126
-
127
-
128
-
129
-
130
-
131
-
132
-
133
-
134
-
135
-
136
-
137
-
138
-
139
-
140
-
141
-
142
-
143
-
144
 |
 |