Epson PowerLite 735c User Manual - Page 46
Obtain IP address, automatically, Use the following IP address, IP address, Subnet mask
 |
View all Epson PowerLite 735c manuals
Add to My Manuals
Save this manual to your list of manuals |
Page 46 highlights
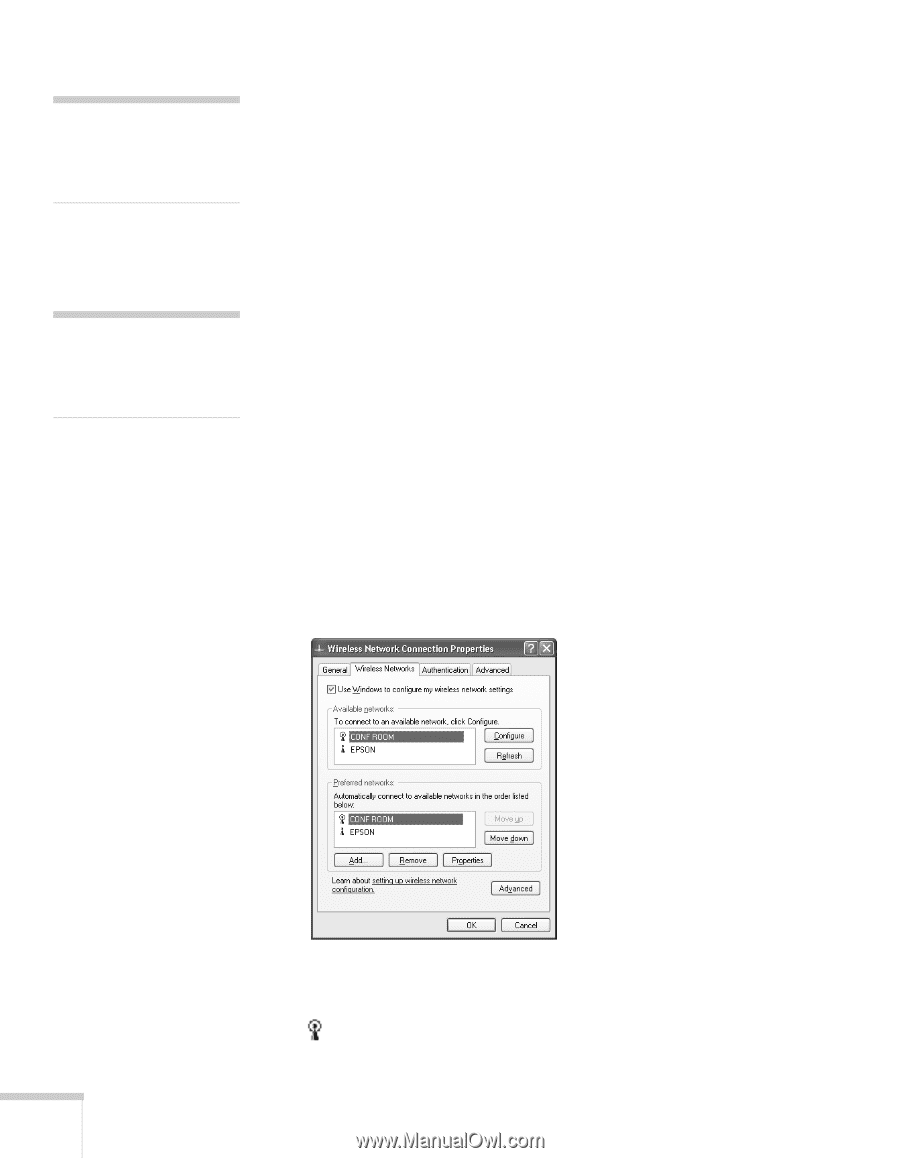
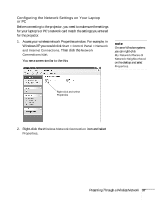
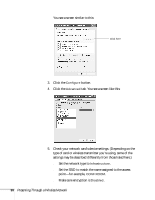
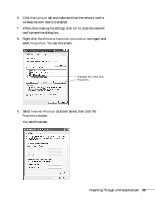
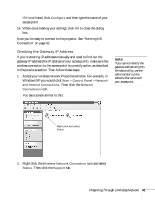
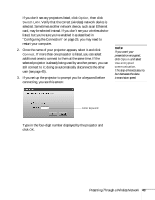
note For specific details about your network, please consult your network administrator. note If you don't know your gateway or access point address, see page 41. 10. If your access point uses DHCP, select Obtain IP address automatically. Otherwise select Use the following IP address and enter the required information: ■ IP address: Type in the IP address you want to assign to the computer. It must be formatted like other addresses on the network; usually the first three numbers (XXX.XXX.XXX) match the access point's IP address. ■ Subnet mask: For example: 255.255.255.000, but depends on how your network is set up. ■ Default gateway: Enter the IP address that was assigned to the access point when it was set up. 11. When done making these settings, click OK. 12. Click the Wireless Networks tab. (If you don't see this tab, you may need to enable your wireless card or network device by clicking Configure to access the device settings; then follow any instructions on the screen to enable the device.) Once you click the Wireless Networks tab, you see this screen: 13. Verify that you've enabled your computer's connection to the access point. It should be listed as shown above, with the small icon next to it, indicating a connection. 40 Presenting Through a Wireless Network
-
 1
1 -
2
-
3
-
4
-
5
-
6
-
7
-
8
-
9
-
10
-
11
-
12
-
13
-
14
-
15
-
16
-
17
-
18
-
19
-
20
-
21
-
22
-
23
-
24
-
25
-
26
-
27
-
28
-
29
-
30
-
31
-
32
-
33
-
34
-
35
-
36
-
37
-
38
-
39
-
40
-
 41
41 -
 42
42 -
 43
43 -
 44
44 -
 45
45 -
 46
46 -
 47
47 -
 48
48 -
 49
49 -
 50
50 -
 51
51 -
52
-
53
-
54
-
55
-
56
-
57
-
58
-
59
-
60
-
61
-
62
-
63
-
64
-
65
-
66
-
67
-
68
-
69
-
70
-
71
-
72
-
73
-
74
-
75
-
76
-
77
-
78
-
79
-
80
-
81
-
82
-
83
-
84
-
85
-
86
-
87
-
88
-
89
-
90
-
91
-
92
-
93
-
94
-
95
-
96
-
97
-
98
-
99
-
100
-
101
-
102
-
103
-
104
-
105
-
106
-
107
-
108
-
109
-
110
-
111
-
112
-
113
-
114
-
115
-
116
-
117
-
118
-
119
-
120
-
121
-
122
-
123
-
124
-
125
-
126
-
127
-
128
-
129
-
130
-
131
-
132
-
133
-
134
-
135
-
136
-
137
-
138
-
139
-
140
-
141
-
142
-
143
-
144
 |
 |