Epson PowerLite 735c User Manual - Page 37
Configuring the Network Settings on Your Laptop, or PC, main EasyMP Network Screen.
 |
View all Epson PowerLite 735c manuals
Add to My Manuals
Save this manual to your list of manuals |
Page 37 highlights
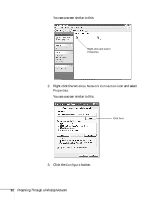
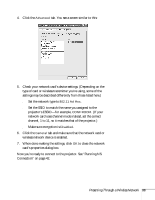
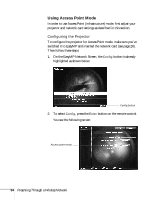
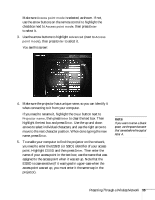
arrows to select individual characters, and use the right arrow to move to the next character position. When done typing the new name, press Enter. 5. To enable your computer to find the projector on the network, select the appropriate Ad hoc mode settings: ■ Select ESSID ad hoc if your network card supports an SSID or ESSID identifier (see page 33). Then enter a name (for example, "CONF ROOM") in the ESSID text box and press Enter. Note that the ESSID is case-sensitive (if you enter the name in upper-case on the projector, you must type it the same way on the computer connecting to the projector). ■ Select Channel ad hoc if your network card supports using channels instead of ESSID names to identify devices on the network. Then select a channel number in the Channel text box and press Enter. 6. If you want to set up a security keyword so that only people who are in the same room as the projector can access it, turn Projector keyword on. Then when you want to connect to the projector, it displays a randomized four-digit number or "keyword" on the screen. When prompted by NS Connection, you can enter the keyword on your computer to connect (see page 43). 7. When done making these settings, highlight the OK button at the top of the screen (you can either use the arrow buttons on the remote control or press ESC to highlight it), then press Enter. Highlight the OK button again and press Enter to return to the main EasyMP Network Screen. Configuring the Network Settings on Your Laptop or PC Before connecting to the projector, you need to make sure the settings for your laptop's or PC's network card match the settings you entered for the projector. 1. Access your wireless network Properties window. For example, in Windows XP you would click Start > Control Panel > Network and Internet Connections. Then click the Network Connections icon. note If you want to enter a blank space, use the space character that comes before the capital letter A. note On some Windows systems, you can right-click My Network Places or Network Neighborhood on the desktop and select Properties. Presenting Through a Wireless Network 31
-
 1
1 -
2
-
3
-
4
-
5
-
6
-
7
-
8
-
9
-
10
-
11
-
12
-
13
-
14
-
15
-
16
-
17
-
18
-
19
-
20
-
21
-
22
-
23
-
24
-
25
-
26
-
27
-
28
-
29
-
30
-
31
-
 32
32 -
 33
33 -
 34
34 -
 35
35 -
 36
36 -
 37
37 -
 38
38 -
 39
39 -
 40
40 -
 41
41 -
 42
42 -
43
-
44
-
45
-
46
-
47
-
48
-
49
-
50
-
51
-
52
-
53
-
54
-
55
-
56
-
57
-
58
-
59
-
60
-
61
-
62
-
63
-
64
-
65
-
66
-
67
-
68
-
69
-
70
-
71
-
72
-
73
-
74
-
75
-
76
-
77
-
78
-
79
-
80
-
81
-
82
-
83
-
84
-
85
-
86
-
87
-
88
-
89
-
90
-
91
-
92
-
93
-
94
-
95
-
96
-
97
-
98
-
99
-
100
-
101
-
102
-
103
-
104
-
105
-
106
-
107
-
108
-
109
-
110
-
111
-
112
-
113
-
114
-
115
-
116
-
117
-
118
-
119
-
120
-
121
-
122
-
123
-
124
-
125
-
126
-
127
-
128
-
129
-
130
-
131
-
132
-
133
-
134
-
135
-
136
-
137
-
138
-
139
-
140
-
141
-
142
-
143
-
144
 |
 |