Epson PowerLite 735c User Manual - Page 25
Adjusting the Image Shape, Correcting Computer Images
 |
View all Epson PowerLite 735c manuals
Add to My Manuals
Save this manual to your list of manuals |
Page 25 highlights
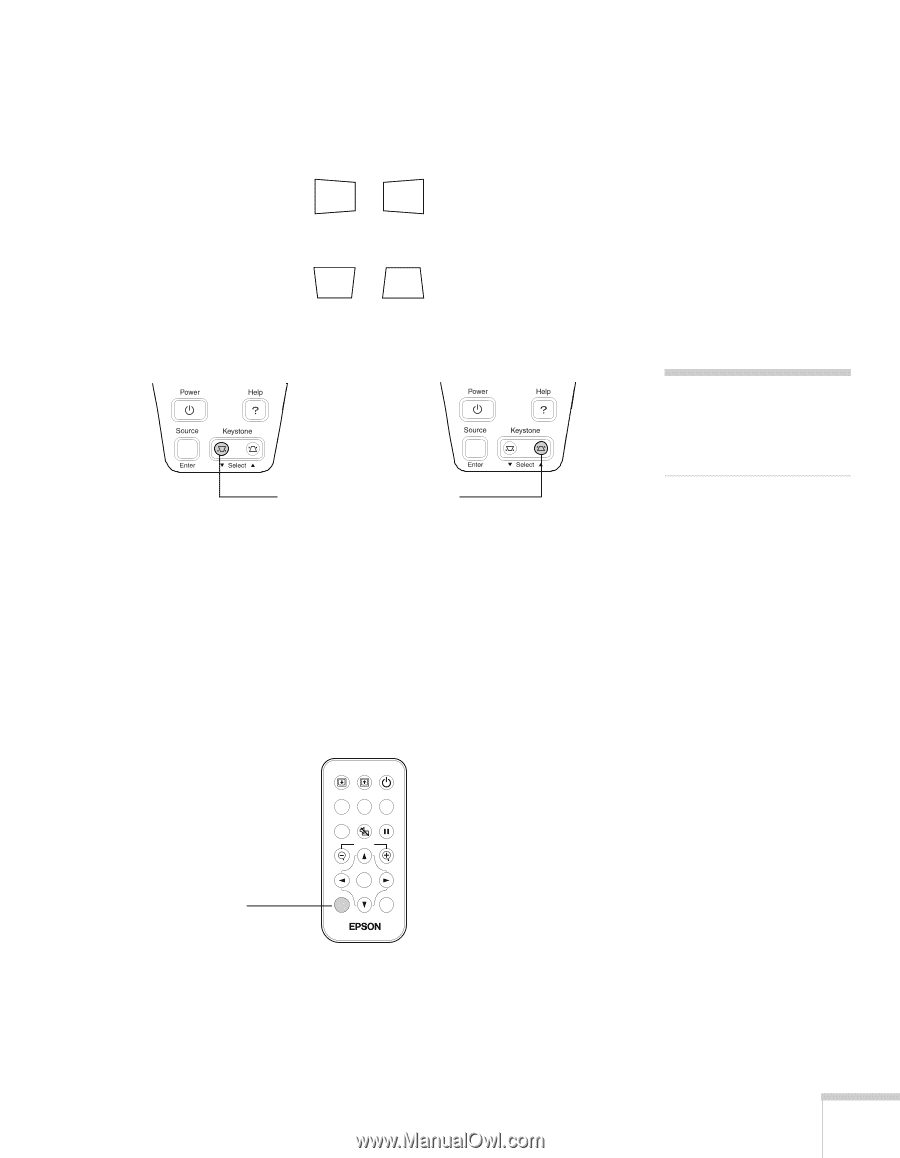
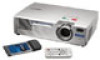
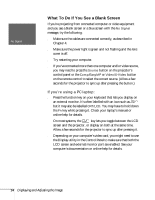
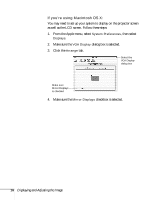
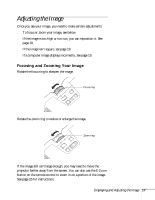
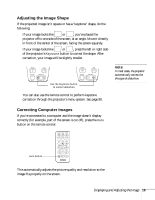
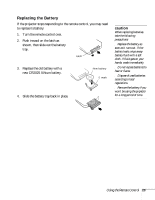
Adjusting the Image Shape If the projected image isn't square or has a "keystone" shape, do the following: ■ If your image looks like or , you've placed the projector off to one side of the screen, at an angle. Move it directly in front of the center of the screen, facing the screen squarely. ■ If your image looks like or , press the left or right side of the projector's Keystone button to correct the shape. After correction, your image will be slightly smaller. Use the Keystone button to correct distortion note In most cases, the projector automatically corrects for this type of distortion. You can also use the remote control to perform keystone correction through the projector's menu system. See page 80. Correcting Computer Images If you're connected to a computer and the image doesn't display correctly (for example, part of the screen is cut off), press the Auto button on the remote control. Auto button Page down Page up Power Comp/EasyMP S-Video/Video Color Mode Menu A/V Mute Freeze E-Zoom Enter Auto ESC This automatically adjusts the picture quality and resolution so the image fits properly on the screen. Displaying and Adjusting the Image 19
-
 1
1 -
2
-
3
-
4
-
5
-
6
-
7
-
8
-
9
-
10
-
11
-
12
-
13
-
14
-
15
-
16
-
17
-
18
-
19
-
 20
20 -
 21
21 -
 22
22 -
 23
23 -
 24
24 -
 25
25 -
 26
26 -
 27
27 -
 28
28 -
 29
29 -
 30
30 -
31
-
32
-
33
-
34
-
35
-
36
-
37
-
38
-
39
-
40
-
41
-
42
-
43
-
44
-
45
-
46
-
47
-
48
-
49
-
50
-
51
-
52
-
53
-
54
-
55
-
56
-
57
-
58
-
59
-
60
-
61
-
62
-
63
-
64
-
65
-
66
-
67
-
68
-
69
-
70
-
71
-
72
-
73
-
74
-
75
-
76
-
77
-
78
-
79
-
80
-
81
-
82
-
83
-
84
-
85
-
86
-
87
-
88
-
89
-
90
-
91
-
92
-
93
-
94
-
95
-
96
-
97
-
98
-
99
-
100
-
101
-
102
-
103
-
104
-
105
-
106
-
107
-
108
-
109
-
110
-
111
-
112
-
113
-
114
-
115
-
116
-
117
-
118
-
119
-
120
-
121
-
122
-
123
-
124
-
125
-
126
-
127
-
128
-
129
-
130
-
131
-
132
-
133
-
134
-
135
-
136
-
137
-
138
-
139
-
140
-
141
-
142
-
143
-
144
 |
 |