HP Integrity rx2800 HP Integrity iLO 3 Operations Guide - Page 111
Apply, Login,
 |
View all HP Integrity rx2800 manuals
Add to My Manuals
Save this manual to your list of manuals |
Page 111 highlights
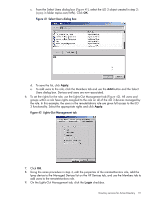
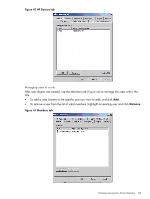
c. From the Select Users dialog box (Figure 41), select the iLO 3 object created in step 2: (lpmp in folder mpiso.com/MPs). Click OK. Figure 41 Select Users dialog box d. To save the list, click Apply. e. To add users to the role, click the Members tab and use the Add button and the Select Users dialog box. Devices and users are now associated. 6. To set the rights for the role, use the Lights-Out Management tab (Figure 42). All users and groups within a role have rights assigned to the role on all of the iLO 3 devices managed by the role. In this example, the users in the remoteAdmins role are given full access to the iLO 3 functionality. Select the appropriate rights and click Apply. Figure 42 Lights-Out Management tab 7. Click OK. 8. Using the same procedure in step 4, edit the properties of the remoteMonitors role, add the lpmp device to the Managed Devices list on the HP Devices tab, and use the Members tab to add users to the remoteMonitors role. 9. On the Lights-Out Management tab, click the Login checkbox. Directory services for Active Directory 111
-
 1
1 -
2
-
3
-
4
-
5
-
6
-
7
-
8
-
9
-
10
-
11
-
12
-
13
-
14
-
15
-
16
-
17
-
18
-
19
-
20
-
21
-
22
-
23
-
24
-
25
-
26
-
27
-
28
-
29
-
30
-
31
-
32
-
33
-
34
-
35
-
36
-
37
-
38
-
39
-
40
-
41
-
42
-
43
-
44
-
45
-
46
-
47
-
48
-
49
-
50
-
51
-
52
-
53
-
54
-
55
-
56
-
57
-
58
-
59
-
60
-
61
-
62
-
63
-
64
-
65
-
66
-
67
-
68
-
69
-
70
-
71
-
72
-
73
-
74
-
75
-
76
-
77
-
78
-
79
-
80
-
81
-
82
-
83
-
84
-
85
-
86
-
87
-
88
-
89
-
90
-
91
-
92
-
93
-
94
-
95
-
96
-
97
-
98
-
99
-
100
-
101
-
102
-
103
-
104
-
105
-
 106
106 -
 107
107 -
 108
108 -
 109
109 -
 110
110 -
 111
111 -
 112
112 -
 113
113 -
 114
114 -
 115
115 -
 116
116 -
117
-
118
-
119
-
120
-
121
-
122
-
123
-
124
-
125
-
126
-
127
-
128
-
129
-
130
-
131
-
132
-
133
-
134
-
135
-
136
-
137
-
138
-
139
-
140
-
141
-
142
-
143
-
144
-
145
-
146
-
147
-
148
-
149
-
150
-
151
-
152
 |
 |
