HP Integrity rx2800 HP Integrity iLO 3 Operations Guide - Page 112
Directory services objects, Active Directory snap-ins, Managing HP devices in a role, Apply, Remove
 |
View all HP Integrity rx2800 manuals
Add to My Manuals
Save this manual to your list of manuals |
Page 112 highlights
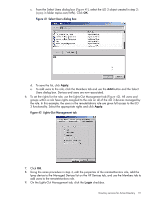
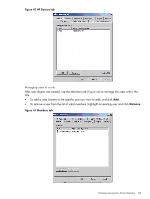
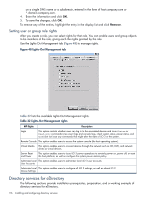
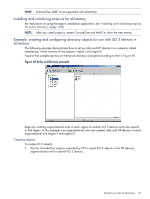
10. Click Apply and OK. Members of the remoteMonitors role are able to authenticate and view the server status. User rights to any iLO 3 are calculated as the sum of all the rights assigned by all the roles in which the user is a member and the iLO 3 is a managed device. Following the preceding examples, if a user is included in both the remoteAdmins and remoteMonitors roles, he or she has all the rights of those roles, because the remoteAdmins role also has those rights. To configure iLO 3 and associate it with an iLO 3 object, use settings similar to the following (based on the preceding example) in the iLO 3 Directory Settings text user interface: RIB Object DN = cn=lpmp,ou=MPs,dc=mpiso,dc=com Directory User Context 1 = cn=Users,dc=mpiso,dc=com For example, user Mel Moore (with the unique ID MooreM, located in the Users organizational unit within the mpiso.com domain, and a member of one of the remoteAdmins or remoteMonitors roles) can be allowed to log in to the iLO 3. To log in, he can enter mpiso moorem, or [email protected], or Mel Moore, in the Login Name field of the iLO 3 login, and use his Active Directory password in the Password field. Directory services objects One of the keys to directory-based management is proper virtualization of the managed devices in the directory service. This virtualization enables the administrator to build relationships between a managed device and user or groups already contained within the directory service. The iLO 3 user management requires the following basic objects in the directory service: • iLO 3 • Role • User Each object represents a device, user, or relationship that is required for directory-based management. NOTE: After you install the snap-ins, restart ConsoleOne and MMC to display the new entries. After the snap-in is installed, you can create iLO 3 objects and roles in the directory. Using the Users and Computers tool, you can: • Create iLO 3 objects and role objects. • Add users to the role objects. • Set the rights and restrictions of the role objects. Active Directory snap-ins The following sections discuss the additional management options available in Active Directory Users and Computers after you have installed the HP snap-ins. Managing HP devices in a role To add HP devices to be managed in a role, use the HP Devices tab (Figure 43). • To browse to a specific HP device and add it to the list of member devices, click Add. • To browse to a specific HP device and remove it from the list of member devices, click Remove. 112 Installing and configuring directory services
-
 1
1 -
2
-
3
-
4
-
5
-
6
-
7
-
8
-
9
-
10
-
11
-
12
-
13
-
14
-
15
-
16
-
17
-
18
-
19
-
20
-
21
-
22
-
23
-
24
-
25
-
26
-
27
-
28
-
29
-
30
-
31
-
32
-
33
-
34
-
35
-
36
-
37
-
38
-
39
-
40
-
41
-
42
-
43
-
44
-
45
-
46
-
47
-
48
-
49
-
50
-
51
-
52
-
53
-
54
-
55
-
56
-
57
-
58
-
59
-
60
-
61
-
62
-
63
-
64
-
65
-
66
-
67
-
68
-
69
-
70
-
71
-
72
-
73
-
74
-
75
-
76
-
77
-
78
-
79
-
80
-
81
-
82
-
83
-
84
-
85
-
86
-
87
-
88
-
89
-
90
-
91
-
92
-
93
-
94
-
95
-
96
-
97
-
98
-
99
-
100
-
101
-
102
-
103
-
104
-
105
-
106
-
 107
107 -
 108
108 -
 109
109 -
 110
110 -
 111
111 -
 112
112 -
 113
113 -
 114
114 -
 115
115 -
 116
116 -
 117
117 -
118
-
119
-
120
-
121
-
122
-
123
-
124
-
125
-
126
-
127
-
128
-
129
-
130
-
131
-
132
-
133
-
134
-
135
-
136
-
137
-
138
-
139
-
140
-
141
-
142
-
143
-
144
-
145
-
146
-
147
-
148
-
149
-
150
-
151
-
152
 |
 |
