HP LX195 HP LX195 MediaSmart Server - User Guide - Page 35
Shared Folders and Media Sharing, Set up Additional Features - media server
 |
UPC - 884420857396
View all HP LX195 manuals
Add to My Manuals
Save this manual to your list of manuals |
Page 35 highlights
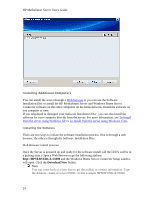
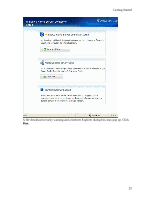
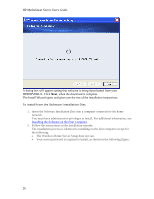
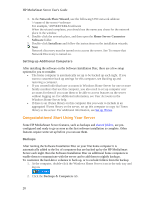
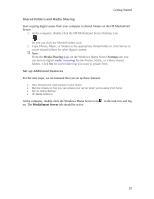
Getting Started Shared Folders and Media Sharing Start copying digital assets from your computer to shared folders on the HP MediaSmart Server. 1. At the computer, double-click the HP MediaSmart Server desktop icon. Or you can click the Shared Folders icon. 2. Copy Photos, Music, or Videos to the appropriate shared folder or click Server to create shared folders for other digital content. Note From the Media Sharing page on the Windows Home Server Settings tab, you can turn on digital media streaming for the Photos, Music, or Videos shared folders. Click On for each folder that you want to stream from. Set up Additional Features For the next steps, we recommend that you set up these features: • User Accounts for each person in your home • Remote Access so that you can access your server when you're away from home • Server Online Backup • HP Media Collector At the computer, double-click the Windows Home Server icon in the task tray and log on. The MediaSmart Server tab should be active. 29
-
 1
1 -
2
-
3
-
4
-
5
-
6
-
7
-
8
-
9
-
10
-
11
-
12
-
13
-
14
-
15
-
16
-
17
-
18
-
19
-
20
-
21
-
22
-
23
-
24
-
25
-
26
-
27
-
28
-
29
-
 30
30 -
 31
31 -
 32
32 -
 33
33 -
 34
34 -
 35
35 -
 36
36 -
 37
37 -
 38
38 -
 39
39 -
 40
40 -
41
-
42
-
43
-
44
-
45
-
46
-
47
-
48
-
49
-
50
-
51
-
52
-
53
-
54
-
55
-
56
-
57
-
58
-
59
-
60
-
61
-
62
-
63
-
64
-
65
-
66
-
67
-
68
-
69
-
70
-
71
-
72
-
73
-
74
-
75
-
76
-
77
-
78
-
79
-
80
-
81
-
82
-
83
-
84
-
85
-
86
-
87
-
88
-
89
-
90
-
91
-
92
-
93
-
94
-
95
-
96
-
97
-
98
-
99
-
100
-
101
-
102
-
103
-
104
-
105
-
106
-
107
-
108
-
109
-
110
-
111
-
112
-
113
-
114
-
115
-
116
-
117
-
118
-
119
-
120
-
121
-
122
-
123
-
124
-
125
-
126
-
127
-
128
-
129
-
130
-
131
-
132
-
133
-
134
-
135
-
136
-
137
-
138
-
139
-
140
-
141
-
142
-
143
-
144
-
145
-
146
-
147
-
148
-
149
-
150
-
151
-
152
-
153
-
154
-
155
-
156
-
157
-
158
-
159
-
160
-
161
-
162
-
163
-
164
-
165
-
166
-
167
-
168
-
169
-
170
-
171
-
172
-
173
-
174
-
175
-
176
-
177
-
178
-
179
-
180
-
181
-
182
-
183
-
184
-
185
-
186
-
187
-
188
-
189
-
190
-
191
-
192
-
193
-
194
-
195
-
196
-
197
-
198
-
199
-
200
-
201
-
202
-
203
-
204
-
205
-
206
-
207
-
208
-
209
-
210
-
211
-
212
-
213
-
214
-
215
-
216
-
217
-
218
-
219
-
220
-
221
-
222
-
223
-
224
-
225
-
226
-
227
-
228
-
229
-
230
-
231
-
232
-
233
-
234
-
235
-
236
 |
 |