HP OmniBook 7150 HP OmniBook 7100/7150 Reference Guide - Not Orderable - Page 45
To set or change a password, Press F10 to Save and Exit the BIOS Setup utility.
 |
View all HP OmniBook 7150 manuals
Add to My Manuals
Save this manual to your list of manuals |
Page 45 highlights
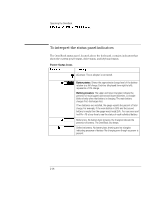
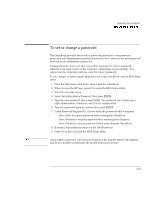
Operating the OmniBook Protecting the OmniBook To set or change a password The OmniBook provides two levels of password protection-user password protection and administrator password protection. You cannot set the user password until you set an administrator password. If password protection is set, then you will be prompted to enter a password whenever you reset or turn on the computer (depending on your setting). You cannot use the computer until you enter the correct password. To set, change, or delete password protection for this OmniBook, use the BIOS Setup utility. 1. From the Start menu, shut down, then restart the OmniBook. 2. When you see the HP logo, press F2 to enter the BIOS Setup utility. 3. Select the Security menu. 4. Select Set Administrator Password, then press ENTER. 5. Type the new password, then press ENTER. The password can contain up to eight alphanumeric characters, and it is not case-sensitive. 6. Type the password again to confirm, then press ENTER. 7. Under Password Required To, choose when the password will be required. • Select Boot to require password when booting the OmniBook. • Select Resume to require password when resuming from Suspend. • Select Undock to require password when undocking the OmniBook. 8. If desired, repeat this procedure for Set User Password. 9. Press F10 to Save and Exit the BIOS Setup utility. Note If you forget a password, call Customer Support at the number listed in the Support and Service booklet to determine the proper removal procedure. 2-21
-
 1
1 -
2
-
3
-
4
-
5
-
6
-
7
-
8
-
9
-
10
-
11
-
12
-
13
-
14
-
15
-
16
-
17
-
18
-
19
-
20
-
21
-
22
-
23
-
24
-
25
-
26
-
27
-
28
-
29
-
30
-
31
-
32
-
33
-
34
-
35
-
36
-
37
-
38
-
39
-
 40
40 -
 41
41 -
 42
42 -
 43
43 -
 44
44 -
 45
45 -
 46
46 -
 47
47 -
 48
48 -
 49
49 -
 50
50 -
51
-
52
-
53
-
54
-
55
-
56
-
57
-
58
-
59
-
60
-
61
-
62
-
63
-
64
-
65
-
66
-
67
-
68
-
69
-
70
-
71
-
72
-
73
-
74
-
75
-
76
-
77
-
78
-
79
-
80
-
81
-
82
-
83
-
84
-
85
-
86
-
87
-
88
-
89
-
90
-
91
-
92
-
93
-
94
-
95
-
96
-
97
-
98
-
99
-
100
-
101
-
102
-
103
-
104
-
105
-
106
-
107
-
108
-
109
-
110
-
111
-
112
-
113
-
114
-
115
-
116
-
117
-
118
-
119
-
120
-
121
-
122
-
123
-
124
-
125
-
126
-
127
-
128
-
129
-
130
-
131
-
132
-
133
-
134
-
135
 |
 |